Little Beaver Augers MDL5HD 2017 Clutch Assembly Replacement
ID: 135801
Description: Use this guide to replace the clutch assembly...
Steps:
- Before you begin, make sure the engine is switched off and cool to the touch.
- Pull the spark plug connector straight off of the spark plug.
- Use a 1/2 inch socket to remove the two nuts securing the clutch bracket clamp.
- You may need another 1/2 inch wrench to hold the bolt from underneath while you loosen the nut.
- Remove the clutch bracket clamp.
- Use a 5/32 inch hex wrench to loosen the two set screws on the clutch drum.
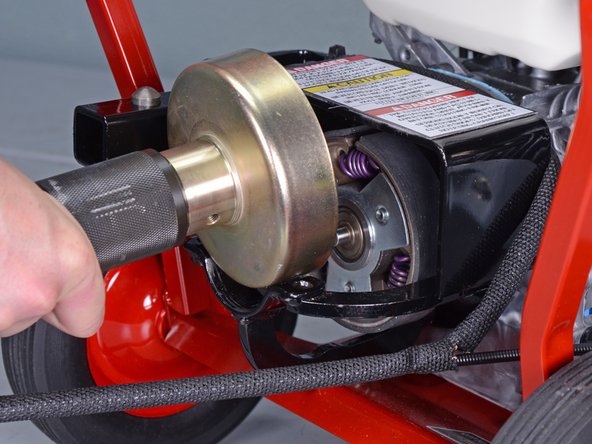
- Slide the clutch drum straight off of the clutch rotor assembly.
- Use a flathead screwdriver or small pry bar to pry the clutch drum off of the flexible shaft.
- Slide the clutch drum off of the flexible shaft and remove it.
- During reassembly, apply anti-seize lubricant to the interface between the clutch drum and flexible shaft.
- The clutch drum can be replaced as part of the clutch assembly replacement.
- The replacement clutch drum should come with a new pilot bearing installed. If it doesn't, you may need to install a new pilot bearing.
- Use a long-handle 5/32 inch hex wrench to loosen the two set screws on the clutch rotor assembly.
- The first photo shows the set screws on the replacement part for reference. Loosen the screws on the installed part, not the replacement part.
- The screws are positioned behind the clutch rotor and won't be easy to access. Use a long-handle hex wrench as shown in the second photo.
- Slide the clutch rotor assembly off of the engine drive shaft.
- The clutch rotor assembly can be replaced as part of the clutch assembly replacement.
- During reassembly, make sure the clutch rotor assembly key is inserted correctly into its slot before reassembly.
- During reassembly, apply anti-seize lubricant to the interface between the clutch rotor and engine drive shaft.