Logitech M720 Micro-switch Replacement
ID: 136122
Description: The M720, along with other similar mice, tend...
Steps:
- Begin disassembly by removing the battery
- Peel off the sticker underneath the battery to reveal the small Philips screw underneath. As my particular mouse had already been disassembled, the sticker is not shown in the images
- Using a flat blade screwdriver or similar instrument, peel off the rubber pad at the upper edge of the mouse to reveal two more screws
- Unscrew a total of 5 Phillips head scews as marked
- Gently separate the top and bottom parts of the mouse, being careful not to pull the two parts too far apart, so as to avoid damaging the small ribbon cable that connects the switches on the top housing to the main board
- Un-clip and remove the ribbon cable from the main board as shown. The two parts of the mouse are now separate
- The connector on the main board is much smaller and more fragile than the connector at the other end. It would be better to leave the small end alone and unclip the big end.
- Remove the clip holding the translucent scroll wheel assembly to the black plastic piece
- Lift off the scroll wheel assembly, making sure not to loose the two small springs underneath, towards the front. The springs were already missing in my mouse, but I have marked the location in red
- Remove the two screws holding down the black plastic piece, to which the scroll wheel assembly was attached
- Lift off the main board and place it gently to the side, taking care not to damage the remaining ribbon cable attached to a small switch and bracket assembly on the bottom housing
- Unscrew and lift off the metal bracket. The ribbon cable and small piece of PCB at it's end should now be free
- Make sure not to lose the small plastic on-off slider switch cover, which should now be free to fall out if the bottom housing is turned over
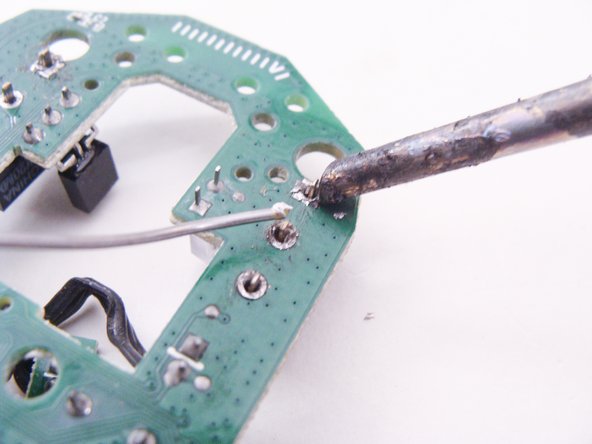
- Identify and de-solder the micro-switch solder pads using your preferred de-soldering method, such as a solder pump or de-soldering wick. Your soldering iron tip should be clean and properly tinned, unlike my atrocious tip pictured here
- If required, pry the old switches off with a flat-blade screwdriver while applying heat to the solder pads
- Install and solder the new switches
- Again, be sure to use a correctly tinned and clean soldering iron tip. Your tip should not be as gnarly as mine is in these pictures