iMac Intel 21.5" Retina 4K Display 2019 Display Assembly Replacement
ID: 136169
Description: Prereq for removing the display.
Steps:
- With the hinge free to move, the iMac will be unbalanced and hard to work on. Place an iMac service wedge, in the stand to stabilize the iMac.
- If you are using the iFixit cardboard service wedge, follow these assembly directions to put it together.
- Before beginning any work on your iMac: Unplug the computer and press and hold the power button for ten seconds to discharge the power supply's capacitors.
- Be very careful not to touch the capacitor leads or any exposed solder joints on the back of the power supply. Only handle the board by the edges.
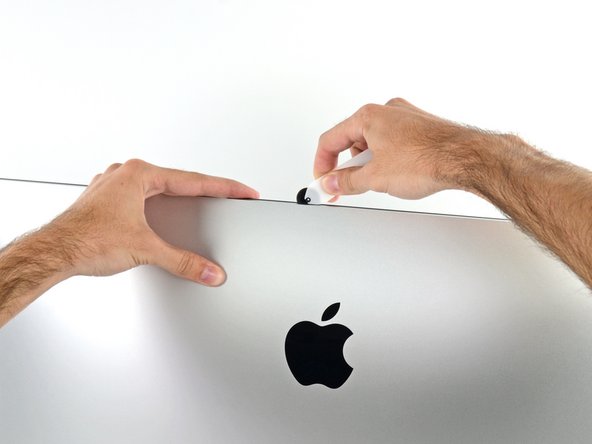
- Starting on the left side of the display, near the power button, insert the iMac Opening Tool into the gap between the glass panel and the rear enclosure.
- The hub on the iMac Opening Tool will keep you from pushing the wheel in too far. If using a different tool, insert no more than 3/8" into the display. Otherwise, you risk severing antenna cables and causing serious damage.
- Use the tool like a pizza cutter—roll it along the gap, cutting the foam adhesive in between the frame and display.
- Be sure to always push with the cutting wheel forward. If you pull, the wheel might get pulled out of the handle.
- Run the tool up along the left side of the display.
- Continue running the tool up around the top left corner.
- Cut the adhesive along the top left of the display.
- Continue along the top of the display.
- You may want to run the tool back and forth a few times to ensure you completely cut through the adhesive.
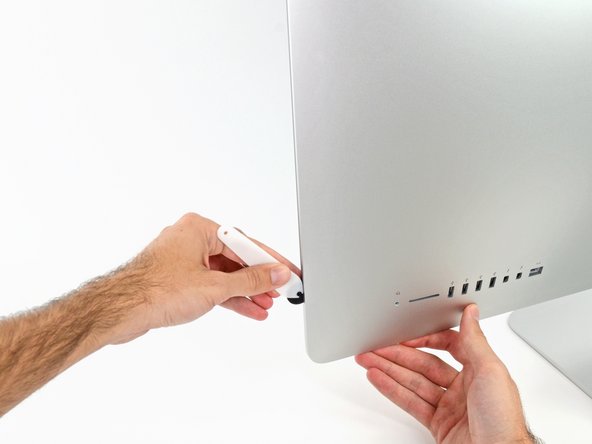
- Push the tool around the top right corner of the display.
- Push the tool down along the right side of the display.
- Finish pushing the opening tool to the bottom of the right side of the display.
- At this point, you'll want to run the tool back around the entire display, to ensure you cut as much adhesive as possible.
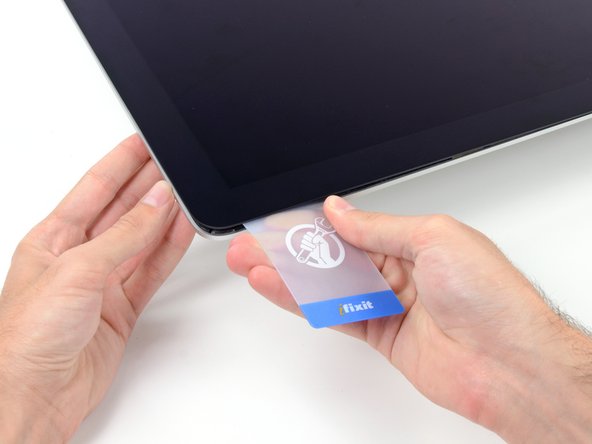
- While the opening tool cut most of the adhesive, the display will still be slightly adhered to the case. A plastic card will be necessary to free up the last of this adhesive.
- Set the iMac face-up on a table.
- Starting from the top right corner of the iMac, wedge a plastic card between the display and frame.
- Be careful not to insert the plastic card more than 3/8", or you may damage internal components.
- Gently twist the plastic card sideways to create a gap between the display and frame.
- Move slowly and be careful not to stress the display glass too much—you only need to make a gap of about 1/4".
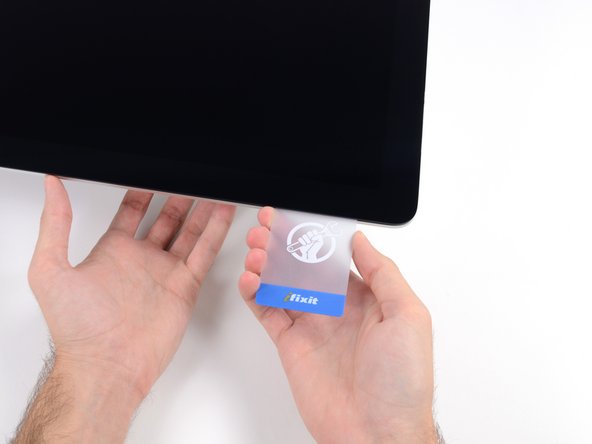
- Slide the card toward the center of the display to cut any of the remaining adhesive along the top right corner of the iMac.
- Be sure to stop before the iSight camera, or you may damage it.
- Wedge the plastic card into the top right corner once again, and leave it there to prevent the adhesive from resticking.
- Insert a second plastic card into the gap between the display and frame near the top left corner of the iMac.
- Gently twist the card upward, slightly increasing the space between the display and frame.
- As with the other side, twist slowly to allow the adhesive time to separate, and be careful not to over-stress the display glass.
- Slide the plastic card toward the center.
- Stop sliding just before the iSight camera to avoid damaging the camera.
- Wedge the plastic card back into the top left corner.
- With both plastic cards inserted as shown near the corners, gently twist the cards sideways to increase the gap between display and case.
- If there are any sections that seem to stick and won't separate, stop twisting and use one of the cards to cut the remaining adhesive.
- Begin to lift the top of the display up from the frame.
- Only lift the display a few inches—the display data and power cables are still connected to the logic board.