How to Loosen the Control Panel for the Honda 3000 Watt Inverter Generator EU3000IS1AWK
ID: 136204
Description: This guide shows how to loosen the control...
Steps:
- Before you begin, make sure the generator is off and cool to the touch.
- Use a large flathead screwdriver to unlock the maintenance cover.
- Open the maintenance cover.
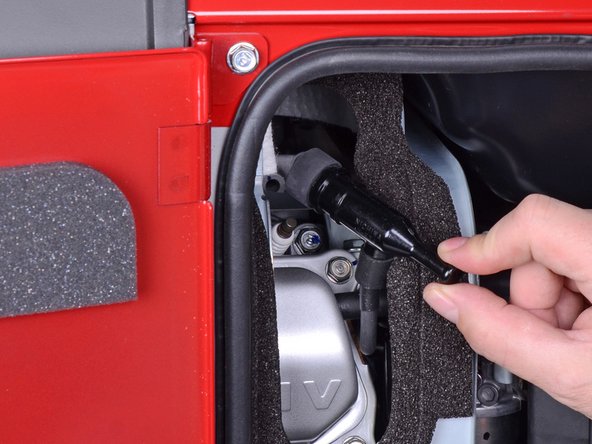
- Use a Phillips screwdriver to remove the screw securing the spark plug cover.
- Remove the spark plug cover.
- Grab the plastic housing at the end of the spark plug wire.
- Pull firmly to disconnect the wire from the spark plug.
- Turn the fuel valve to the cutoff position.
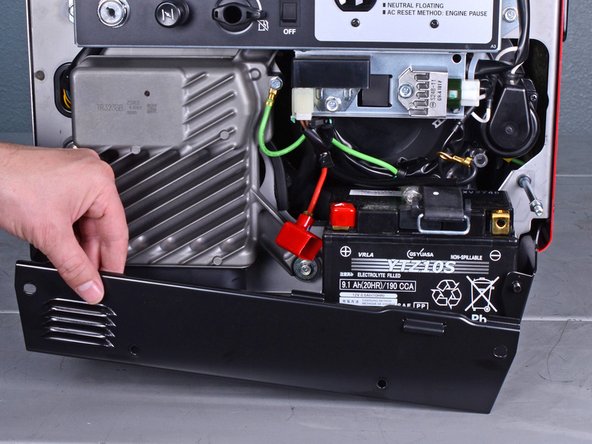
- Use a 10 mm socket to remove the four capped nuts securing the front cover.
- Remove the front cover.
- Use an 8 mm socket to disconnect the battery wires from the battery terminals.
- Disconnect the black negative cable first to prevent the risk of shorting the battery.
- During reassembly, connect the black negative cable first. Make sure you reconnect the wires in the correct polarity.
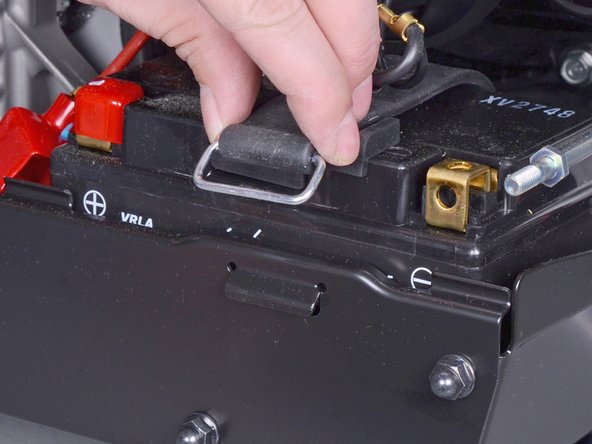
- Unclip the battery strap from the lower plate.
- Remove the battery.
- Use a 10 mm socket to remove the four capped nuts securing the lower plate.
- Set these capped nuts apart. They look similar, but are smaller than the front cover nuts.
- Remove the lower plate.
- Insert a flathead screwdriver into the top of the brown fuse clip in order to release the fuse holder.
- Detach the fuse holder from the brown clip.
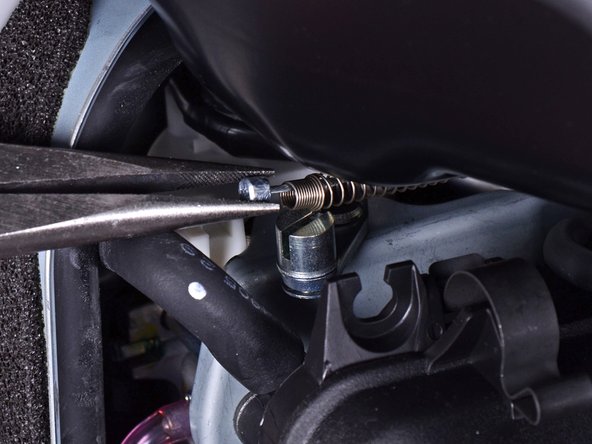
- Use pliers to lift and disconnect the choke cable from the choke stay.
- During reassembly, be sure to test the choke to ensure that it is properly connected.
- Use a long shaft Phillips screwdriver to remove the deeply recessed screw securing the fuel cutoff switch.
- Be careful not to turn the fuel cutoff switch while you remove the screw.
- Remove the fuel cutoff switch.
- During reassembly, be sure to test the switch to ensure that it is properly installed.
- Use a 10 mm socket to remove the four bolts securing the control panel.
- Carefully tilt the control panel downwards.
- The control panel will still be connected to many wires and cables. Be careful not to strain any of the connected wires.