Nostalgia Chocolate Fondue Fountain CFF965 Disassembly
ID: 136779
Description: This guide will show you how to safely...
Steps:
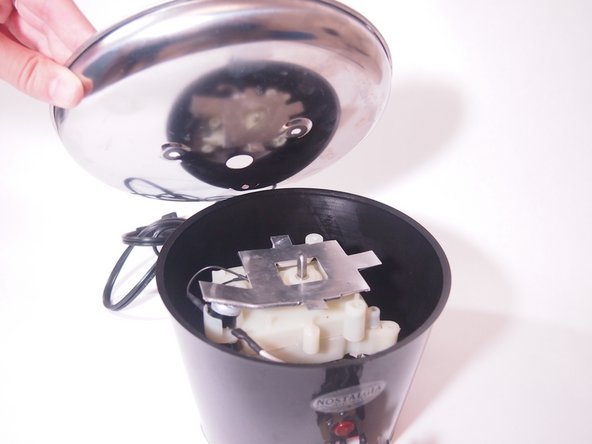
- Lift the tiered tower away from the base bowl with your hands to remove it.
- Lift the auger up and away from the base bowl by hand to remove it.
- Flip the base over.
- Unscrew the 21.3 mm "feet" screws by hand.
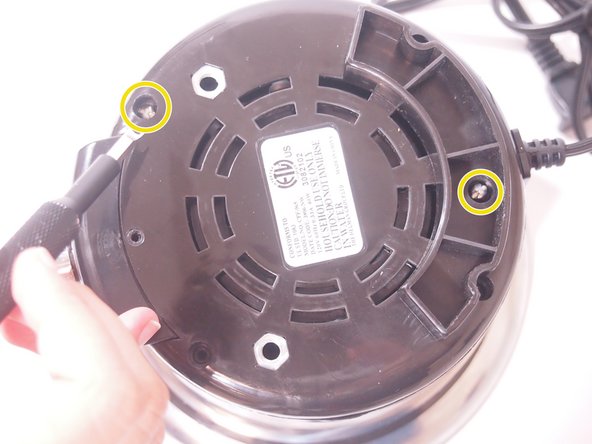
- Unscrew the three 14.2 mm screws with a Phillips #2 screwdriver.
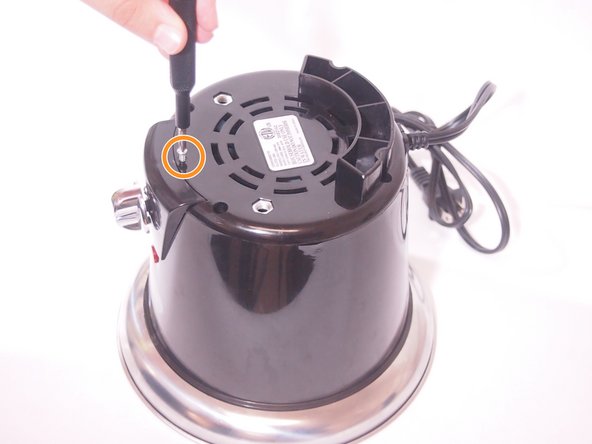
- Unscrew the 9.1 mm screw near the switch with a Phillips #2 screwdriver.
- Unscrew the two 14.2 mm spanner screws using a spanner screwdriver (size 6).
- Pull up on the baseplate by hand to remove it.
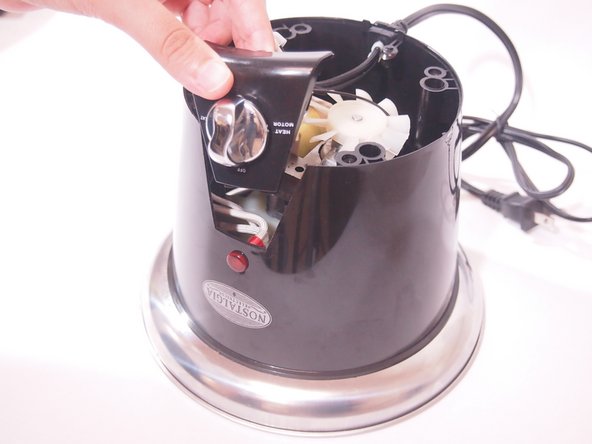
- Pull the switch component up by hand.
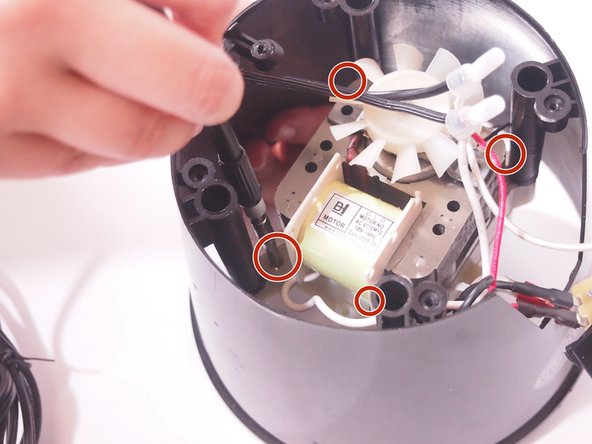
- Unscrew the two 22.1 mm machine screws that secure the motor with a Phillips #2 screwdriver.
- Remove their adjoining 5.9 mm washers by hand.
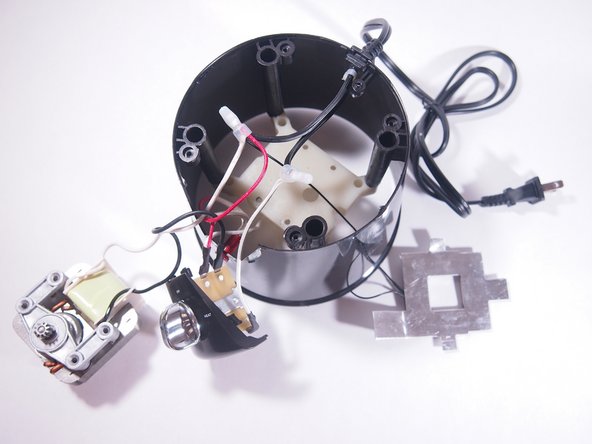
- Unscrew the three 25.4 mm Phillips #2 sheet metal screws that connect the base bowl to the white plastic structure.
- When unscrewing, make sure to hold the metal tower studs on the opposite side of the base bowl (see the second picture). This will make it easier to unscrew the screws.
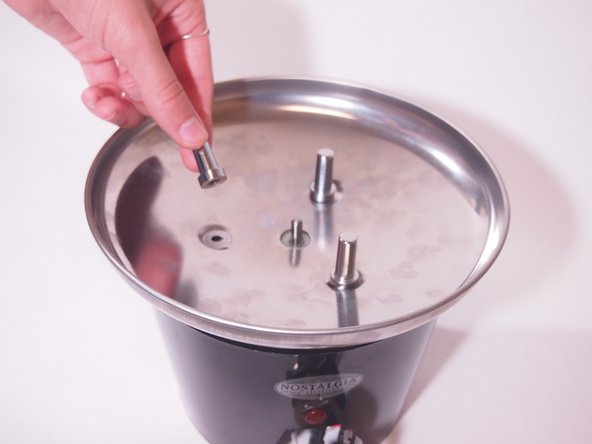
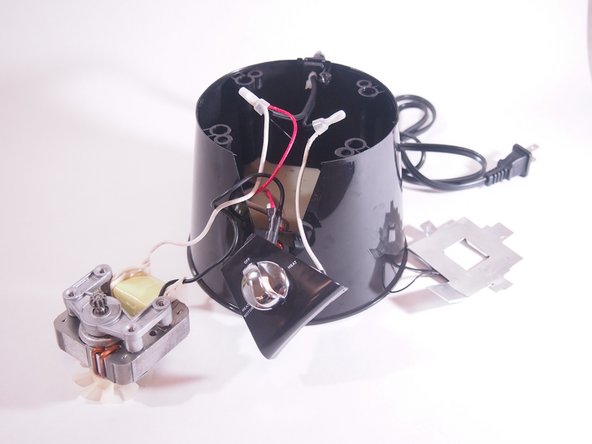
- Flip the base over and remove the base bowl by hand.
- Flip the base over again to view the motor and fan.
- Unscrew the remaining four 14.2 mm Phillips #2 sheet metal screws on the white plastic structure.
- Flip the entire base over.
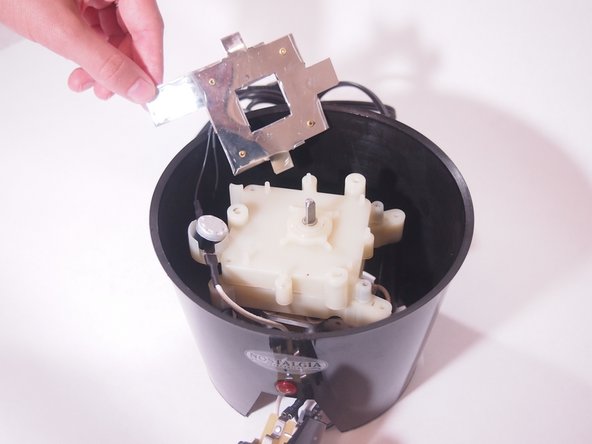
- Lift up the metal heater plate by hand.
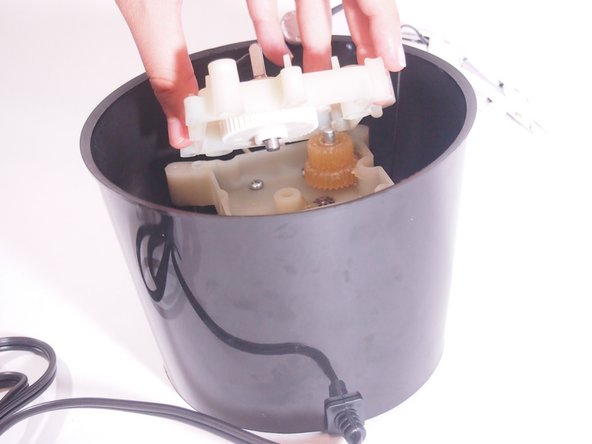
- Remove the top of the white plastic box by hand.
- The top of the white box should have a white gear and metal axis attached as well.
- Remove the yellow gear.
- You can use your hands, but we recommend tweezers to avoid touching the lubrication.
- Unscrew the four 9.1 mm Phillips #2 sheet metal screws.
- Remove the motor by hand.