Miele S828 Vacuum cleaner Disassembly
ID: 139313
Description:
Steps:
- This guide is for the Miele S 828, but many Miele (and other brands) vacuum cleaners are very similar on the inside, so that some advice may be helpful elsewhere.
- This error presents as follows: Suddenly the vacuum cleaner will stop running and the red indicator light beneath the warning sign to the top left will illuminate.
- According to the manual this indicates overheating of the motor. However, this erroneous warning will appear even when the cleaner is completely cold and is caused by a malfunctioning or desoldered overheat bimetal switch.
- To fix temperature switch Size 1 PZ Screwdriver, solder and soldering iron.
- To open motor/replace brushes Hammer, flat metal prying tool, TX20 screwdriver, 13mm Hex wrench, circular clamping tool (109mm diameter)
- Remove 1 PZ screw holding the control unit to the base. The unit can then be pulled off upwards. Best to grab it by the power and rewind cord switch panel. This takes some strength to unplug the flatpin connectors
- Open housing of the cleaner:
- 1. Remove hose, bag and air filters
- 2. Remove the 7 PZ screws holding the top cover to the base: 2 in the front, two under the air filter in the bag compartment and three underneath the control panel
- Remove the motor from its bay. It is not screwed into place but just sits in there on its rubber suspensions. The 4-pin connector plug also just slides upwards out of its holder
- Unscrew the circuit board from the back of the motor. Unplug the connector from the motor.
- The marker shows the temperature switch responsible for the error. Normally, when the temperature rises critically, a little bimetal plate inside the switch flips over and breaks the power circuit (and causes the red warning light to turn on)
- The reverse side of the circuit board shows the faulty part: The soldered connection has broken, imitating a flipped temperature switch, hence the overheat warning.
- Thoroughly resolder these connectors. To be sure, also measure resistance between the pins of the switch, at room temperature it should be close to zero. If its not, consider replacing the temperature switch.
- These additional steps are NOT REQUIRED to fix the overheat error, but to clean the fan and check for wear of the carbon brushes Of note: The brushes are very large and should not need replacement unit after lots of running time (10+ years of daily use)
- Remove the rear motor suspension
- Remove the front metal fan cover. It is only held on the plastic motor chassis by a tight fit, no screws, clips or glue involved.
- Gently hammer around the edge while holding the motor unit in the air and nudge the cover forward.
- Use a flat metal tool as a lever to push the cover further off.
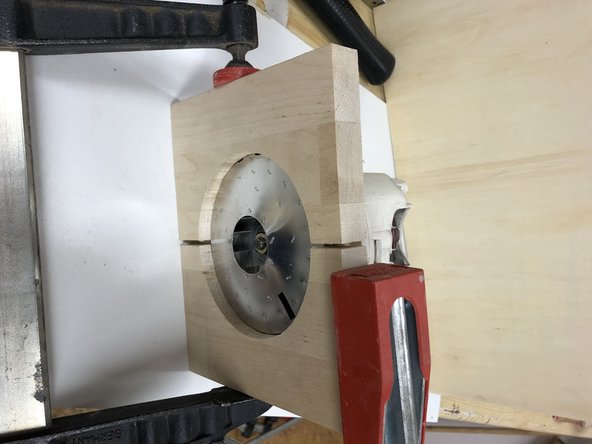
- I used pieces of wood to hold the fairly light and delicate aluminium fan while opening the nut in the center holding it to the drive shaft.
- Use a 13mm hex wrench to open the nut. Of note: Its a left thread, so opens clockwise!
- Open the four T20 Torx screws of the motors front cover
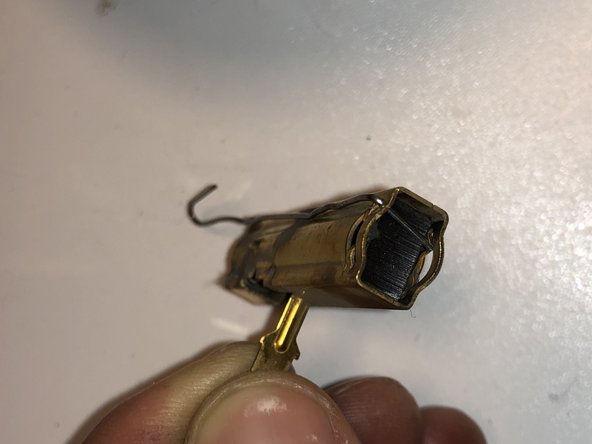
- As you pull off the front cover, the shaft and rotor will most likely stay attached to the front cover, as the front bearing has a tighter fit than the rear one. You can do it this way, meaning you will need a little more force since you're also pulling out the brushes. This won't damage them, as they are held in place only by flatpin connectors.
- Alternatively, use a hammer to gently knock on the drive shaft as you pull forward, so that the rotor stays in place.
- The marked box inside the motor housing contains only a capacitor, no additional temperature switch.
- Clean the fan blade, starting from the outside and push dirt towards the middle (the ducts get wider towards the middle)
- Use a bold and nut to mount the fan on a drill and spin it in water for a thorough rinse.
- When reassembling, a paper clip is a useful tool to hold the brushes back in their housing until the rotor is in place
- Complete steps in opposite order to reassemble.