Samsung Galaxy A40 Super AMOLED Screen Replacement
ID: 139365
Description: Use this guide to replace a cracked or broken...
Steps:
- Insert a SIM card eject tool, a SIM eject bit or a straightened paper clip into the hole on the SIM tray located on the left side of the phone.
- Press your SIM card eject tool firmly into the hole in order to eject the SIM card tray.
- Remove the SIM card tray.
- When reinserting the cards, make sure to properly orient them in the tray.
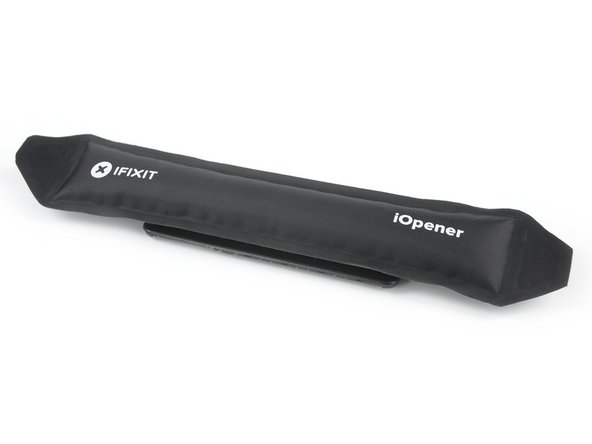
- Apply a heated iOpener to the back cover to loosen the adhesive underneath. Apply the iOpener for at least two minutes.
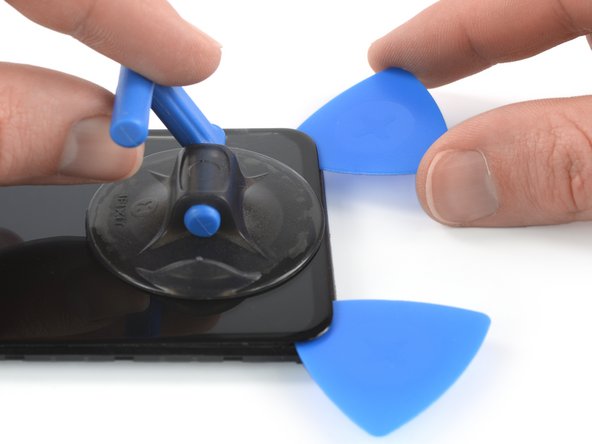
- Secure a suction handle to the right edge of the back cover, as close to the edge as possible.
- If the phone's back cover is damaged, the suction handle may not stick. Try lifting it with strong tape, or superglue the suction handle in place and allow it to cure so you can proceed.
- Lift the back cover with the suction handle to create a small gap between the back cover and the frame.
- Insert an opening pick into the gap.
- In case you have trouble creating a gap, apply more heat to further soften the adhesive. Follow the iOpener instructions to avoid overheating.
- Slide the opening pick to the bottom right corner and leave it in place to prevent the adhesive from resealing.
- Insert a second opening pick at the bottom right corner.
- Slide the opening pick along the right edge of your phone to cut the adhesive beneath the back cover.
- Leave the opening pick in the top right corner.
- At this point of the back cover removal feel free to remove the suction cup or continue to use it for a better grip.
- Insert a third opening pick at the top right corner of your phone.
- Slide the opening pick along the top edge of your phone to cut the adhesive.
- Leave the opening pick in the top left corner to prevent the adhesive from resealing.
- If the adhesive becomes hard to cut, it has most likely cooled down. Use your iOpener to reheat it.
- Insert a fourth opening pick at the top left corner of your phone.
- Slide the opening pick along the left edge of your phone to cut the adhesive.
- Leave the opening pick in the bottom left corner.
- Insert a fifth opening pick to cut the remaining adhesive at the bottom edge of your phone.
- In order to cut all the adhesive at the bottom edge of the device, you need to insert the opening pick about 0.4 inch (1cm).
- To avoid tearing the fingerprint cable during the following step, make sure to gently press down the fingerprint reader while lifting the back cover.
- Fold the back cover upwards and remove it.
- Remove the thirteen 3.4 mm-long Phillips #00 screws.
- Insert an opening pick between the left edge of the phone assembly and the midframe.
- Slide the opening pick along the left edge of the phone to release the plastic clips holding the midframe in place.
- Slide the opening pick around the bottom right corner and release the plastic clips at the bottom edge of the phone assembly.
- Slide the opening pick along the right edge of the phone assembly to release the remaining plastic clips holding the midframe in place.
- Remove the midframe.
- Use the flat end of a spudger to pry up and disconnect the battery cable.
- Use a spudger to disconnect the display flex cable at the bottom right corner of your phone.
- Apply a heated iOpener to the screen to loosen the adhesive underneath. Apply the iOpener for at least two minutes.
- Once the screen is warm to the touch, apply a suction handle to the bottom edge of the phone.
- If the phone's screen is cracked, the suction handle may not stick. Try lifting it with strong tape, or superglue the suction handle in place and allow it to cure so you can proceed.
- Lift the screen with the suction handle to create a small gap between the screen and the frame.
- Insert the tip of an opening pick in the gap between the midframe and the screen.
- Slide the opening pick to the bottom left corner to cut the adhesive. Leave it in its place to prevent the adhesive from resealing.
- Insert a second opening pick and slide it to the bottom right corner of the screen to cut the adhesive.
- Leave the picks in their place to prevent the adhesive from resealing.
- If the adhesive becomes hard to cut, it has most likely cooled down. Use your iOpener to reheat it.
- Insert a third opening pick under the bottom left corner of the phone.
- Slide the opening pick up to the top left corner to cut the adhesive. Leave it there to prevent the adhesive from resealing.
- Insert a fourth opening pick at the top left corner.
- Slide the opening pick along the top edge of the phone to cut the adhesive. Leave the pick in the top right corner of the screen to prevent the adhesive from resealing.
- When you slice near the front facing camera, insert only the tip of the opening pick to avoid damaging or smearing the camera.
- The top speaker grill located above the front facing camera falls out easily. Be careful not to lose it.
- Insert a fifth opening pick and slide it along the right edge of the phone to cut the remaining adhesive.
- Try not to remove the display all the way yet. The display is still held onto the midframe by adhesive beneath its center.
- Leave the opening picks in their place to prevent the adhesive from resealing.
- Apply a heated iOpener to the screen to loosen the adhesive underneath its center. Apply the iOpener for at least two minutes.
- Slide a plastic card underneath the bottom right corner of the screen.
- Use the plastic card to cut the adhesive beneath the center of the screen by sliding it to the top right corner of the phone.
- Try not to remove the display all the way yet, the display cable is still threaded through the frame and possible adhered on the inner side of the midframe.
- Thread the display flex cable through the gap in the midframe and remove the screen.
- Compare your new replacement part to the original part—you may need to transfer remaining components or remove adhesive backings from the new part before installing.