Lenovo ThinkPad T480 Speakers Replacement
ID: 139945
Description: The speakers of your laptop provide sound on...
Steps:
- Disable the battery, power down, and unplug your device before you begin.
- Flip the laptop over so the bottom of the device is showing.
- Using your fingers, slide the lock on each side of the battery to the unlocked position.
- Remove the battery from the slot.
- Using the Phillips #1 screwdriver, loosen the six captive screws.
- Insert the blue plastic opening tool into the space between the lower case and the chassis.
- Slide the opening tool around the perimeter of the case to release the clips holding the case and the chassis together.
- If it feels like the battery well portion of the back cover isn't loose, these clips may be holding the cover to the laptop. Use your opening tool to pry the clips loose and try removing the cover again.
- Remove the back case.
- Use a Phillips #1 screwdriver to remove the two 4.6 mm screws that secure the internal battery to the frame.
- Not All T480 laptops come with an internal battery. If there is a spacer or nothing here, skip the next two steps.
- Use the spudger to slide the battery socket connector parallel to the motherboard and out of its socket on the motherboard.
- Lift the battery straight out of its recess and remove it.
- If the battery is difficult to remove from the recess, use a nylon spudger to gently lift it on one edge, making it easier to grasp and remove by hand.
- To prevent damage or potential fire, do not bend or flex the battery. Only use a plastic spudger and avoid any sharp tools that could puncture the battery.
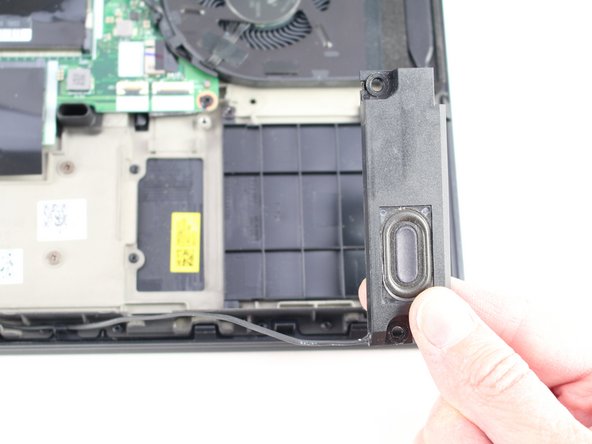
- Using the Phillips #1 screwdriver, remove two 4.8 mm screws from the right speaker.
- Lift the right speaker out of the case.
- Gently remove the speaker cable from the perimeter of the chassis, connecting the right speaker to the left speaker.
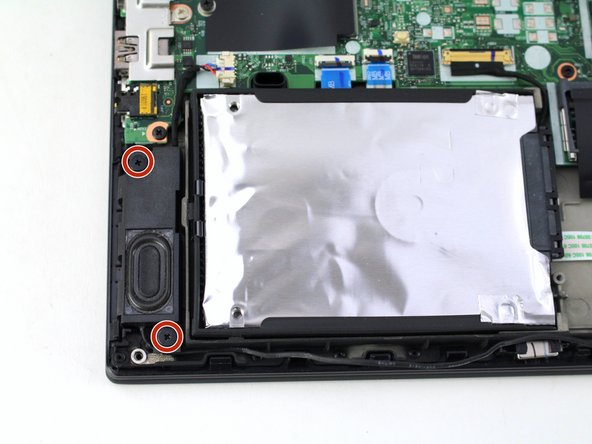
- Remove two 4.8 mm screws from the left speaker using the Phillips #1 screwdriver.
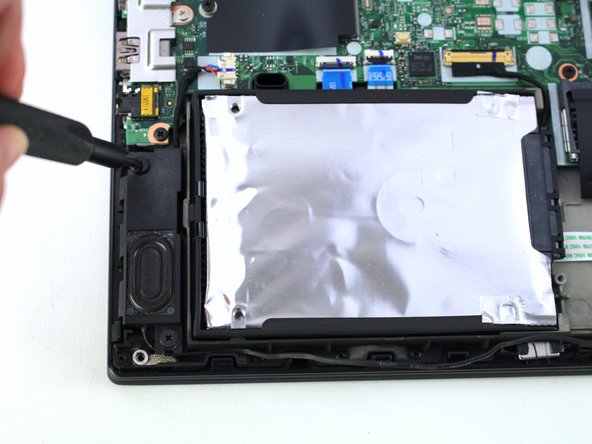
- Using the black nylon spudger, remove the slide connector which attaches the left speaker to the motherboard.
- Remove the left speaker from the case.