Ducky One 2 Mini Cherry MX Switch Replacement
ID: 139980
Description: In this guide I want to show you guys how to...
Steps:
- Unplug and remove the USB Type C connector from the keyboard.
- Place the keycap puller over the key you want to remove and push down until you hear a click from the key.
- Use your opposite hand to hold the keyboard down and pull up with the key puller.
- Pull the cap with a small amount of force until the keycap is removed. Do this until all keys are removed.
- Place all caps in a safe location to avoid any missing caps.
- Once all caps are separated from the keyboard, you should find six Phillips #00 screws.
- Use the Phillips #00 screwdriver to remove all six 2.00 mm screws from the board and place them somewhere safe.
- Separate the board from the base.
- Remember to clean out the base of the keyboard.
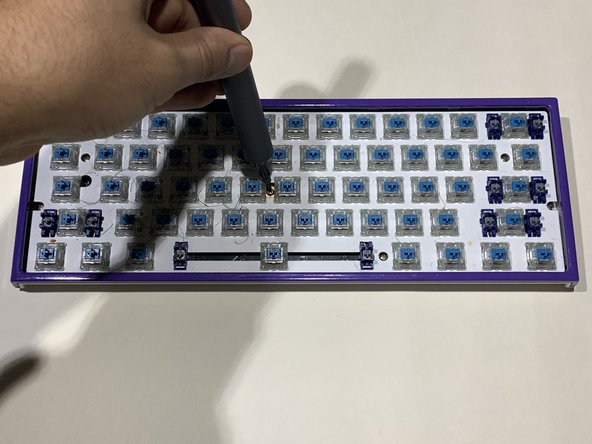
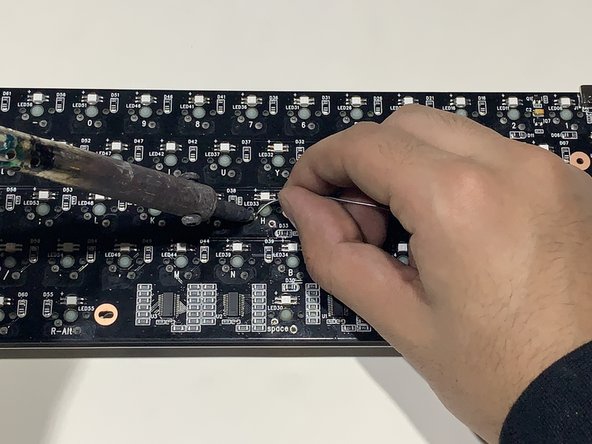
- Flip the board over and you will notice two soldered pins near each letter on the keyboard.
- Hold the soldering iron on the pins for a few seconds and remove with the de-soldering pump.
- Once both the pins are clear of solder, the pins should move freely in the slots.
- When heating the soldered pins, do not let the iron touch the board to avoid any damage.
- Do Not Touch the neck of the solder iron when plugged in to avoid any harm.
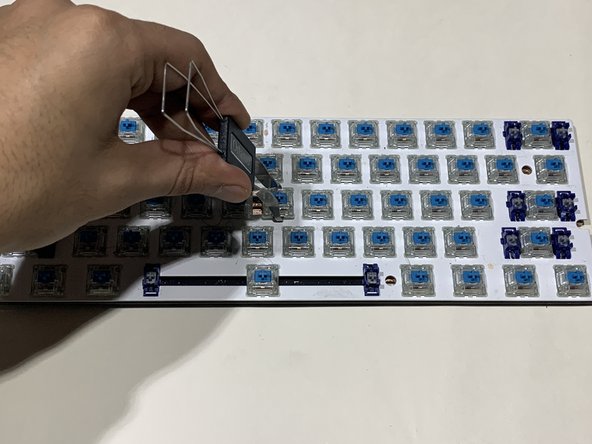
- Once both pins are removed, flip the board over again.
- Use the switch puller, place the tool vertically over the switch. You will notice two tabs on the switches, push the tabs inwards.
- With the tabs pushed in, pull the switch puller up and the switch should separate from the board.
- The switch puller should be vertical because the two tabs on the switch are placed on the top and bottom.
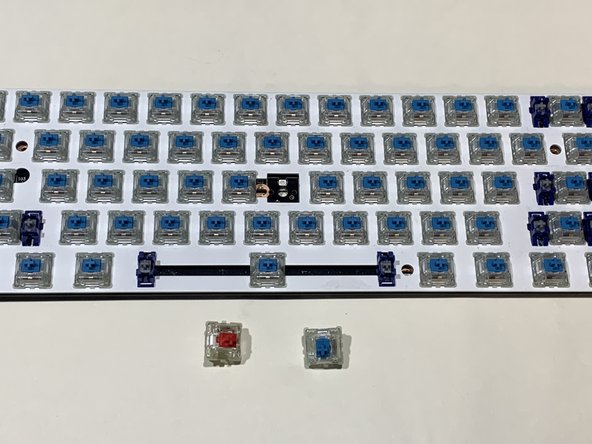
- To place the new switch into the board, line up the two pins on the switch with the slots on the board and push down on it until you hear a "click" sound.
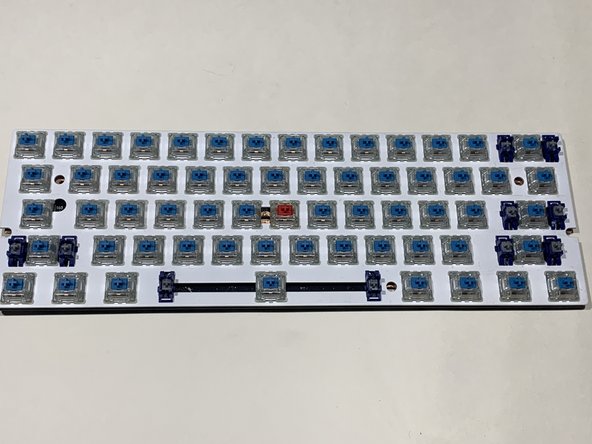
- Repeat steps 4-6 until all switches are replaced.
- Please keep the switches safe and do not let the pins bend to avoid damage.
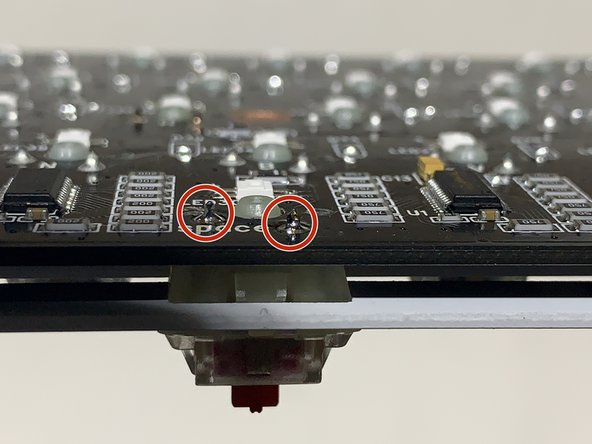
- Flip the board over and you will see the two pins inside the slots for the letters.
- Use the soldering iron to solder the pins to the slots on the board until the pins are covered in solder.
- Repeat for the second pin on the switch and until all the switches are soldered to the board.
- Once all switches are replaced repeat Steps 1 and 2 in reverse order.