AirPods Battery Replacement
ID: 140076
Description: The repair of AirPods has always been a...
Steps:
- AirPods 1 and 2 have cylindrical batteries that plug directly into the body. We need to use Hot Air Gun with helical wind to heat the metal cap to remove the battery.
- Please be noted that vertical wind can’t be used since it is too concentrated and can easily damage the case.
- Set the temperature of the Hot Air Gun to 100℃ and airflow to 7. Switch to helical wind.
- Place the AirPods 20mm around the Hot Air Gun and heat the metal cap for 3 minutes. During the heating process, we need to flip the AirPods constantly to heat it evenly.
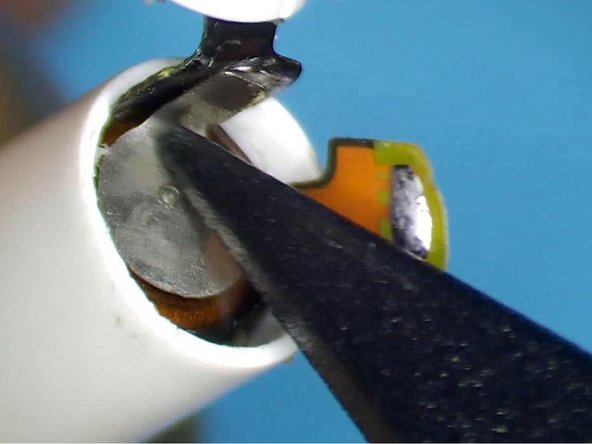
- Pry up the metal cap from the side with an L. The back of the L side has a flex cable. Please do not damage the flex cable while prying.
- Remove adhesive with tweezers. We need to heat the AirPods constantly while removing adhesive.
- Please pay attention to the black flex cable while prying the metal cap. Attach the AirPods to the holder and keep removing adhesive with tweezers. To take out the battery, the adhesive must be removed completely.
- A small amount of alcohol can be added to facilitate adhesive removal.
- Insulate with aluminum foil after adhesive removal.
- Set the temperature of the Soldering Iron to 365℃ and apply some Paste Flux to the bonding pad.
- Heat with Soldering Iron and pry up the cathode of the battery. Please do not touch the aluminum foil while applying heat to avoid damaging the plastic case. Since the anode of the battery is on the other side of the cathode of the flex cable, we need to pry up the flex cable.
- Keep applying a small amount of Paste Flux. Heat with Soldering Iron to separate the anode of the battery from the flex cable.
- Remove the anode iron plate of the battery with a Cutting Nipper.
- Then we take out the battery with revamped tweezers. Detach the AirPods from the holder. Heat the bottom of the AirPods evenly for 3-5 minutes with Hot Air Gun at 100℃.
- Insert the two holes of the battery anode with tweezers and clamp the anode to remove the battery.
- Take out excess adhesive. For easy installation later, remove adhesive around the metal cap completely.
- Apply tin to the anode of the battery with Soldering Iron.
- Plug the battery into the AirPods.
- Please be noted that the anode of the battery must align with the anode bonding pad on the flex cable.
- Attach the AirPods to the holder and insulate with aluminum foil. Heat with Soldering Iron to solder the battery anode to the flex cable.
- After soldering, press the flex cable down. Put the battery anode in position and heat with Soldering Iron to solder.
- Then we put the AirPods into the charging case to test. The AirPods can be charged.
- Apply B7000 Adhesive to the bottom of the AirPods.
- Close the metal cap and fix it with tape. After about 1 hour, the adhesive has set and we peel off the tape.
- Put the AirPods into the charging case to test. The AirPods can pair with the phone and music can be played.
- Take off the AirPods and the music stops. The battery has been successfully replaced.