How to Fix a Noisy Punching Bag Ceiling Mount
ID: 140139
Description: Are you tired of people complaining about the...
Steps:
- This is how the ceiling bag looks without the adjustments. No flexibility and sturdiness are the causes behind the noise.
- This is an unsafe attachment of the bag to the ceiling mount. Too much pressure on the ceiling mount can lead to it breaking, therefore making the bag dangerous to its surroundings.
- With the help of another individual, remove the punching bag from the ceiling mount.
- To prevent the punching bag from falling on its surroundings, place it either flat on the ground or against the wall.
- Using a wrench or a drive ratchet, remove the hex nut from the hex screw.
- Hold the hex nut with a plier for better grip (this helps with unscrewing).
- Remove the hex screw from the ceiling mount.
- Tighten the middle hex screw with the help of a drive ratchet.
- Make sure the top hex nut is as tight as possible.
- You can hold the TOP hex nut with a plier while tightening the middle hex nut for better results.
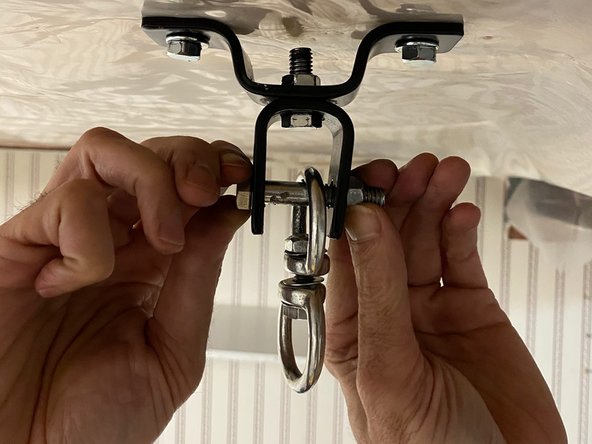
- Reinsert the hex screw back into the ceiling mount. Place the Swivel Hook inside the hex screw.
- The Swivel Hook should be attached/connected to the hex screw.
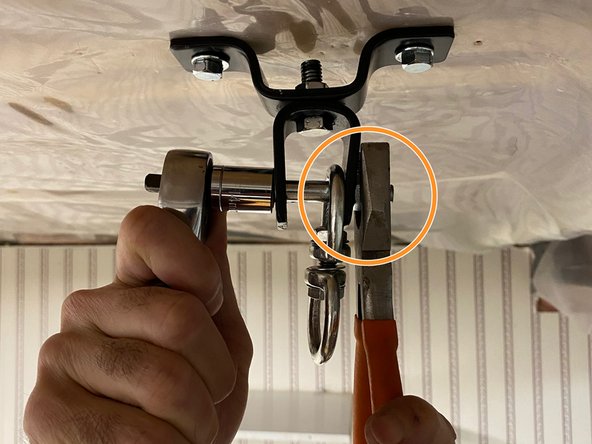
- Tighten back the bolt screw onto the hex screw.
- Using a plier and a drive ratchet, fully tighten the hex screw onto the hex nut.
- Attach a Snap Hook to the Spring. Use a snap hook to connect the Spring with the Swivel Hook.
- Attach the Snap Hook to the Swivel Hook.
- This is how the Spring should be connected to the Swivel Hook.
- Connect the punching bag with Spring. Attach the punching bag snap hook to the Spring.
- Make sure the punching bag hangs steadily, and all components are tight.