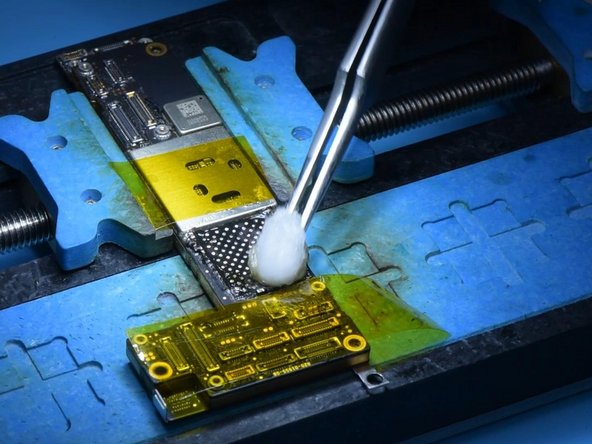
Upgrade iPhone 12 64GB Storage to 256GB
ID: 140298
Description:
Steps:
- The capacity of this iPhone is 64GB.
- Remove the display, Disconnect the battery, and Remove the motherboard.
- Attach the motherboard to the holder and then attach the high-temperature tape.
- Heat the side of the NAND with Hot Air Gun at 280℃ and airflow 45.
- Remove black adhesive on the side of the NAND with a Side Glue Cleaner Blade.
- Heat the NAND with Hot Air Gun at 385℃ and airflow 45. Pry up the NAND with a Pry Knife
- Apply medium temperature solder paste to the bonding pad with Soldering Iron at 365℃.
- Apply a small amount of Paste Flux.
- Remove tin on the bonding pad with Soldering Iron and Solder Wick.
- Clean the bonding pad with PCB Cleaner.
- Heat the bonding pad with Hot Air Gun at 280℃ to remove the black adhesive.
- Dip rosin with Soldering Iron and Solder Wick to remove tin on the bonding pad.
- Clean the bonding pad with PCB Cleaner afterward.
- Apply some Paste Flux to the bonding pad and put an iPhone 12 256G NAND in position.
- Solder the NAND with Hot Air Gun at 365℃ and airflow 45.
- Install the motherboard and display. Plug in the data cable and connect the iPhone to the computer. Open 3uTools to flash the iPhone.
- The phone does not display a progress bar during the flash process and won't display a progress bar until the flash has finished.
- Activate the phone on 3uTools.
- Set up the phone and WiFi can be searched normally.
- Go to Settings > About. The phone has a 256G capacity.
- The serial number, WiFi address, and Bluetooth address remain unchanged.