Kindle 2 SIM Card Replacement
ID: 14085
Description: Use this guide to replace the SIM Card in your...
Steps:
- Lay the Kindle face down on a soft cloth to protect its screen.
- Wedge the plastic opening tool in the small opening between the grey plastic and the metal casing.
- Move the plastic opening tool across the opening while pressing down to separate the grey plastic from the metal casing.
- Slide the gray plastic top piece away from the Kindle's metal casing.
- Once the gray plastic top piece is detached from the metal back cover, remove it.
- Use a Phillips #00 screwdriver to remove the two 4 mm screws from the metal casing.
- Use the plastic opening tool to push down and pry towards the metal casing to release each of the three clips that hold the metal case in place.
- Remove the metal casing.
- The volume control button rests in a slot on the side of the Kindle. When the metal casing is removed, the volume control button may fall out. When reassembling, place the volume control button back into its slot.
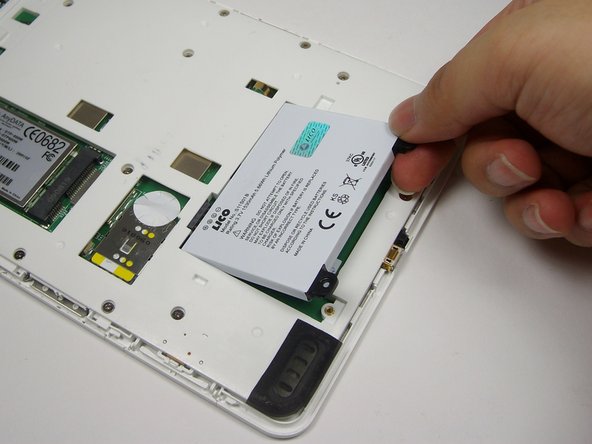
- Use a Phillips #00 screwdriver to remove the two 3 mm screws that hold the battery in place.
- The battery should be removed before continuing with the rest of this guide to prevent harm to you and the device.
- Pry upward under the black tab with the spudger to dislodge the battery.
- Use your fingers to lift the battery out of the device.
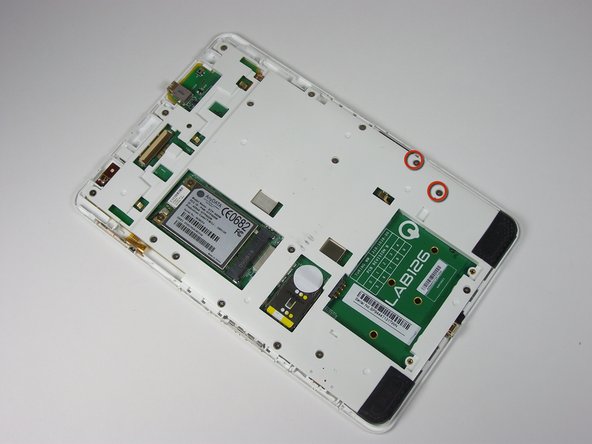
- Remove 16 3mm Phillips #3 screws from the plastic panel.
- Lift the plastic panel and place it away from the Kindle 2.
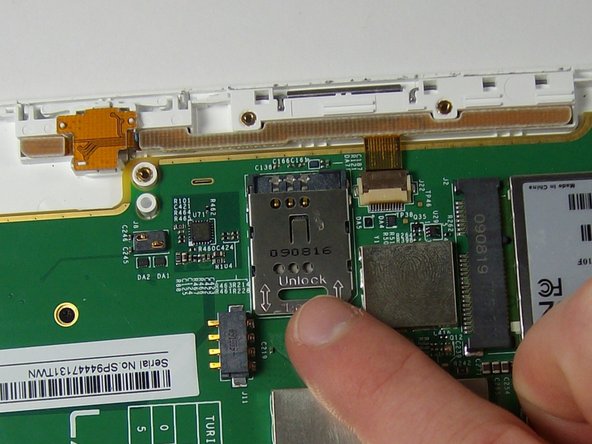
- Locate the SIM card slot above and to the left of the LAB126 Logo and beneath the Wireless Card.
- Push the SIM card in the direction of the "UNLOCK" arrow on the SIM card case.
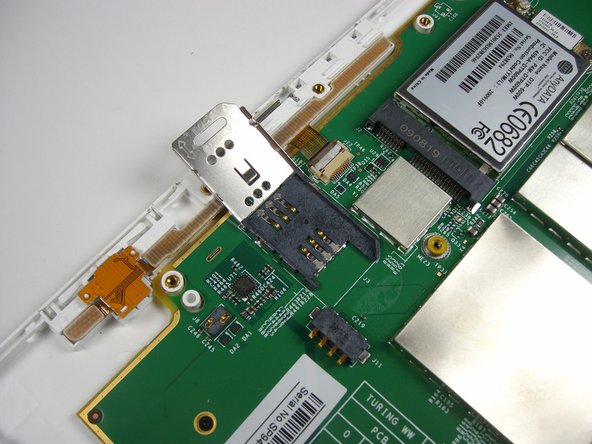
- Lift the now unlocked case up on its hinges to reveal the SIM card slot.