Toshiba Satellite A210 Fan Replacement
ID: 14095
Description: Before going in and attempting this guide you...
Steps:
- Unplug the AC adapter and all other auxiliary components from the laptop.
- Slide the battery lock tab away from the center of the laptop to unlock the battery.
- Slide the battery release tab away from the center of the laptop and hold it.
- Lifting from the small notch between the two tabs, pull the battery out of the laptop.
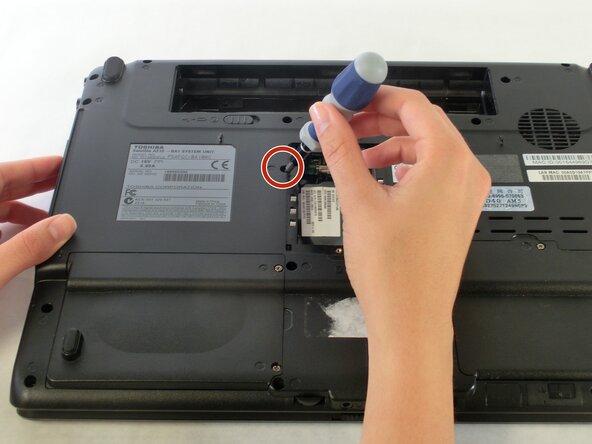
- Use a PH0 screwdriver to remove the screw holding the optical drive in place.
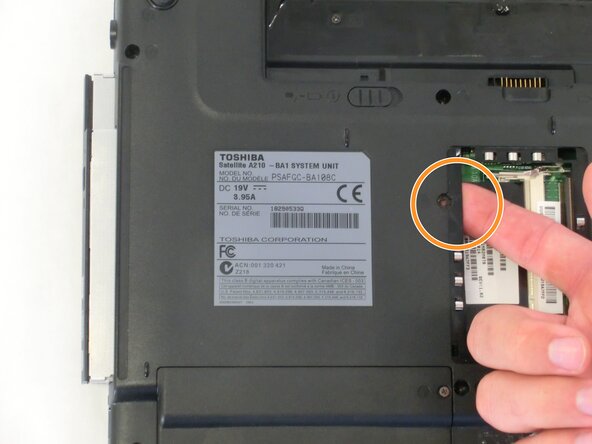
- Using your index finger, push the metal tab inside the RAM bay which is located directly underneath the screw-hole.
- The optical drive will then slide out.
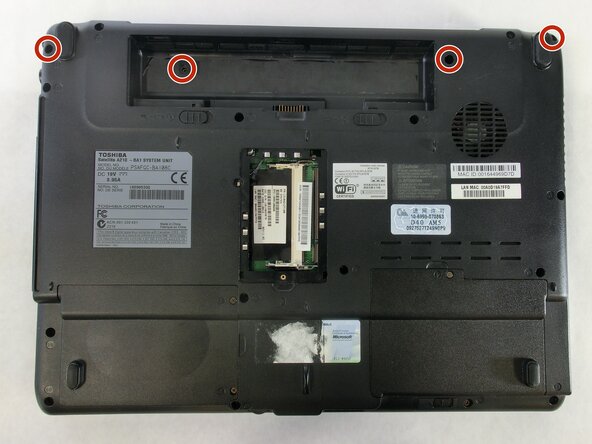
- Unscrew the 4 highlighted screws with a PH1 screwdriver.
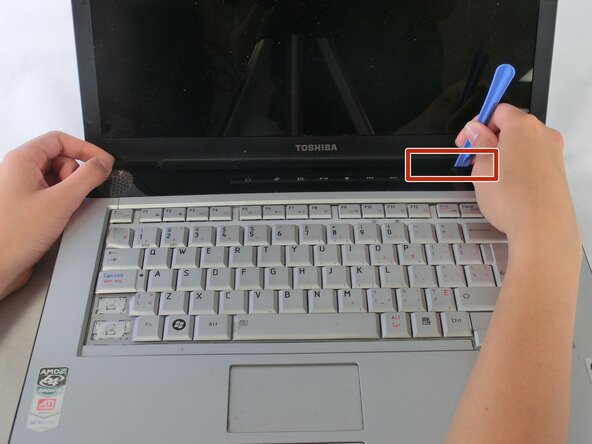
- Orient the laptop so that the screen is open and facing you.
- Slide the plastic opening tool underneath the top edge of the black plastic insert.
- Pull it off and set aside.
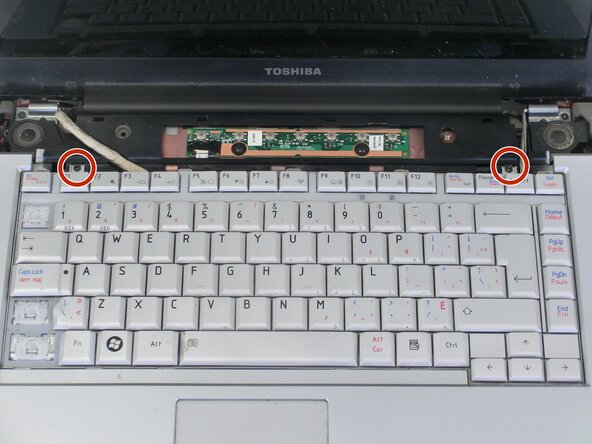
- Remove the 2 PH1 screws.
- Lift the keyboard from the top being carful not to remove it fully. There is still a ribbon cable that connects the keyboard to the laptop.
- Disconnect the keyboard ribbon cable and remove the keyboard from the laptop.
- Close the laptop and flip it over.
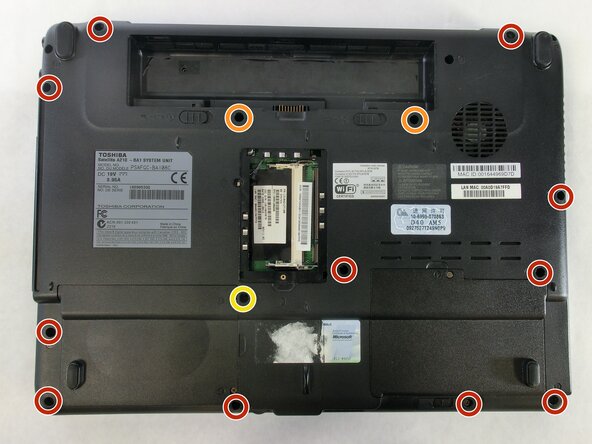
- Unscrew the 11 red circled screws with a PH1 screwdriver. These screws are larger in size.
- Unscrew the 2 orange circled screws with a PH1 screwdriver. These screws are shorter and thicker than the previous.
- Unscrew the 1 yellow circled screw with a PH1 screwdriver. This screw is longer and thinner than the previous.
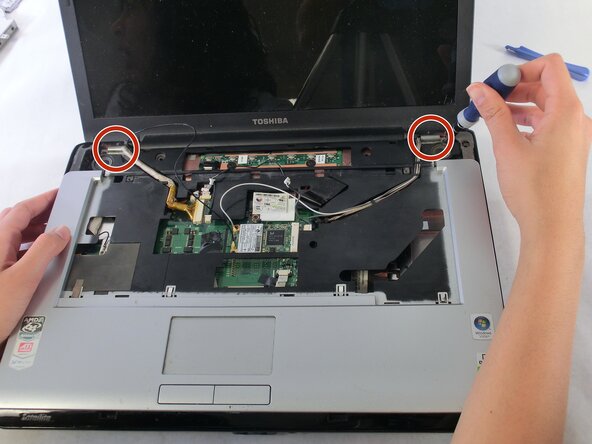
- Flip the laptop over and open it so that the screen is facing you.
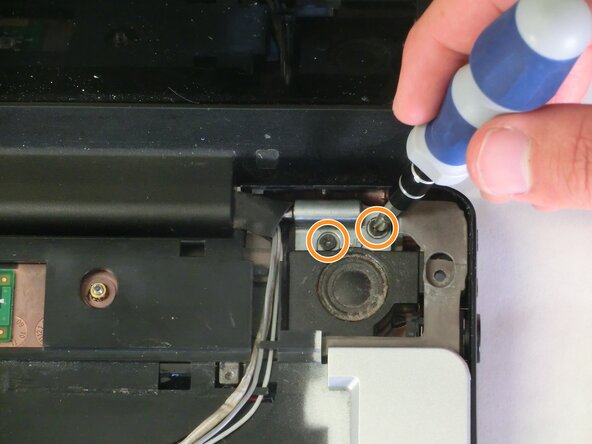
- Locate the hinges on either side of the screen, which secure the display to the body of the laptop.
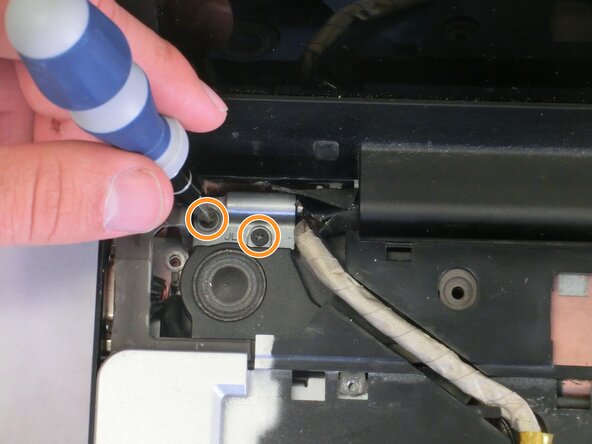
- Unscrew the 2 screws in each hinge with a PH1 screwdriver.
- The display is no longer connected to the laptop and could fall. Be careful not to drop it during the next steps.
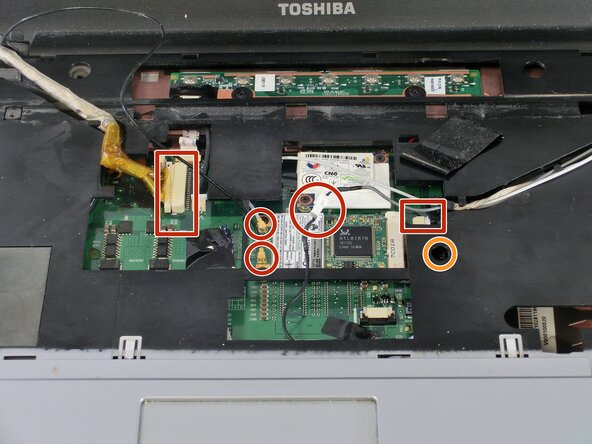
- Unfasten the connectors from the highlighted locations.
- Disconnect by gently pulling on the fasteners which connect the wires to the laptop.
- Pulling directly on the wires could cause permanent damage to the connectors or the wires themselves.
- Unscrew the screw indicated by the yellow circle.
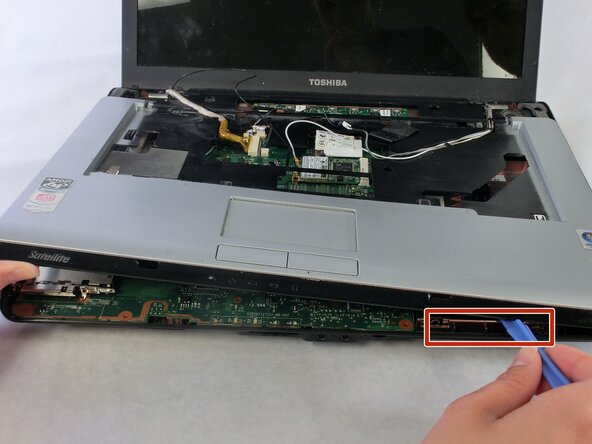
- Slide the plastic opening tool underneath the edges of the upper casing, which is shown in the images.
- The LCD screen can now be removed from the laptop.
- Lift the upper plastic casing and remove it from the lower half of the laptop.
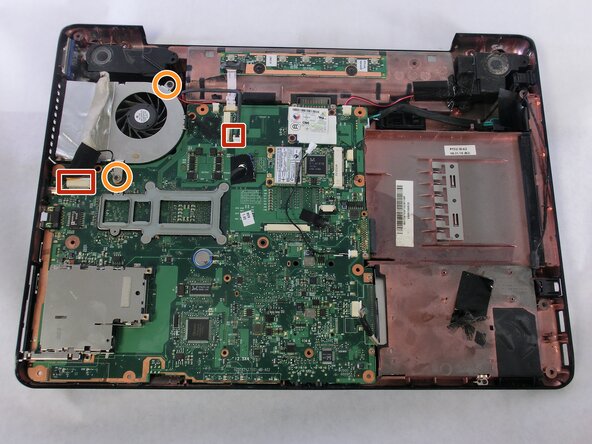
- Unfasten the two connections shown.
- Unscrew the two screws securing the fan to the laptop. Use a PH1 for the screw that is adjacent to the speaker and a PH0 for the other screw.
- Lift up the fan and pull the black plastic tab away from the fan housing. Remove the fan.
- Do not remove the metal fan housing. It is taped to a metal heat-sink and should not be removed.