VHS Shell Replacement
ID: 141858
Description: In this guide, you will learn step-by-step...
Steps:
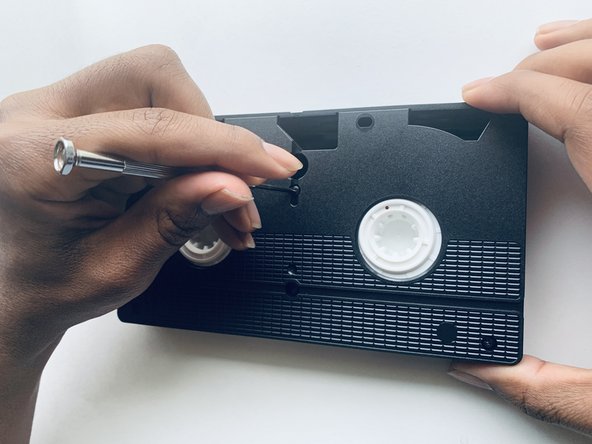
- Unscrew the five 3mm screws with the Phillips #1 screwdriver.
- Once the screws are out, pull off the front of the VHS shell.
- Take off any labels on the sides of tape before doing this step.
- Make sure you are taking off the front of the shell, otherwise the reels or other loose pieces may fall out.
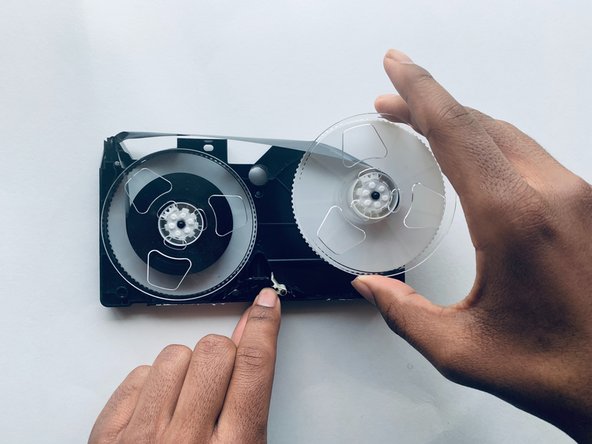
- Hold down on the white lever.
- While holding down, carefully take out the reel on the right.
- Take out the left reel and set them both aside, with the tape still wrapped inside and connecting them.
- Get the replacement shell and unscrew the 5 marked 3mm (21/32 in length) #1 Phillips screws with the screwdriver.
- If you are unable to buy an empty VHS shell, you can also use one that already has a tape in it, just you would have to repeat step 3 to take out the reel.
- Once the screws are out, pull off the front of the replacement shell.
- Take off any labels on the sides of tape before doing this step.
- Make sure you are taking off the front of the shell, otherwise the reels or other loose pieces may fall out.
- Place the right reel into the replacement shell, making sure the tape goes in-between metal and plastic circular pieces here.
- Make sure that the reel is placed in so that any excess tape not in the reel is hanging out of the top (like pictured in step 8).
- Place the left reel into the replacement shell, making sure the tape goes in-between metal circular piece and the plastic triangular piece pictured.
- Turn the reels to retract any excess tape hanging out of the top.
- This isn't a necessary step, just one that I prefer to do.
- Place the top of the replacement shell back on.
- Screw the screws back in with a screwdriver.