Honda CR-V 2006-2010 Weatherstripping Replacement
ID: 142227
Description: This guide was made by repairing the...
Steps:
- Identify how much of the stripping is detached by lightly pulling down on the rubberized material.
- Clean the surfaces that need to be reattached. This is easily done with brake cleaner.
- Apply brake cleaner directly to the metal parts of the door where the weatherstripping was attached and wipe it dry with a microfiber towel.
- Spray brake cleaner onto the towel and wipe along the backside of the weatherstripping (the side that touches the car).
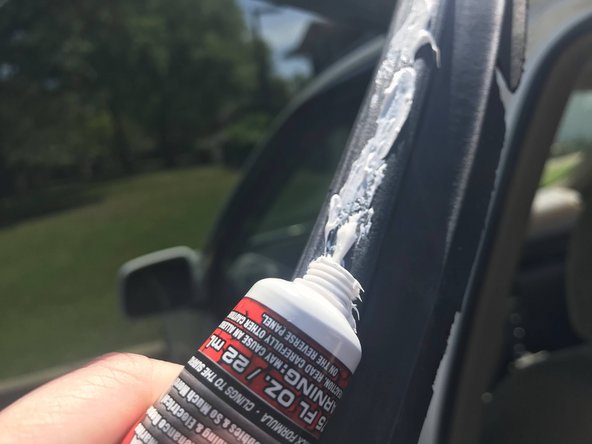
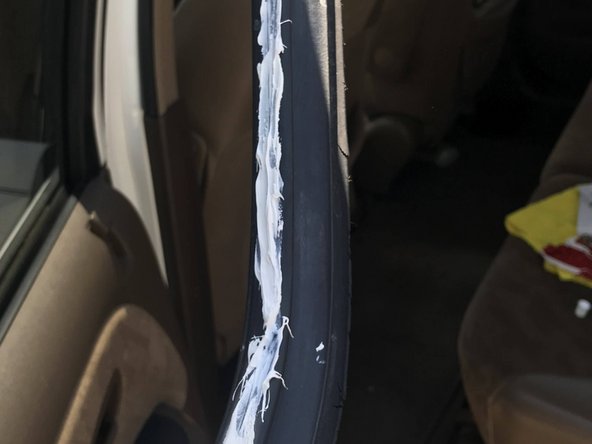
- Once the cleaner has dried, take your silicone/ waterproof sealant and apply thick, evenly spread beads to the backside of the weatherstripping.
- Press the weatherstripping firmly into its seated position.
- Check to make sure the weatherstripping is in the correct position or if there are any spots that appear to be out of alignment,
- If it appears to be in place, hold the weatherstripping down with masking or painters tape.
- Wipe away any excess adhesive with a clean microfiber towel that has been sprayed with brake cleaner.
- To make sure that the weatherstripping has been properly attached, close the car door and observe the edges where the weatherstripping is present. If there are parts where the weatherstripping is bulging out or is not present, realign and close the door again.
- With the stripping correctly in place, close the door and let the adhesive dry.
- This will ensure that the adhesive holds the stripping in the optimal position.
- In order to prevent moisture from staying behind your weatherstripping which causes it to detach, apply silicone spray to it.
- After the adhesive has fully cured, spray silicone spray directly between the door and the weatherstrippings overhang and spray directly on it.
- Wipe with a clean microfiber towel to apply evenly.
- This step will also help the lifespan of your weatherstripping by protecting it from dry rot.