How to Repair LED Strip Lights
ID: 142240
Description: If your LED light strips are malfunctioning,...
Steps:
- Find the spot where the lights stop working and where there are four connections labeled in descending order, "12V, R, G, B" with a scissor "cut here" marking and a copper colored backing.
- With a scissor, cut along the "cut here" line, separating the faulty strip from the working strip.
- Align the new strip next to the working strip and keep them steady. Look at the four connections like a mirror image. R to R, G to G, etc.
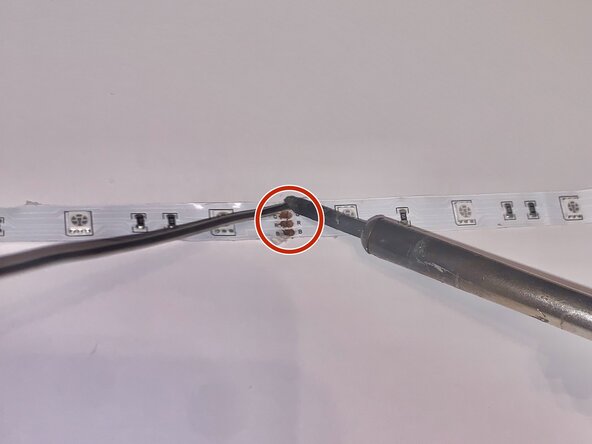
- Use a soldering iron to solder all four connections.
- Make sure the solder is secured.
- Once the four connections are soldered securely, plug in the strip and turn the lights to all three colors to ensure that the connections are steady. Now you may place the lights where so desired.
- If the strips had an adhesive backing, some new adhesive material may be required.