Creative Ziio 7" Camera Replacement
ID: 14321
Description: Introduction: If your Creative Ziio 7" tablet’s...
Steps:
- Remove the back panel by using the plastic opening tool to carefully pry around the panel's edges.
- The volume control button and the top power button may fall out during this step.
- Unscrew the four 3mm Phillips #00 screws found in each corner of the motherboard.
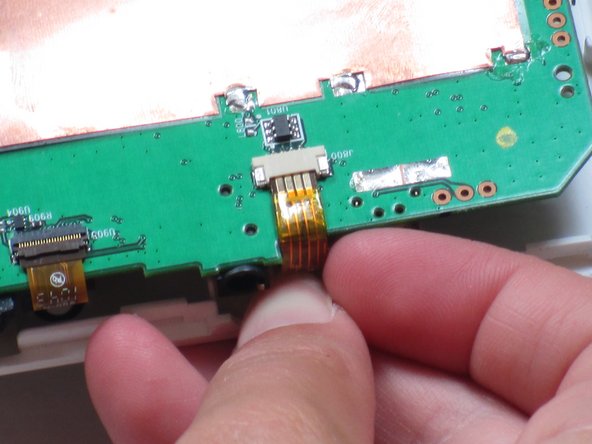
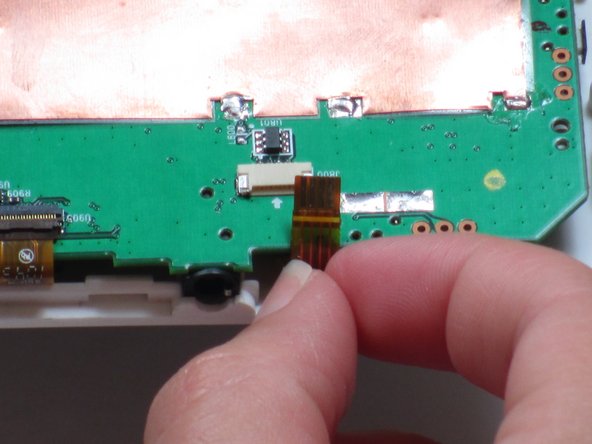
- Unplug the ribbon cable near the edge of the motherboard in the bottom right of the device.
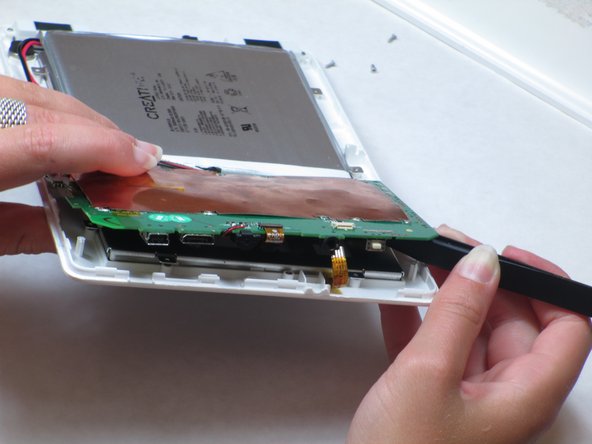
- Lift up the motherboard.
- A mesh-like strip on the right side will be connected to the bottom of the motherboard.
- Remove the tape on top of the strip. Use tweezers or pliers to pull on the strip and unplug it.
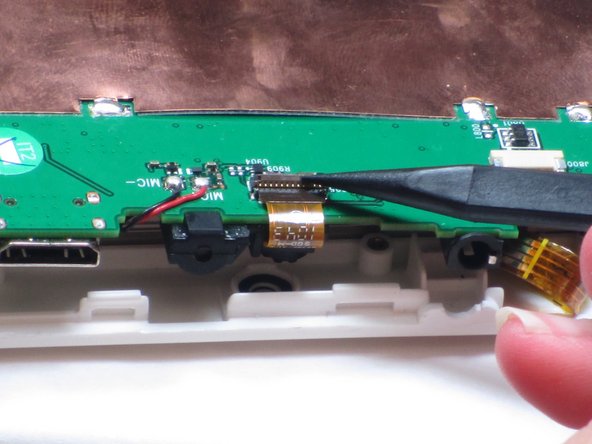
- Lift up the motherboard and locate the ribbon cable (burnt orange-colored strip) centered on top of the motherboard.
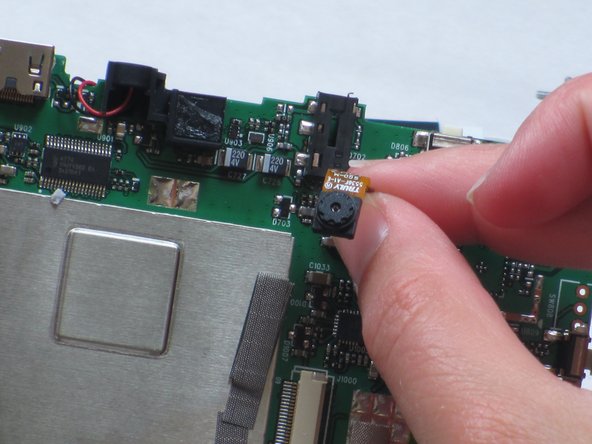
- The ribbon cable with the attached camera is plugged into the motherboard.
- Unplug the ribbon cable using your fingers to pull up on the flap.
- Use a spudger to pry the camera away from the rubber camera mount.
- Do not remove the entire rubber camera mount. Only remove the camera attached with adhesive.
- Remove the broken camera and use electronic-friendly adhesive to attach a new camera.