Samsung Galaxy Note Headphone Jack and Earpiece Replacement
ID: 14384
Description: Before removing the headphone jack and...
Steps:
- Make sure the screen is face-down and the camera is opposite you.
- Insert the flat end of a spudger into the phone's top right rectangular slot.
- Use the spudger as a lever to pry open the back of the phone.
- With the spudger still inserted, carefully slide the spudger down the side of the phone.
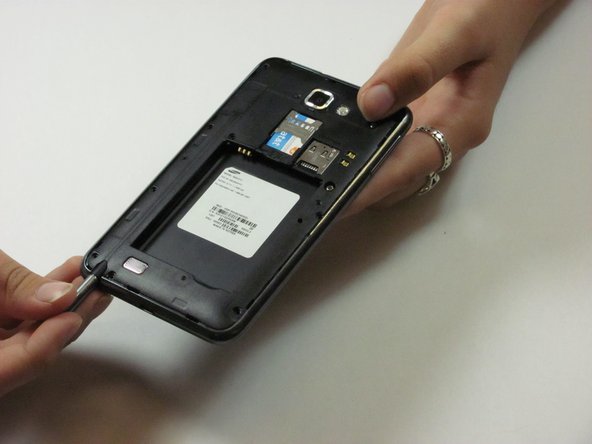
- Gently peel off the back cover with your hand.
- Place the spudger in the battery's bottom right slot.
- Gently pry to remove the battery.
- Remove the nine 3mm screws on the perimeter of the phone with a Phillips #00 screwdriver.
- Remove the stylus from the bottom of the phone.
- Pry all the way around the sides with a plastic pry tool and gently pop off the midframe.
- If the cover does not come off easily, continue to pry along the phone's perimeter.
- This step can take some patience. Prying too hard or forcing the screen off can crack or scratch the screen and break the thin plastic around the stylus case.
- Separate the midframe from the phone. The midframe should now pull off easily.
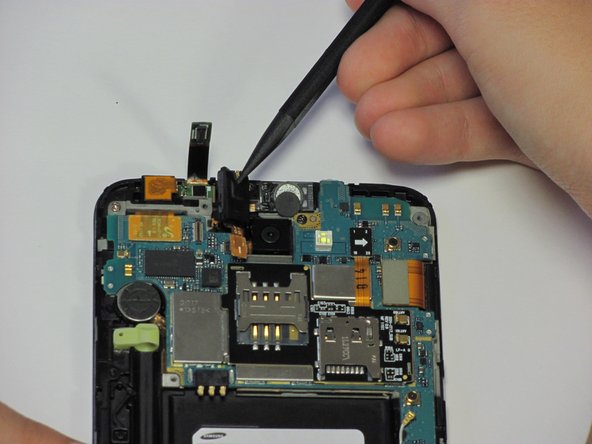
- Use the spudger to pry up the yellow ribbon cable.
- Use the spudger to pry up the long, green ribbon next to the yellow one you just pried up.
- Push the green ribbon back to access the black bracket underneath it.
- Use your fingers to gently lift up the black bracket and set it aside.
- Flip the spudger around and insert the pointy end into the headphone jack.
- Lift the headphone jack directly upwards using the spudger as a lever. This will also remove the connected speaker.
- The headphone jack and earpiece are held down with an adhesive, so removing them might take some force.