IBM Thinkpad T61 Keyboard Replacement
ID: 14435
Description: This guide is for those who need to remove the...
Steps:
- Ensure the laptop has been properly shut down and unplugged.
- Turn the computer over so that you can see the battery release tab located near the top of the Thinkpad.
- Use your finger to slide the release tab to the unlocked symbol.
- Hold the tab in the unlocked position and push the battery away from the computer to remove it.
- Slide the new battery in until it clicks.
- Ensure that the release tab is in the locked position.
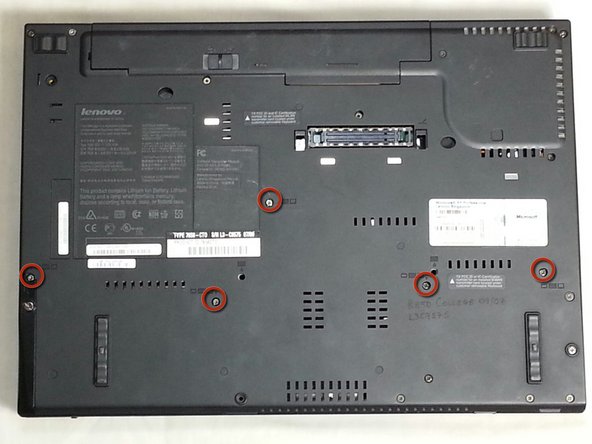
- Use the PH1 bit screwdriver, remove five 17.0mm screws on the back of the computer.
- These screws have a keyboard symbol next to them.
- Make sure you keep the screws together and do not misplace any of them
- Turn the computer over so the keyboard is facing upwards, and open the Thinkpad.
- Release the panel by lifting up on the outside edges just below the keyboard.
- Gently pull the panel away from the computer.
- BE CAREFUL! The panel is still attached by the touchpad's data cable.
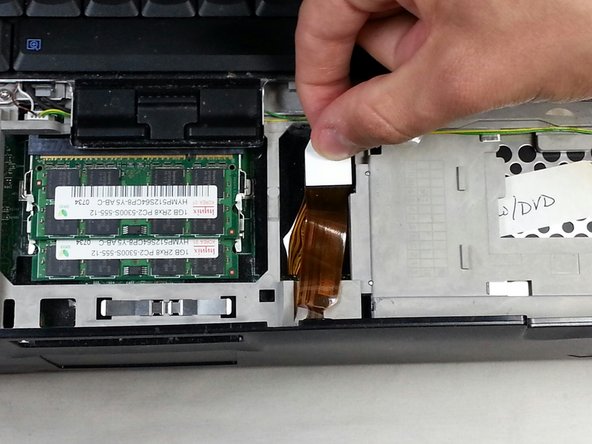
- Detach the connecter by pulling up on the white tab.
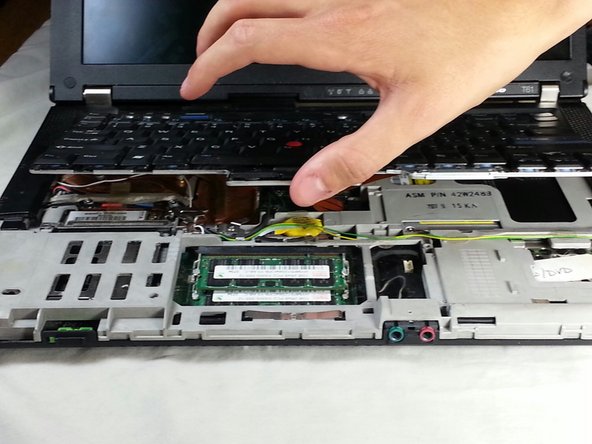
- Using your fingers, lift the front edge of the keyboard until you can see the wire connecting it.
- Gently pull up on the connecter to disconnect the keyboard.
- The keyboard will no longer be attached and can now be fully removed.
- Take the replacement keyboard and push the new connector tab back into place.
- Line up keyboard and place back into the position, make sure it is lined up with the back first.
- Lower the rest of the keyboard back into place so it lies flat against the computer's shell.
- Push in white tab to reconnect the touch pad panel.
- Push in touch pad panel back into place by lining it up starting from the bottom and pushing it down until it fits back into place.
- Close laptop.
- Flip the laptop over so that the side with the screws is facing up.
- Put back all the screws, make sure they are in tightly.
- The new keyboard is now in securely.