Xbox One Optical Drive Laser Replacement
ID: 144549
Description: This guide explains how to replace the Xbox...
Steps:
- Make sure the optical drive is not connected to any power source and is powered off.
- Unscrew the four Phillips #1 screws on the top of the optical drive.
- Lift the lid off of the optical drive case, this should require little to no force.
- Slide the remaining optical drive case off of the internal components.
- Internal components often snag on these points when removing the optical drive case.
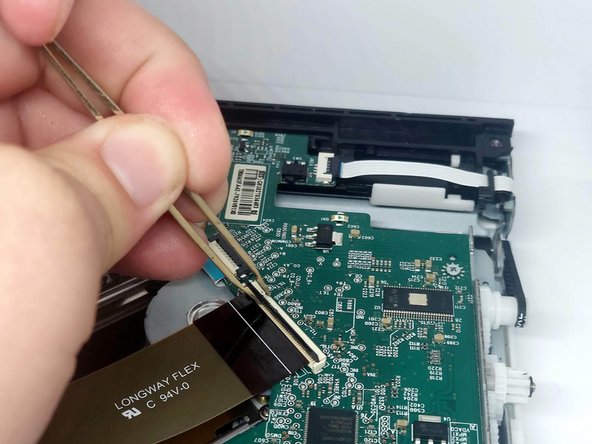
- Locate the three ZIF connectors on the optical drive PCB.
- Using tweezers, gently lift the tab on each ZIF connector to release the ribbon cables.
- Remove the ribbon cable from each ZIF connector.
- Unscrew the three Phillips #0 screws mounting the PCB.
- Gently lift the PCB and place it to the side.
- When lifting the PCB, be careful to not detach the wires connecting the PCB to the motor.
- Unscrew the three Phillips #0 screws mounting the optical drive laser.
- Lift the old optical drive laser from the unit and place in the new optical drive laser.