Toshiba Satellite A215 S4697 Fan Replacement
ID: 14456
Description: When your computer heats up and runs loudly, it...
Steps:
- Close the laptop and turn it over so that the base is facing upwards and the spine is facing away from you.
- Find the battery compartment.
- Slide the left slider which is just beneath the battery compartment into its leftmost position.
- Slide and hold the right slider into its rightmost position. Lift the battery out of the compartment.
- Do not touch the gold nodes inside the compartment.
- Place laptop right side up on a flat and clean surface. Open the laptop.
- Find the strip just above the keyboard and locate the gaps behind the F1, F8, and Insert keys.
- Remove the strip by sticking your plastic opening tool into these gaps in order, and pulling up.
- Locate the two 2.3mm Phillips #1 screws at the top of the keyboard that attaches the keyboard to the frame behind it.
- Remove screws.
- Find the latch above the F8 key that overlaps the keyboard.
- Use a plastic opening tool to press the key board's tab downward, until the key board is released.
- Pull the keyboard out by shifting it forward towards the screen and pulling up.
- CAUTION: Do not pull it out all the way yet. It is still attached to the laptop by a cable.
- Find the ribbon cable that connects the keyboard to the laptop. Look for the black tabs on both sides of cable at the laptop end of the cable.
- Using a pair of tweezers, pull the black tabs on both sides of the cable connector towards the screen until the cable can be pulled out easily.
- Pull out the cable and completely remove the keyboard.
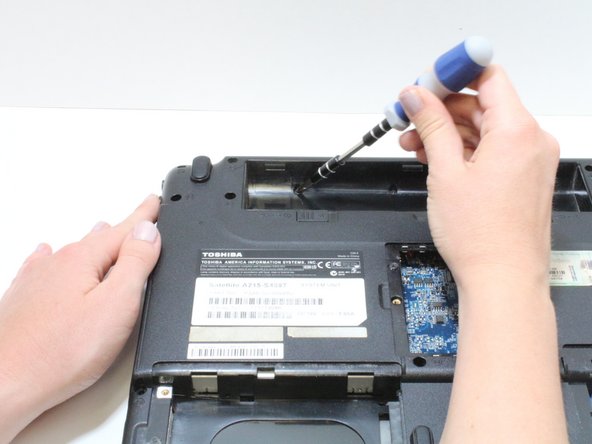
- Turn computer over so that the battery compartment is facing up and is at the top.
- Locate and unscrew one captive Phillips #1 screw located at the center.
- A captive screw cannot be completely removed from the device's component.
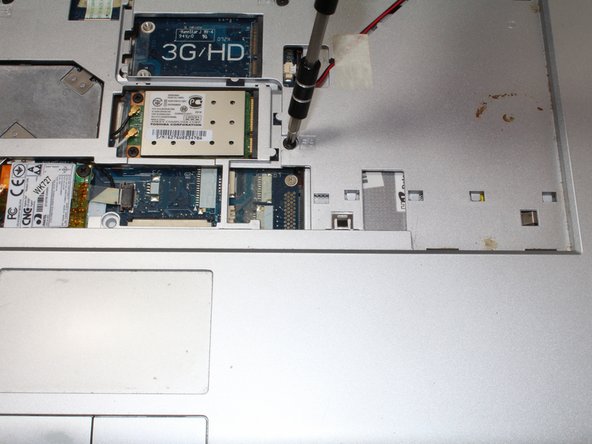
- Use a plastic opening tool to open the motherboard access cover.
- Do not touch the motherboard.
- Remove one 1.5mm Phillips #1 screw located near the top left edge of the opening.
- Flip your device right side up, and rotate it so that the optical drive is facing you.
- Insert a paper clip into a manual release switch located to the right of the automatic release button.
- Optical Drive will not release if you insert the clip diagonally. Make sure to insert the clip straight into the switch.
- Gently pull out the disk drive until you can see the metallic case of the optical drive.
- Hold the metal case and continue to pull the drive out toward you.
- Once you see the yellow labels on the disk drive, fully retract the disk mount until you hear a click.
- Continue to pull the disk drive toward you until it is completely removed from the laptop's housing.
- Close the lid and flip the laptop over so that the bottom side is facing you.
- Remove nineteen 8mm Phillips #1 screws, labeled with "F8."
- Locate and Remove two "f4" screws as well.
- Locate the RAM compartment.
- Unscrew the two Phillips #1 screws and lift the lid up.
- Note that these two screws do not detach from lid.
- Unscrew the two 8mm Phillips #1 screws inside the RAM compartment.
- Remove the three 3mm Phillips #1 screws inside the battery compartment.
- Turn computer over and open lid.
- Make sure all the screws are cleared off the device before you flip the device over.
- Remove the four 8mm Phillips #1 screws in the slot where the keyboard sat.
- Locate the speaker cables near the top right corner.
- Use tweezers to carefully disconnect the cable.
- Locate the cable on the bottom left hand corner of keyboard slot.
- Gently pull it out to the left.
- Locate the cable at the top of the frame.
- Using tweezers, pull tabs on either side, toward the screen, and pull the cable out of socket.
- Locate another ribbon cable at the lower center of the keyboard slot.
- Using tweezers, pull tabs out to the left, and pull cable out of socket.
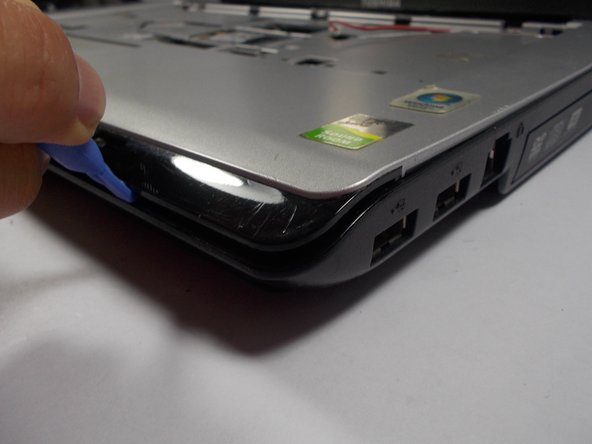
- Using a plastic opening tool, insert into slit around laptop and separate the silver frame from black bottom.
- The black lip on the front of the laptop is part of the top silver frame.
- Lift frame away from laptop.
- Locate the fan in the top left hand corner of the inside of the laptop.
- Remove the following screws from the fan encasement:
- Two 12 mm Phillips #1 screws
- Two 2.3 mm Phillips #1 screws.
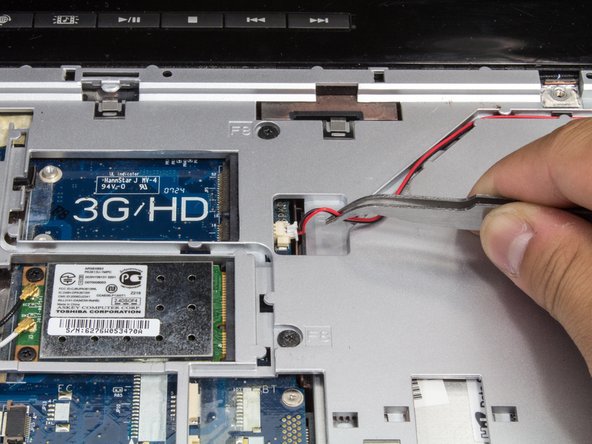
- Pull away gray flat cable from the fan so that it is no longer stuck to the fan's surface.
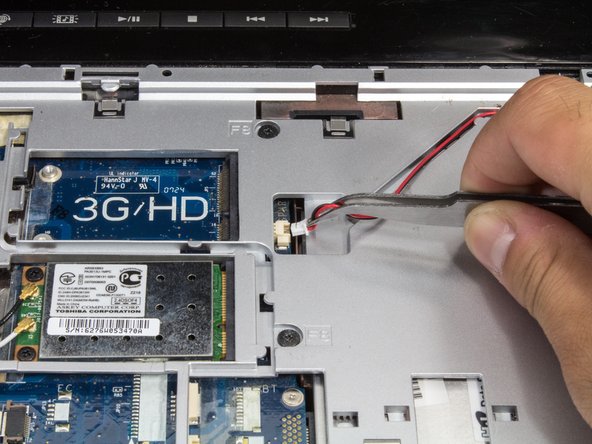
- Disconnect cable by pulling the black end to the left so that it detaches from the white plastic piece.
- Using tweezers, disconnect power cable by gently pulling white end straight away from its socket.
- Lift fan up out of laptop.
- Pull out any dust or use a pressurized air duster to clean the fan.