Saeco Minuto Pump Replacement
ID: 144619
Description: If the pump becomes weak, you will have to...
Steps:
- Disconnect the power plug!
- Remove the water tank.
- Remove all the coffee beans.
- Remove the brewing assembly.
- Remove the drip tray and the coffee grounds drawer.
- Pry up with a plastic opening tool at the bottom edge of the chrome-plated cover to lift up the coffee dispensing spout. This cover is often very tight, so you have to pry hard and hope that the part does not break.
- When the lower edge of the spout is released, you can pry on the side edge until the chrome cover comes off completely.
- Remove the Torx T10 screw at the top edge of the coffee dispensing spout.
- Lift off the black cover over the coffee dispensing spout. The sliding nozzles will come off at the same time.
- Remove both Torx T10 screws on the left and right at the bottom edge of the coffee dispensing spout.
- Pull off the hot water dispensing spout.
- Remove the Torx T20 screw on the finger guard of the grinder. Remove the finger guard.
- If the screws are covered with coffee remains, you should first clean them with a needle and a vacuum cleaner.
- Remove three Torx T10 screws in the bean container.
- Remove the three Torx T10 screws under the water tank.
- Grab the upper cover on the sides and lift it up.
- The cover is still connected with a cable and a tube.
- Take off the silicone tube.
- Remove the water level sensor cable from its brackets.
- Carefully remove the plug from the water level sensor.
- The cover is now free and can be removed.
- Open the service Dior.
- Remove five Torx T10 screws.
- Remove one T10 Torx screw securing the top of the grinder.
- If you haven't already done so: Unscrew the center Torx T10 screw at the bottom of the coffee spout distributor.
- Unscrew the Torx T10 screw in the middle left front.
- Lift the service door up and remove it.
- Unscrew the Torx T10 screw securing the coffee spout distributor inside.
- Lift the coffee spout distributor up and remove it.
- The coffee spout distributor tends to be dirty. Open it and clean it thorougly.
- You should now be able to lift the inner frame out of the outer one. On some models, it is still attached with other screws.
- Lift the inner frame up and remove it from the outer case. It may get stuck a bit, help with a plastic lever tool.
- This is what the inner frame looks like from three sides. All components are easily accessible, especially the pump, the flowmeter and the heater.
- And this is what the completely gutted outer case looks like. It can now be cleaned well.
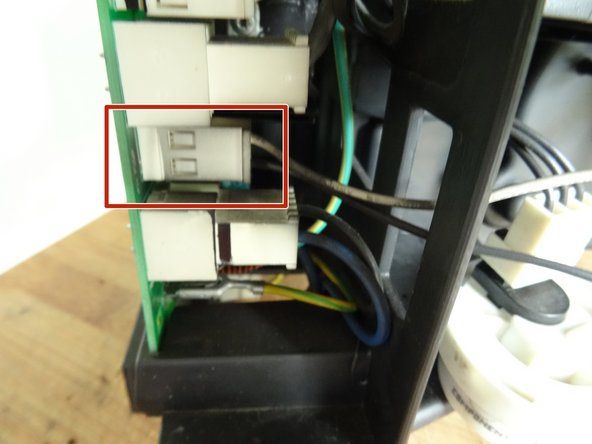
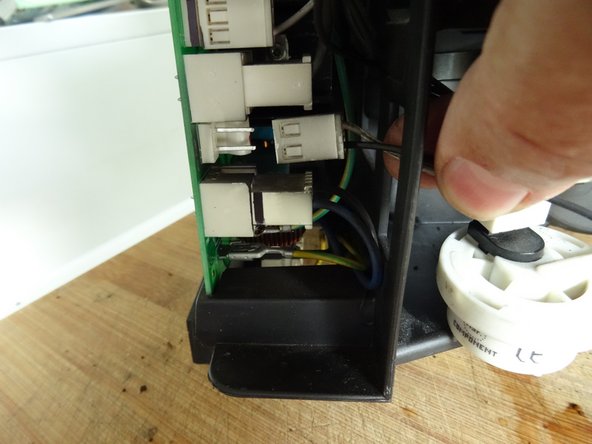
- Pull the pump cable connector to disconnect it from the PCB.
- Slide the water inlet off the left side of the pump using a flat screwdriver.
- Get the pump out of the left rubber holder.
- Place the cables tightly around the pump and unscrew the pump from the connection - the pressure relief valve - on the right side
- Get the pump out of the right rubber holder.
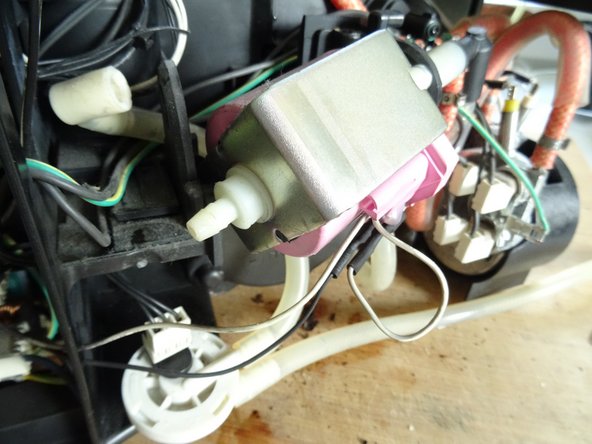
- If the replacement pump is not equipped with a thermal fuse, you must disconnect it from the old pump and transfer it to the new one. (marked red in the third picture)