HP EliteBook 1050 G1 Keyboard Panel Replacement
ID: 145165
Description: This guide will show the reader how to replace...
Steps:
- Remove the two 5.5mm screws with a Torx T8 driver.
- Remove the five 8.7mm screws with a Torx T8 driver.
- Remove the two 6.6mm screws with a Torx T8 driver.
- Pry open the backplate with a Jimmy.
- Remove the two 1.9mm screws from the SSDs with a Phillips #0 driver.
- Disconnect the two PCIe SSDs by sliding them out of each port.
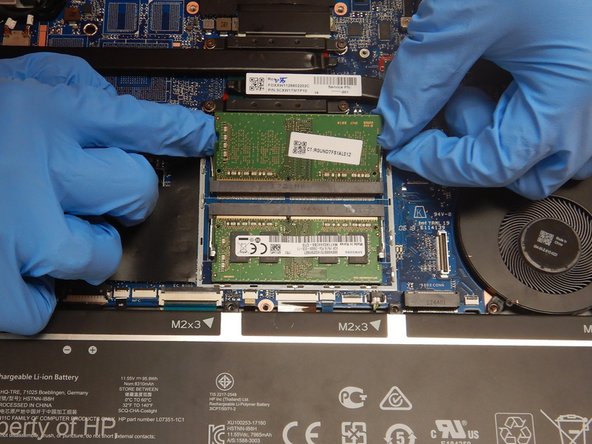
- Pull the clips on either side of the RAM chip away from each other using your fingers.
- As you pry apart the clips, the RAM should pop up to rest at an angle to the motherboard.
- Slide the RAM chips out of their respective slots.
- Remove eight 4.5 mm screws from the battery with a Phillips #1 screwdriver.
- Disconnect the white tipped battery cable from the motherboard.
- Remove the six 4.5mm screws from the fan assembly using a Phillips #00 screwdriver.
- Unscrew four 3.6mm screws from the heatsink assembly with a Phillips #00 screwdriver.
- These "captive" screws are connected to the heatsink and will not detach from it.
- Remove the fan assembly.
- Unplug the seven ZIF connecters from the motherboard by flipping up the black switches with a spudger and pulling out the cables.
- Remove two 1.9mm screws from the display cable bracket using a Phillips #00 driver.
- Remove the two connectors on the right side gently.
- Remove the connector on right side of motherboard.
- Remove the three 4.5mm screws using a Phillips #00 driver and remove the bracket.
- Remove the two coaxial cables.
- Remove the two 3mm screws using a Phillips #00 driver.
- Remove the motherboard by lifting it up and out of the case.
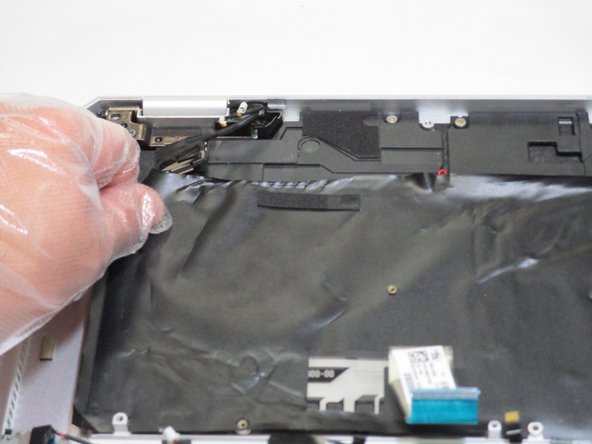
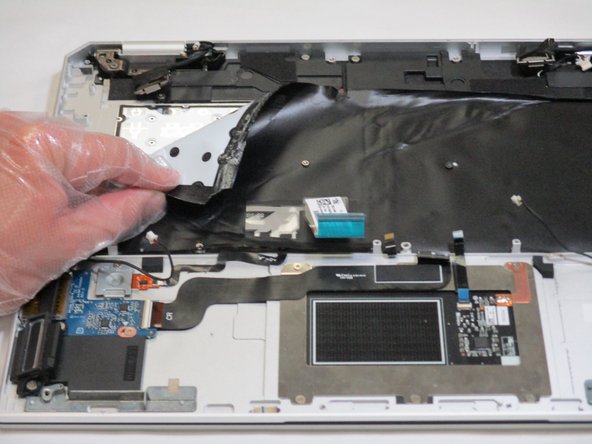
- Peel back the black cover on the keyboard.
- Remove all 52 screws from the keyboard panel using a Phillips #000 screwdriver.
- Remove the keyboard panel from the laptop.