Acer Chromebook CB3-431-C5EX Motherboard Replacement
ID: 145166
Description: This is a guide to replace a faulty motherboard...
Steps:
- Working on your device while it is turned on may result in electric shock. Make sure to shut down and unplug your device before you begin.
- Turn device over so the bottom panel is facing you.
- Remove the eight 4mm Phillips #0 screws.
- Remove the two 6mm Phillips #0 screws.
- Insert a plastic opening tool into the crack between the bottom panel and the side of the computer.
- Gently pry the panel off the computer by continuously pulling up and on the panel and moving the plastic opening tool around the crack until the panel comes off.
- There are several clips holding the cover in place.
- Remove the bottom panel and set it aside.
- Remove the two 4mm Phillips #0 screws on either side of the battery pack that are securing it in place.
- Disconnect the taped white 8-pin cable on the bottom right of the battery pack.
- Use thumbnail to pull on the small protruding tabs on either side of the connector.
- Carefully lift the entire battery pack out of the laptop.
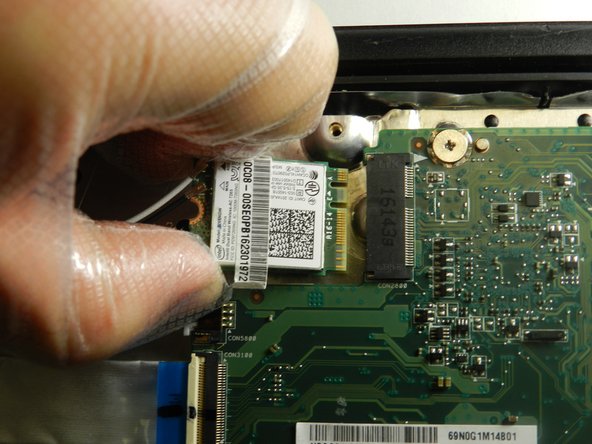
- Remove the 4.7 mm screw from the Wi-Fi card using a Phillips #0 screwdriver.
- Remove the Wi-Fi card from the laptop.
- Unplug the black wire connecting the small circuit board to the motherboard.
- Lift the respective white and black tabs and slide the ribbon cables out of their connectors.
- Carefully remove the display adapter from the motherboard.
- Remove the black tab connecting the motherboard to the keyboard.
- Remove the five 4.7 mm screws from the motherboard using a Phillips #0 screwdriver.
- Remove the two 4.5 mm screws from the motherboard using a Phillips #0 screwdriver.
- Gently remove motherboard from the laptop.