How to Open the Apple TV 4K 2021 Siri Remote
ID: 145221
Description: Use this guide to open the Apple TV 4K 2021...
Steps:
- Use a P2 Pentalobe screwdriver to remove the two 6.1 mm-long screws securing the bottom cover.
- Remove the bottom aluminium cover.
- Insert an iFlex into the gap on the right side of the circular clickpad.
- Insert the iFlex about 3 mm.
- Use the iFlex to create a gap by prying the circular clickpad upwards.
- Insert an opening pick into the gap. Remove the iFlex after inserting the opening pick.
- Slide the opening pick around the top half of the clickpad.
- Avoid sliding the opening pick to the bottom half of the clickpad. A flex cable runs there!
- Lift the clickpad from the lower right side to access the press connector.
- Use an opening pick to pry up the clickpad connector to disconnect it.
- Remove the clickpad.
- Insert the iFlex into the gap on the right edge of the volume button.
- Insert the iFlex about 3 mm.
- Use the iFlex to pry up the volume button to unhinge the plastic clips which keep the button in place.
- Remove the volume button.
- Insert an angled probe into the housing to release the right plastic clip of the mute button.
- Carefully push against the buttons clip from the inside.
- Make sure that the probe doesn't hit any components on the mainboard and is inserted horizontally.
- Insert the probe into the gap on the surface of the mute button.
- Use the probe to pry up the mute button and unhinge the remaining plastic clips.
- Remove the mute button
- Insert a probe into the case to release the right plastic clip of the play/pause button.
- Gently press against the clip from the inside.
- Make sure that the probe doesn't hit any components on the mainboard and is inserted horizontally.
- Insert the probe into the gap on the surface of the play/pause button.
- Use the probe to pry up the play/pause button and unhinge the remaining plastic clips.
- Remove the play/pause button.
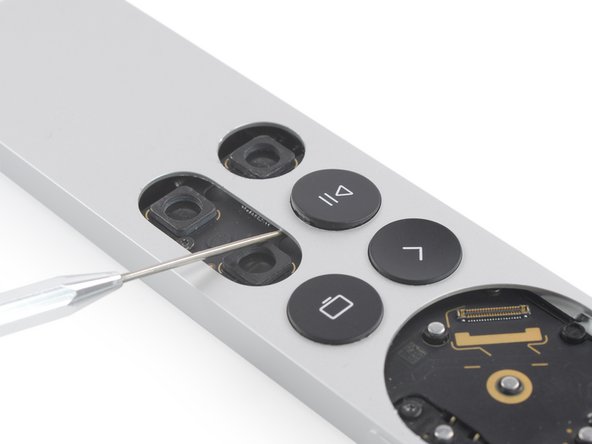
- Insert the probe into the housing where the clickpad was previously to release the upper plastic clip of the back button.
- Carefully press against the clip from the inside.
- Make sure that the probe doesn't hit any components on the mainboard and is inserted horizontally.
- Insert the probe into the gap on the surface of the back button.
- Use the probe to pry up the back button and unhinge the remaining plastic clips.
- Remove the back button.
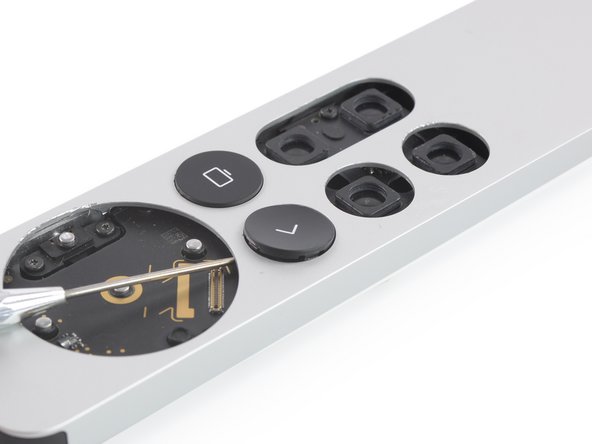
- Insert the probe into the inner housing where the clickpad used to be to release the upper plastic clip of the TV button.
- Carefully press against the clip from the inside.
- Make sure that the probe doesn't hit any components on the mainboard and is inserted horizontally.
- Insert the probe into the gap on the surface of the TV button.
- Use the probe to pry up the TV button and unhinge the remaining plastic clips.
- Remove the TV button.
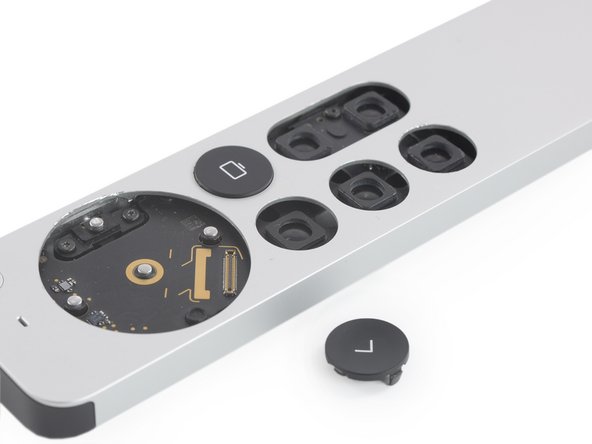
- Use a T3 Torx screwdriver to remove the two 4.7 mm-long screws securing the Siri button on the right edge of the remote.
- Use the pointed end of a spudger or a pair of tweezers to lift the Siri button up and out of the remote.
- Remove the Siri button.
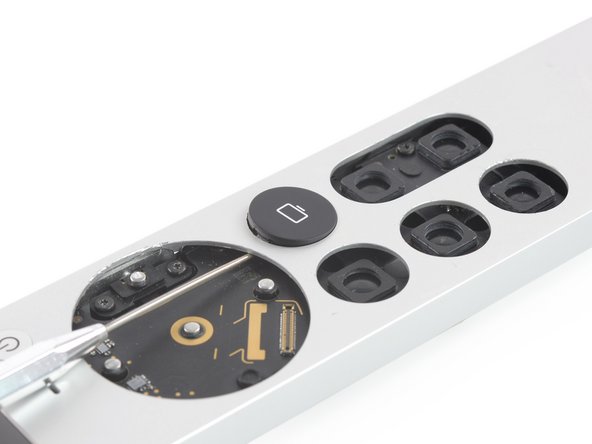
- Turn the remote upside down.
- This will avoid the power button falling into the case and getting jammed.
- Insert the flat end of a spudger into the charging port.
- Don't worry! This won't damage the port.
- Push the spudger in to slide the insides of the remote out about 1 inch (2.5 cm).
- Don't try to push it all out yet! The power button needs to be removed first.
- Turn the remote back over and make sure that the recess of the inner frame aligns with the power button.
- Use the pointed end of a spudger to press the power button into the recess of the inner frame (if it didn’t already fall in by itself).
- Remove the power button.
- Pull the inner frame out of its aluminum housing.
- There is a slight resistance when pulling out.