1999 Toyota Camry LE Rear Right Trunk Light Housing Replacement
ID: 145346
Description: In this iFixit manual, we explain the steps...
Steps:
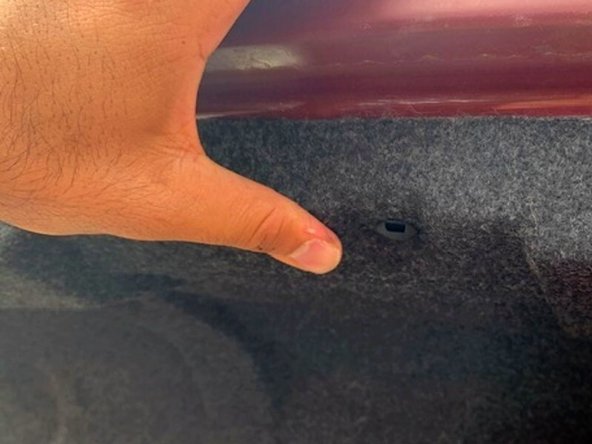
- Place a 6.35mm or smaller flat-head screwdriver between the black clips and the trunk cover.
- Pull down on the handle of the screwdriver until the clip comes out of the cover.
- Removing the clips will require force. There will be a small cracking noise when you have successfully removed the clips. This is normal.
- Do not lose the black plastic pins. You will use them again when reassembling the trunk interior.
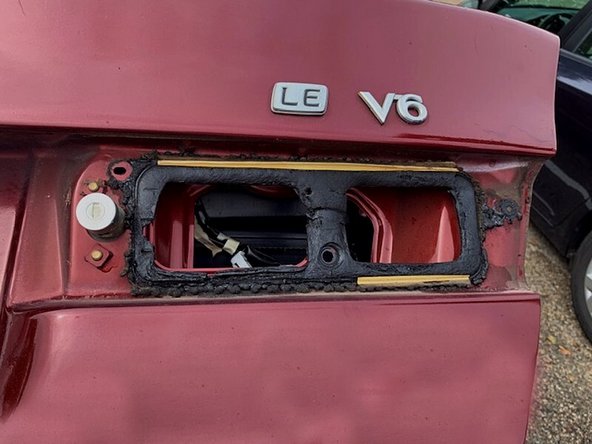
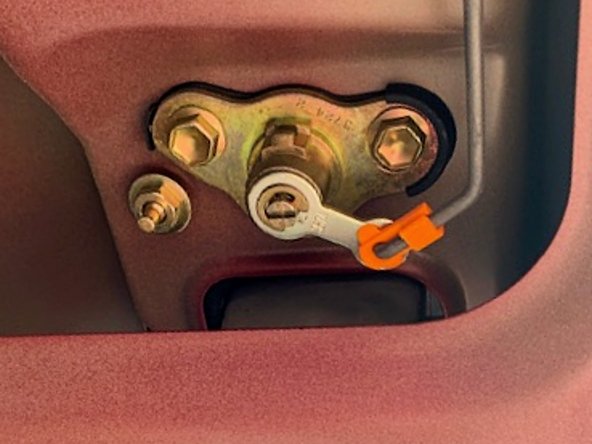
- Unscrew the three screws that hold the fixture in place.
- The screw closest to the exterior may be too tight to remove with your hand. In this event use an 11mm wrench to unscrew.
- Save all the screws that you unscrew. If your replacement light does not provide screws, use the ones that you removed from the previous light.
- Do not unscrew any screw that is connected to the trunk locking system because doing so may result in hindering the performance of the locking and unlocking mechanism.
- Press the small button on the end of the electrical connector and pull it away from the main electrical connection of the car.
- Caution: Make sure that the car is turned off when disconnecting the electrical connection.
- Disconnecting the electrical connection is similar to unplugging two extension cords.
- Carefully pull the light housing out of the trunk.
- Insert the new light into the fitting of the light housing.
- There will be a thick black rubber-like adhesive material surrounding the edges where the light housing is placed. Do not remove that material. That is the sealant that prevents water from entering the trunk.
- The light should not require excessive force if placed correctly.
- Insert the white end of the electrical source wire into the connector attached to the light fixture.
- This is similar to connecting two extension cords together.
- Caution: Make sure the vehicle is turned off when reconnecting the electrical connection to the light.
- Reinsert and tighten all of the screws that you removed in Step 2.
- You will need an 11mm wrench to tighten the screw on the exterior of the trunk.
- Make sure that every screw is secure. Any loose screws may risk the light from falling out of its housing.
- Align the holes on the fabric with the holes on the interior of the car trunk.
- Push the pins into place.
- These are the same black plastic clips that we pried out in Step 1.