Logitech Craft Battery Replacement
ID: 145388
Description: Follow this guide to replace a worn-out or dead...
Steps:
- Before you begin, flip the keyboard's power switch into the OFF position.
- Unplug all cables from your keyboard.
- Lay your keyboard down with the feet facing up on a clean work surface.
- The dial will prevent the keyboard from laying perfectly flat. If you need to, lay the keyboard on a soft towel to prevent wobble.
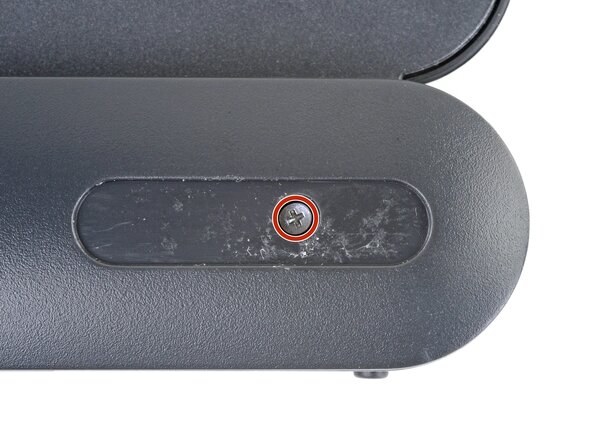
- Heat an iOpener and lay it on the left rear plastic foot for about two minutes.
- Alternatively, you can also use a hair dryer to heat the sticker. Make sure it's on the Low setting to avoid warping the plastic.
- Only one foot (the one next to the power switch) has a hidden screw underneath—you don't need to remove both feet.
- Insert the point of a spudger under an end of the foot.
- Push the spudger underneath the foot and lift until you can grip it with your fingers.
- The foot should come away from the keyboard without much force. If it feels stuck, apply more heat and try again.
- Peel the foot up and remove it.
- If there's plastic film covering the screw, use the point of a spudger to poke through it.
- Use a Phillips screwdriver to remove the 4.7 mm‑long screw securing the bottom cover.
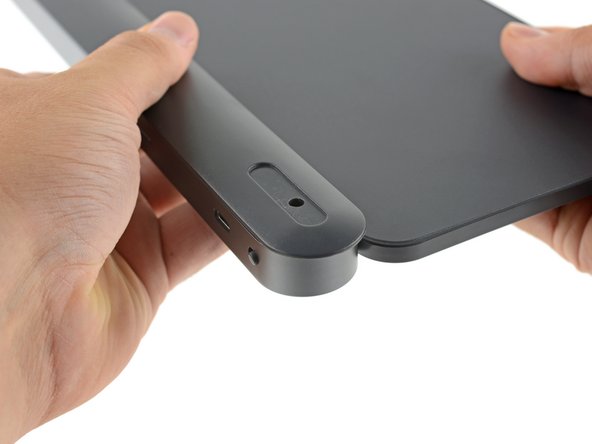
- The bottom cover is held in place by slotted plastic clips along the entire length of the keyboard.
- Don't attempt to force the cover off until all clips have disengaged. The bottom cover should come away with little to no force.
- Hold the keyboard upside down above your work surface.
- Grip the bottom cover and slide it towards the ON/OFF switch to unlock it from the rest of the device.
- Lay the keyboard back down onto your work surface.
- Lightly push down on the bottom cover and slide it further towards the ON/OFF switch.
- Remove the bottom cover.
- During reassembly, make sure the bottom cover sits flush along the entire length of the keyboard—all clips need to lock back in place.
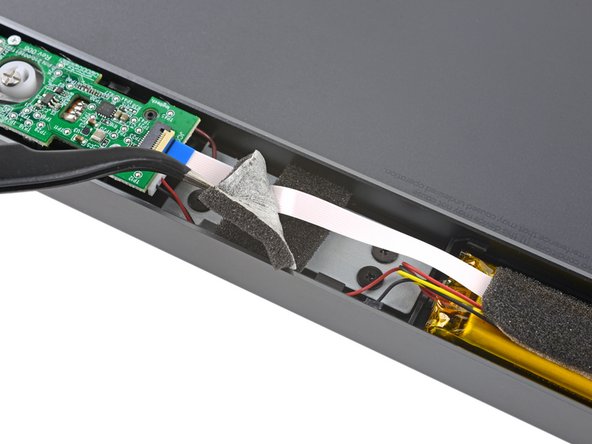
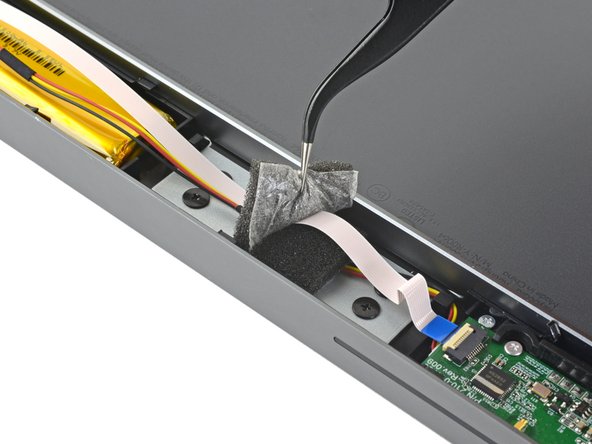
- Various pieces of foam protect the battery wires and the interconnect ribbon cable. They'll need to be removed in order to access the battery.
- Use a pair of tweezers to peel up and remove the first piece of foam covering the interconnect cable.
- The foam pads are all secured with light adhesive.
- Try your best to not rip these foam pads as you remove them—ideally they're reused during reassembly.
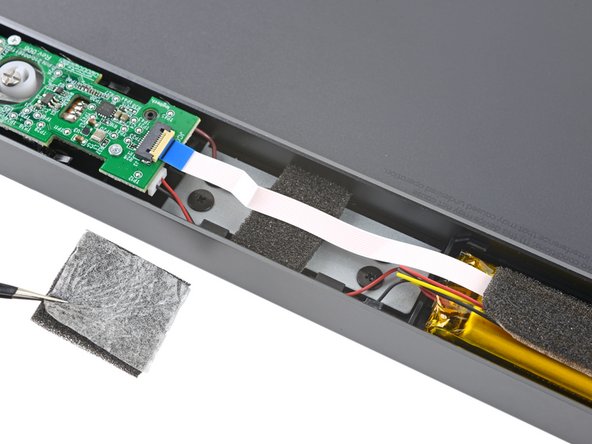
- Remove the two remaining topmost pieces of foam from the keyboard.
- Be very careful not to puncture the battery, as it can leak dangerous chemicals or catch fire.
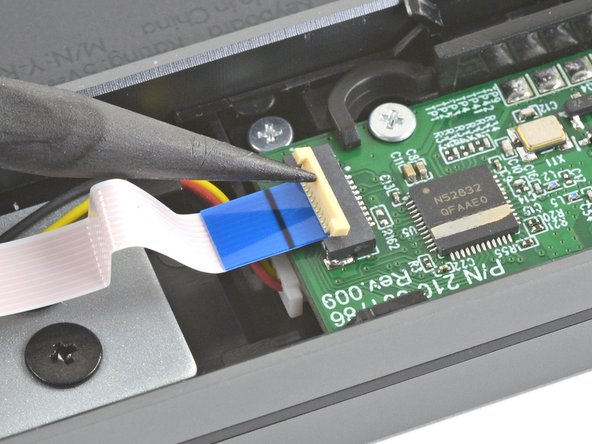
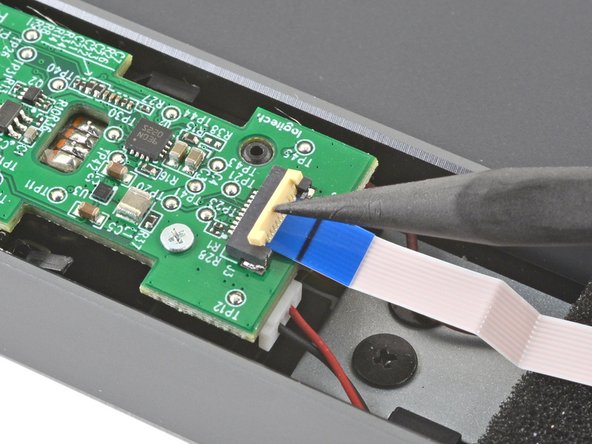
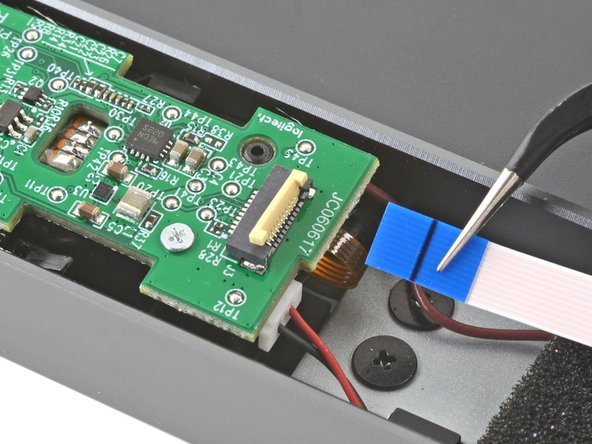
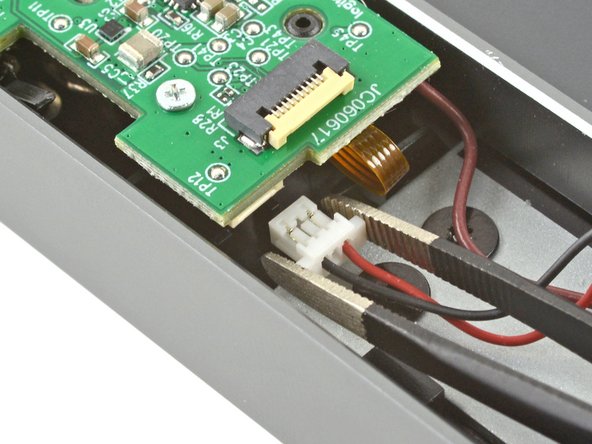
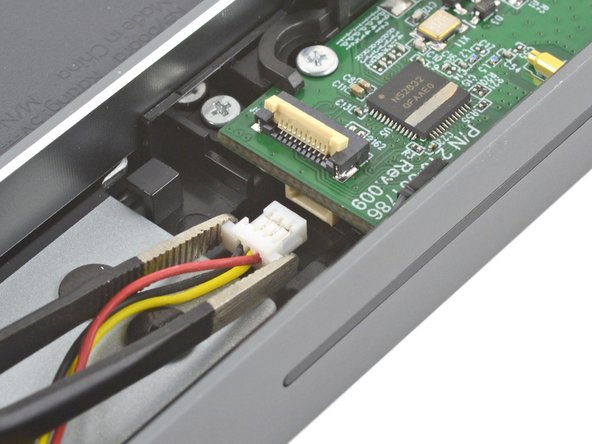
- Use the point of a spudger to gently lift the hinged locking flap on the interconnect cable's ZIF connector up and away from the cable.
- Use a pair of tweezers to slide the interconnect cable out of its connector.
- Try to grip the cable by the blue plastic, not by the cable itself.
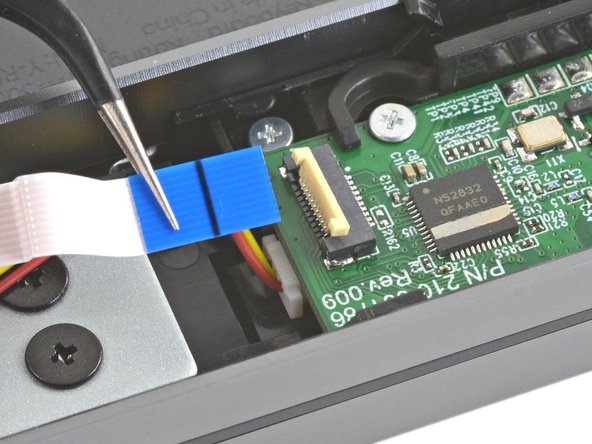
- Use the point of a spudger to lift the hinged locking flap on the opposite end of the interconnect cable.
- Use a pair of tweezers to slide the interconnect cable out of its connector.
- Try to grip the cable by the blue plastic, not by the cable itself.
- Remove the interconnect cable.
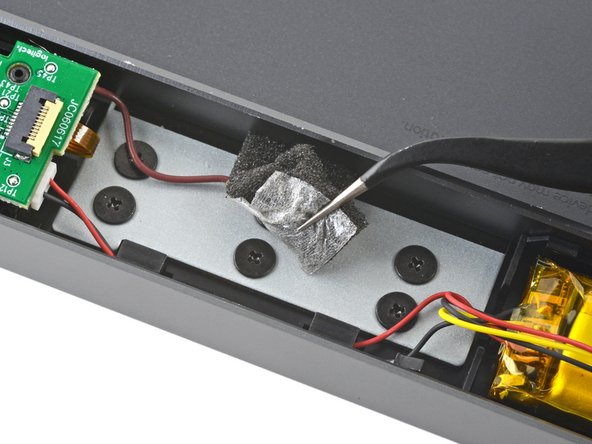
- Use a pair of tweezers to remove the two remaining pieces of foam securing the battery wires.
- Use a pair of tweezers to slide the battery wires out from underneath their plastic routing clips on either side of the battery.
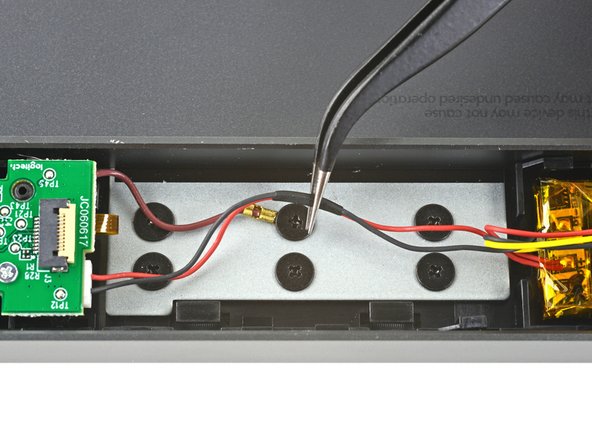
- Use a pair of tweezers to firmly grip the left battery connector.
- Hold the tweezers with your fingers as close to the connector as possible to get a firm hold.
- Gently rock the connector side‑to‑side and slide it straight out of the socket.
- Always pull cables by their connectors and not the wires themselves.
- Repeat the previous step to disconnect the right battery connector.
- During reassembly, note that the battery connector that goes into the right board has three battery wires, and the left has two.
- Insert the flat edge of a spudger underneath one of the short edges of the battery.
- Push the spudger underneath the battery and lift, separating it from the adhesive holding it to the keyboard.
- Make sure you push underneath the battery and not into it. Don't bend or deform the battery.
- If the battery isn't separating, apply a few drops of isopropyl alcohol (>90%) to its edge and slightly tilt the keyboard. Wait one minute for the alcohol to soften the adhesive and try again.
- Remove the battery.
- To install a replacement battery:
- Remove any leftover adhesive from the battery well.
- Use double‑sided tape or pre-cut adhesive to secure the battery, making sure the battery is correctly oriented—the battery connector that goes into the right board has three battery wires, and the left has two.