Xiaomi Mi Watch 2021 Battery Replacement
ID: 145447
Description: Use this guide to replace a worn-out or dead...
Steps:
- Opening the Mi Watch will compromise its waterproof seals. Have replacement seals ready before you proceed past this step, or take care to avoid liquid exposure if you reassemble your watch without replacing the seals.
- Before starting the disassembly, turn off your watch.
- Remove the four 3.2 mm-long T3 Torx screws on the back of the watch.
- A T3 screwdriver has a tight fit on these screws and might require a bit more downward pressure to unfasten the screws. A T2 fits as well but poses the risk to strip the screw heads.
- Insert the flat end of a spudger into the loudspeaker opening at the top edge of the rear case assembly.
- Push the spudger upwards to create a small gap between the rear case assembly and the watch housing.
- Insert your spudger into the gap and pry up the rear case assembly.
- Only work with the edge of your spudger and do not insert it deeper than 3 mm.
- Steady the rear case assembly with a finger to prevent it from suddenly popping open and damaging the flex cable.
- Don’t try to remove the rear case assembly all the way yet. It is still connected to the motherboard with a thin flex cable.
- Carefully swing open the rear case assembly by folding the rear case to the side with the watch buttons.
- Avoid straining the flex cable during this procedure.
- While it's possible to remove the battery without disconnecting the rear case assembly first (jump straight to step 8), there's a substantial risk of damaging components. We highly recommend removing the rear case assembly.
- Remove the 2.7 mm-long Phillips screw securing the metal bracket.
- Use a pair of tweezers to unhinge the metal bracket and remove it.
- During reassembly, make sure to latch the metal bracket.
- Use the flat end of a spudger to pry up and disconnect the rear case assembly connector from the motherboard.
- Use the flat end of a spudger to pry up and disconnect the battery connector.
- Take care not to puncture or bend the battery with your tool—a punctured or bent battery may leak dangerous chemicals or cause a thermal event.
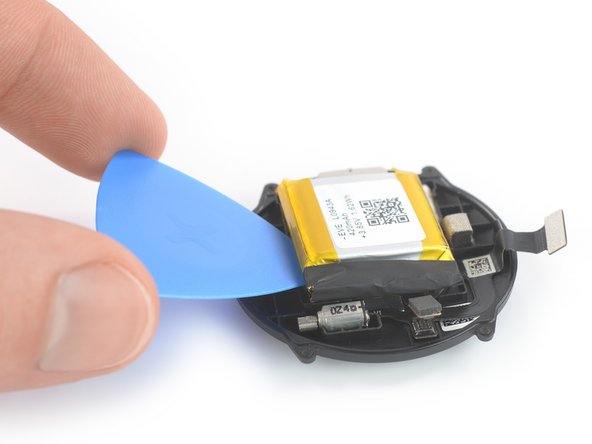
- Insert an opening pick underneath the left edge of the battery.
- Tilt down your opening pick to pry up the battery.
- Remove the battery.
- Do not reinstall a damaged or deformed battery, as doing so is a potential safety hazard.