LG G8 ThinQ Screen Replacement
ID: 146643
Description: If your LG G8 ThinQ’s screen is experiencing...
Steps:
- Unplug and power off your phone before you begin.
- Insert the SIM card eject tool into the pinhole in the lower right side of the phone.
- Remove the SIM card and tray.
- Place the phone so that the screen is facing down.
- Insert opening cards between the back panel and frame of the phone to loosen the clips and adhesive.
- Using equal pressure, carefully pry the back panel away from the phone.
- Once enough space has been created, use an opening tool to completely separate the back panel from the phone.
- Remove all 14 screws from the midframe using a Phillips #000 screwdriver.
- Work an opening tool around the perimeter of the midframe to pry and remove it from the phone.
- Using an opening tool, carefully pry out remove the speaker system from the phone.
- Using an opening tool, carefully disconnect the ribbon cables from both cameras.
- Using an opening tool, carefully pry up and remove both cameras from the phone casing.
- Using an opening tool, carefully disconnect the ribbon cable connecting the 3.5mm audio jack to the motherboard.
- Remove the screw holding the 3.5 mm audio jack in place using a Phillips #000 screwdriver.
- Remove the audio jack from the phone.
- Flip phone so that screen is facing up.
- Using a heating pad, hairdryer, or heat gun, apply heat to loosen the adhesive beneath the battery.
- Be careful to not overheat the phone; the screen and battery are susceptible to damage.
- The adhesive can be difficult to soften; it may take many attempts.
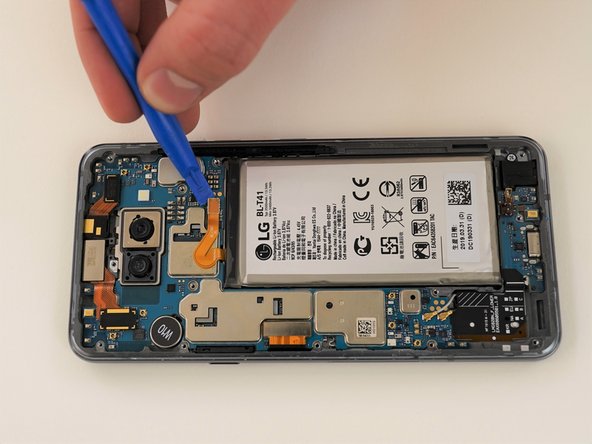
- Using an opening tool, carefully pry up the ribbon cable to disconnect the battery.
- Using opening cards or an opening tool, carefully pry around the edges of the battery.
- If you have trouble prying up the battery, the adhesive may not be loose enough. Re-apply heat, or use some isopropyl alcohol under the battery, allowing it to penetrate for several minutes to weaken the adhesive.
- Remove the battery from the phone.
- Use an opening tool to disconnect the two coaxial cables from the motherboard.
- Using an opening tool, carefully disconnect the screen ribbon cable from the motherboard.
- Using an opening tool, carefully pry up the motherboard from the frame and remove it from the phone.
- Remove the vibration motor from the phone casing using an opening tool.
- Heat the vibration motor from the other side of the phone to loosen adhesive if needed.
- Using a plastic spudger, carefully pry up and remove the charging daughter board from the case.
- Reinstall removed components onto new phone casing and screen.