Huawei P40 Pro Screen Replacement
ID: 146644
Description: Use this guide to remove or replace the screen...
Steps:
- Apply a heated iOpener to the rear glass to loosen the adhesive underneath. Apply the iOpener for at least two minutes.
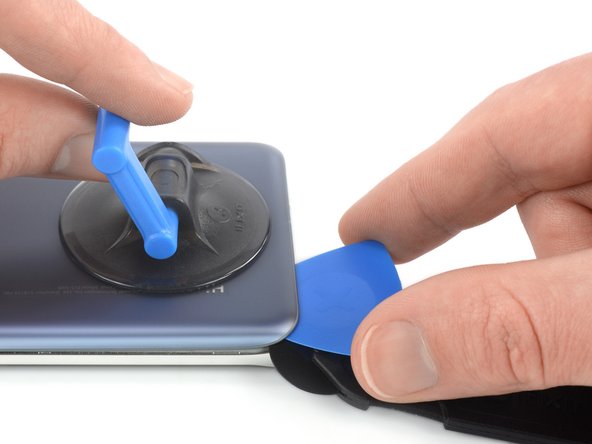
- Since the rear glass of the Huawei P40 Pro is curved, we highly recommend to slice the adhesive with a softer plastic tool like the iMac opening wheel before working with opening picks to prevent the rear glass from shattering.
- Secure a suction handle to the bottom edge of the rear glass, as close to the curved edge as possible.
- If your rear glass is badly cracked, covering it with a layer of clear packing tape may allow the suction cup to adhere. Alternatively, very strong tape may be used instead of the suction cup. If all else fails, you can superglue the suction cup to the rear glass.
- Lift the back cover with the suction handle to create a small gap between the back cover and the frame.
- In case you have trouble creating a gap, apply more heat to further soften the adhesive. Follow the iOpener instructions to avoid overheating.
- Insert an iMac opening wheel into the gap.
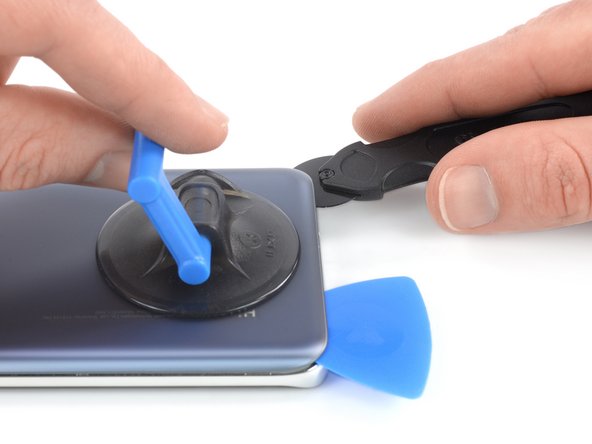
- Slide the opening wheel to the bottom left corner to slice the adhesive.
- Insert an opening pick into the gap between rear glass and frame at the bottom left corner of your phone to prevent the adhesive from resealing.
- Reinsert the opening wheel at the bottom edge of the rear glass.
- Slide the opening wheel to the bottom right corner to slice the adhesive.
- Insert an opening pick underneath the bottom right corner of the rear glass, next to the opening wheel to prevent the adhesive from resealing.
- If the adhesive becomes hard to cut, it has most likely cooled down. Use your iOpener to reheat it.
- Insert the opening wheel underneath the bottom left corner of the rear glass.
- Slide the opening wheel along the left edge of your Huawei P40 Pro to cut the adhesive.
- Insert an opening pick underneath the top left corner of the rear glass, next to the opening wheel to prevent the adhesive from resealing.
- Insert the opening wheel underneath the top left corner of the rear glass.
- Slide the opening wheel along the top edge of your phone to cut the adhesive.
- Insert an opening pick underneath the top right corner of the rear glass, next to the opening wheel to prevent the adhesive from resealing
- Insert the opening wheel underneath the top right corner of the rear glass.
- Slide the opening wheel along the right edge of your phone to cut the remaining adhesive.
- Remove the rear glass.
- Remove the eleven 4.5 mm-long Phillips #00 screws.
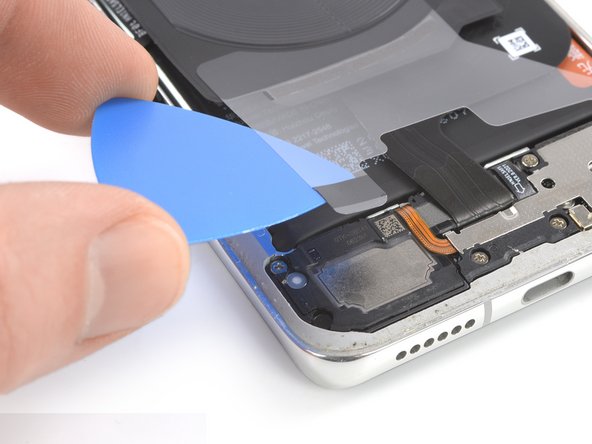
- Slide an opening pick underneath the bottom right corner of the protective foil.
- Use the opening pick to gently peel the protective foil off the daughterboard cover.
- Repeat the previous procedure to peel the bottom left protective foil corner off the speaker.
- The left side of the midframe is very fragile. Take your time prying it up to prevent breaking it.
- Slide an opening pick underneath the bottom left corner of the plastic midframe.
- Slide the opening pick along the left edge of the midframe to release the plastic clips holding it in place.
- Insert the tip of an opening pick at the top edge of the midframe next to the top left corner.
- Tilt the opening pick downwards to pop the plastic clips out of their sockets.
- Slide the opening pick along the top edge of the midframe to release the remaining plastic clips.
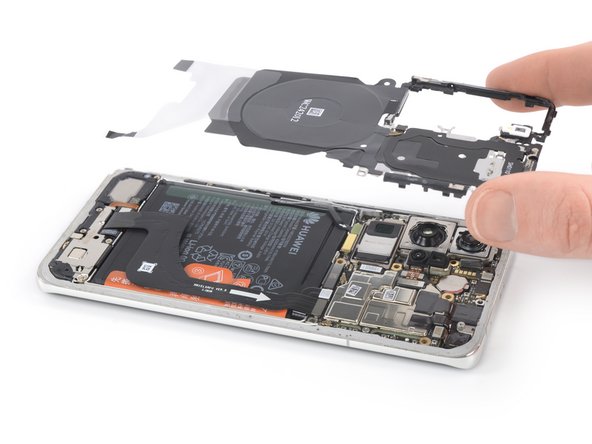
- Remove the midframe.
- Use the flat end of a spudger to pry up and disconnect the interconnect cable.
- Use the flat end of a spudger to pry up and disconnect the battery cable.
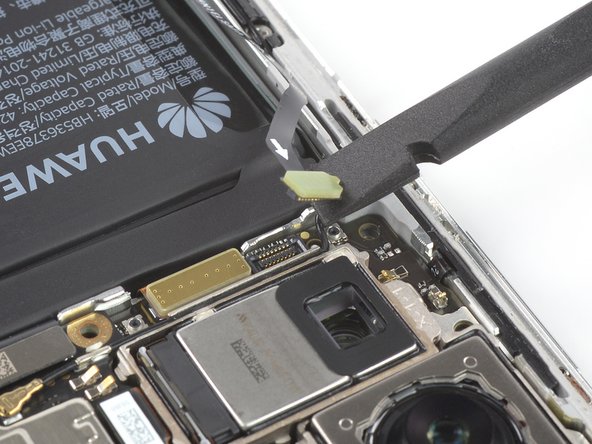
- Use a spudger tor pry up and disconnect the antenna flex cable.
- Fold the antenna cable to the side to avoid damaging it during the battery removal.
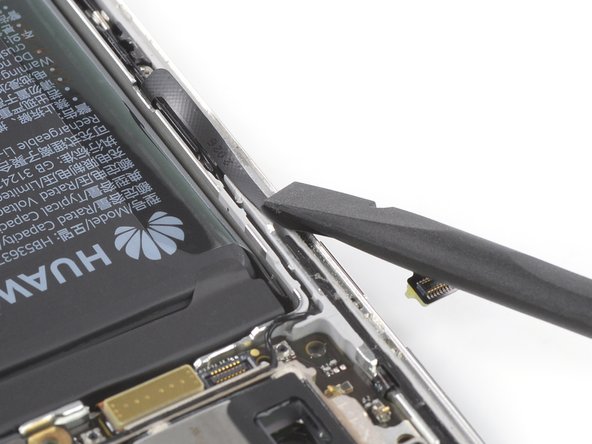
- Fold the interconnect flex cable toward the charging port in order to get access to the battery pull tabs.
- You might want to use a small piece of tape to temporarily stick this cable onto your working desk to avoid accidentally damaging it during the battery removal.
- Take care not to puncture or bend the battery with your tool—a punctured or bent battery may leak dangerous chemicals or cause a thermal event.
- Use a pair of blunt nose tweezers or a clean fingernail to peel the orange adhesive strip labelled with a 1 off the battery.
- The orange adhesive tape will rip along a small perforated line.
- Use a pair of blunt nose tweezers or a clean fingernail to peel the orange adhesive strip labelled with a 2 off the battery.
- The orange adhesive tape will rip along a small perforated line.
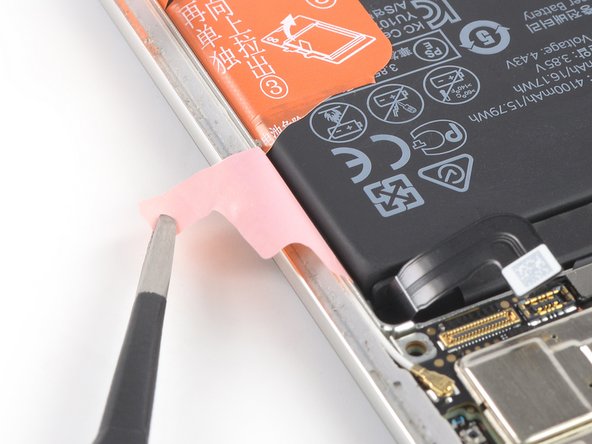
- Peel the orange adhesive strip labelled with a 3 off the battery.
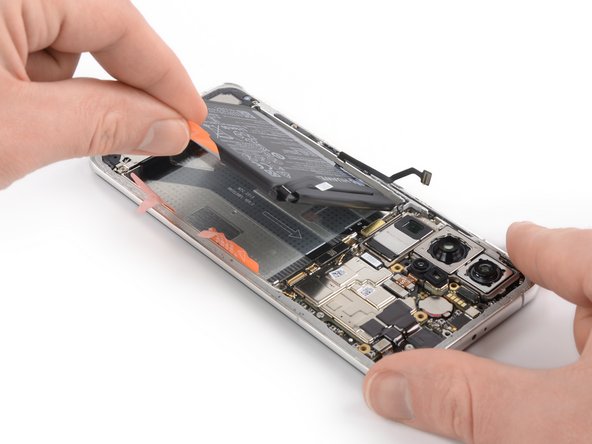
- Pull up on the orange adhesive strip to lift the battery out of its recess and swing it up to an upright position.
- Although these adhesive tabs are supposed to make the battery removal easier, they may require some force. In case you're having trouble removing the battery, you can apply a heated iOpener to the center of the display to loosen the adhesive underneath.
- Peel the battery off the remaining adhesive.
- Remove the battery.
- During reassembly, temporarily reconnect the battery to the motherboard to help align it correctly. Disconnect the battery after it is seated.
- Peel the battery's adhesive sticker off the midframe.
- This step is mandatory if you are replacing the display. It is highly recommended to use a fresh adhesive sticker when installing a new battery.
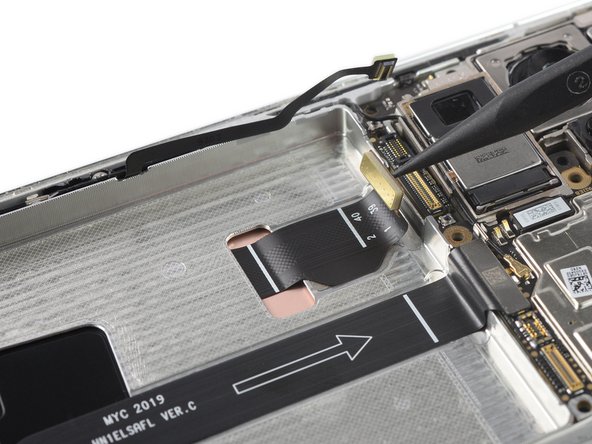
- Use a spudger to disconnect the display flex cable from the motherboard by prying the connector straight up from its socket.
- The display flex cable is adhered to the midframe with mild adhesive. Use a pair of tweezers or your fingers to carefully peel it off.
- Apply a heated iOpener or a heat gun to the screen to loosen the adhesive underneath. Apply the iOpener for at least two minutes.
- The protective adhesive of the P40 Pro is very strong and hard to cut. It is likely that you have to reapply the iOpener after each of the following steps to soften the adhesive enough to cut it.
- A hair dryer, heat gun, or hot plate may also be used, but be careful not to overheat the device.
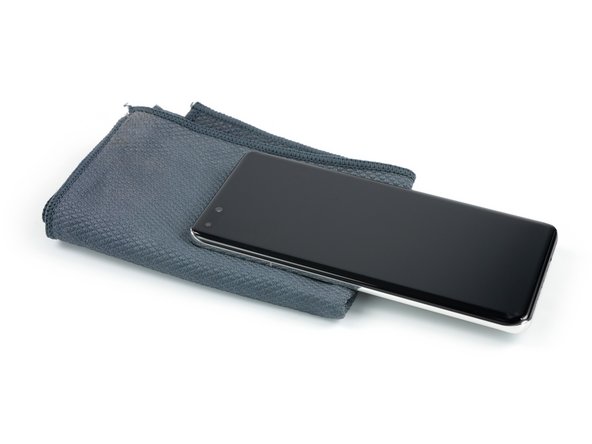
- Since the rear camera module sticks out of the midframe, we recommend placing a lint free cloth or similar underneath the camera module during the following steps in order to avoid damaging the lenses.
- Since the screen of the Huawei P40 Pro is curved, we highly recommend slicing the adhesive with a flexible tool like the iFlex before working with opening picks to prevent the display glass from shattering.
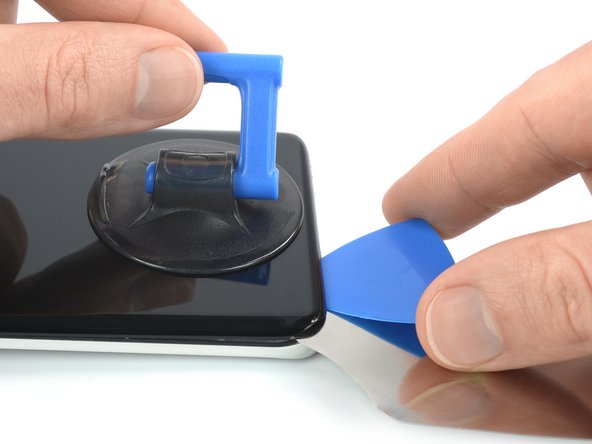
- Once the screen is warm to touch, apply a suction cup to the bottom edge of the screen.
- If your screen is badly cracked, covering it with a layer of clear packing tape may allow the suction cup to adhere. Alternatively, very strong tape may be used instead of the suction cup. If all else fails, you can superglue the suction cup to the screen.
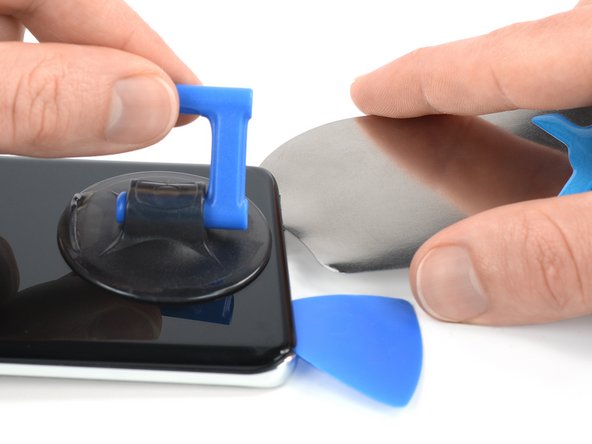
- Lift the screen with the suction handle to create a small gap between the screen and the frame.
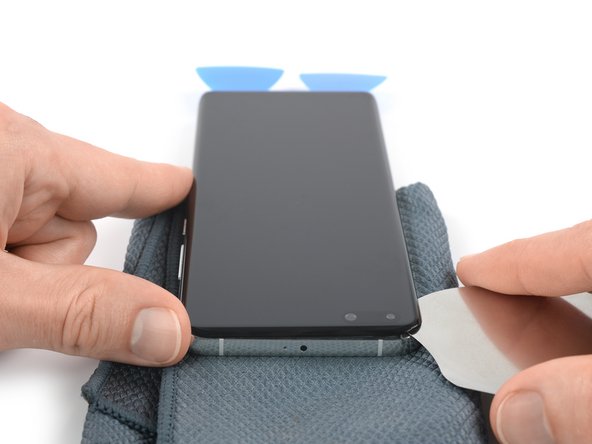
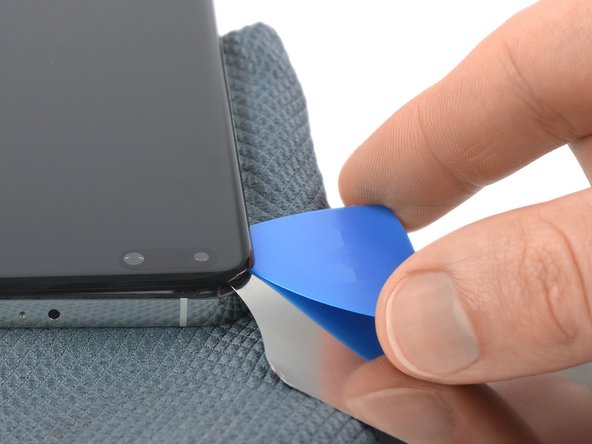
- Insert an iFlex in the gap between the midframe and the screen.
- Slide the iFlex to the bottom left corner of the screen to slice its adhesive.
- Insert an opening pick next to the bottom left corner of the screen to prevent the adhesive from resealing.
- Do not insert the opening pick right at the corner. An opening pick right at the corner puts more tension on the screen and makes it likely to shatter because of the curved display glass.
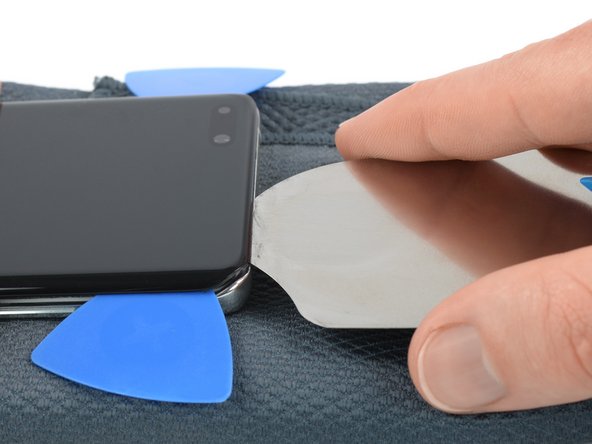
- Relocate the iFlex to the center of the bottom edge and slide it to the bottom right corner of the screen to slice the display adhesive.
- Insert an opening pick next to the bottom right corner of the screen to prevent the adhesive from resealing.
- If the adhesive becomes hard to cut, it has most likely cooled down. Use your iOpener to reheat it.
- Insert the iFlex next to the bottom left corner of the screen.
- Slide the iFlex along the left edge of your Huawei P40 Pro to slice the adhesive.
- Insert an opening pick next to the top left corner of the screen to prevent the adhesive from resealing.
- Insert the iFlex next to the bottom right corner of the screen.
- Slide the iFlex along the right edge of your Huawei P40 Pro to slice the adhesive.
- Insert an opening pick next to the top right corner of the screen to prevent the adhesive from resealing.
- If the adhesive becomes hard to cut, it has most likely cooled down. Use your iOpener to reheat it.
- When you slice near the front facing camera, insert only the tip of the iFlex (about 3 mm) to avoid damaging or smearing the camera.
- Insert the iFlex next to the top left corner of the screen.
- Slide the iFlex along the top edge of your phone to cut the remaining adhesive.
- Do not try to remove the display all the way yet. The display cable is still threaded through the frame.
- Thread the display flex cable through the gap in the midframe and remove the screen.
- Apply new adhesive where it's necessary after cleaning the relevant areas with isopropyl alcohol (>90%).
- During reassembly, follow this guide if you're using a pre-cut adhesive card.
- If your replacement screen is not equipped with a new earpiece speaker module you need to transfer it from your old screen to the new one. To function correctly, the earpiece speaker needs to be installed on the new screen in exactly the same location that it was installed on the old screen.
- Slide an opening pick underneath the earpiece speaker module assembly.
- The earpiece speaker module assembly is held in place by mild adhesive. In case you're having trouble removing it, you can heat an iOpener and place it onto the screen to loosen it.
- Use to opening pick to separate the earpiece speaker module assembly from the screen.