Bosch PBD40 bench drill press circuit board speed control Replacement
ID: 146657
Description: You can get spare parts directly from Bosch :...
Steps:
- To access the inner workings, first turn the 4 slotted screws from the top.
- Then turn the 6 Philips screws from the right-hand side.
- Attention! The 7th and last screw to be opened is located inside and holds the housing to the motor. To do this, also loosen the screw from the right using a very long or very short screwdriver or a ratchet.
- Now the front cover and the left fairing can be removed. Attention, the cables are tightly routed. Two retaining plates (red arrows) for the cables must be loosened to work better. Behind the speed controller is a loose adapter to the circuit board ... do not lose it.
- All cables from the board to be replaced (orange rectangle) can be disconnected inside the unit. There is no need for soldering or clamping.
- To get to one of the black cables, the right side of the housing must also be removed. To do this, open the screw for the axis of the height adjustment and pull out the axis. ATTENTION: Hold the gear wheel in the middle and watch out for the small elongated driver.
- On the right side there is also an adapter from the transmission switch to the transmission. This is only plugged on and tricky to assemble.
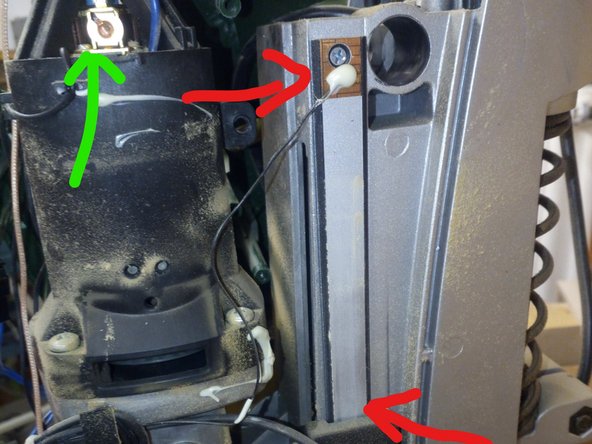
- Now you could also change the carbon brushes (green arrow). The red arrow shows the measuring bar
- From below the drill head, you can see the round magnet and the sensor board for the RPM measurement. By the way, the speed is only displayed, but has no control function. This is only done by the speed controller in analog mode.