Dell Latitude 3190 Motherboard Replacement
ID: 146679
Description: If the motherboard in your Dell Latitude 3190...
Steps:
- Use a Phillips #0 screwdriver to remove the seven 7 mm screws securing the back case.
- Using a plastic opening tool carefully separate the plastic base cover from the rest of the laptop.
- Lift the bottom cover from the laptop.
- Locate the battery.
- Disconnect the battery cable located on the top of the battery.
- Use the spudger and disconnect the battery cable.
- Pull the cable out of the way.
- Use a Phillips #0 screwdriver to remove the three 3 mm screws from the battery.
- Pull the black battery tap upwards to remove the battery.
- The battery adhesive is strong, do not be afraid to use force. You may need to use the spudger or opening tool as a wedge.
- Use a spudger to disconnect the battery cable from the motherboard located at the top of the battery.
- Locate the M.2 SSD after the battery is removed
- Use the Phillips #0 screwdriver to remove the 3 mm screw from the SSD.
- Pull the M.2 SSD from the board.
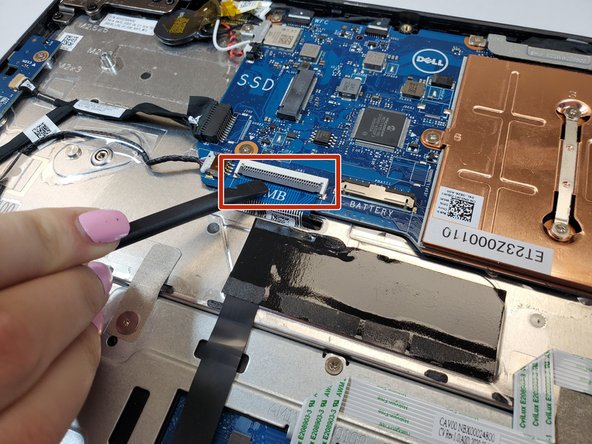
- Remove the motherboard cable by pulling up on the black bar and carefully removing the blue ribbon cable.
- Disconnect the white speaker cable connector.
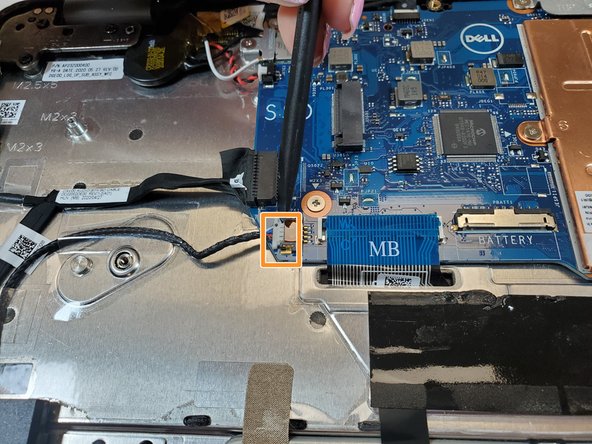
- Using a spudger, disconnect the black power board and audio cable.
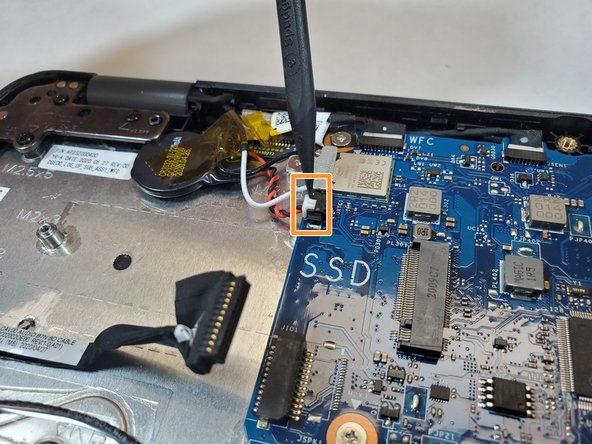
- Disconnect the white coin cell battery cable.
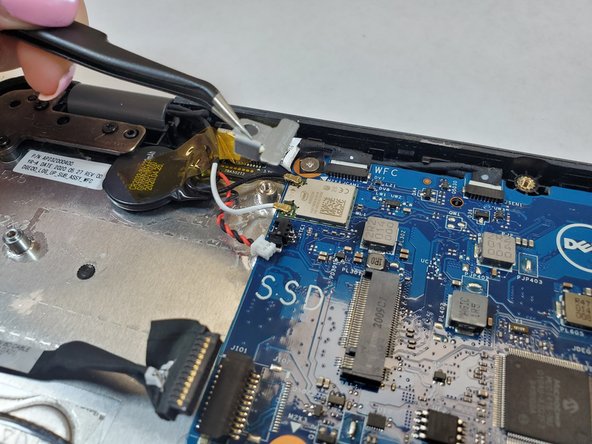
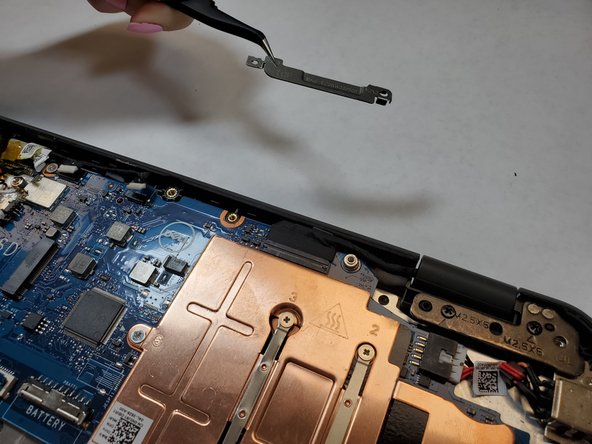
- Use the Phillips #0 screwdriver to remove the 3 mm screw and lift the metal bracket that secures the WLAN card on the system board.
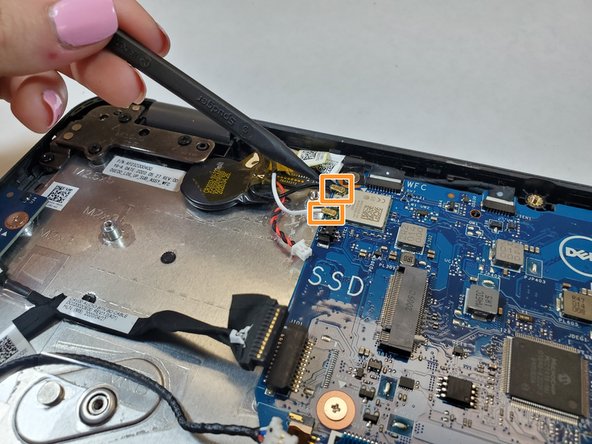
- Disconnect the black and white WLAN cables.
- Remove the screw that secures the camera cable to the system board.
- Disconnect camera cable.
- Disconnect the black sensor cable.
- Use the Phillips #0 screwdriver to remove the two 3 mm screws from the metal bracket on the display cable.
- Lift the metal bracket that secures the display cable on the computer.
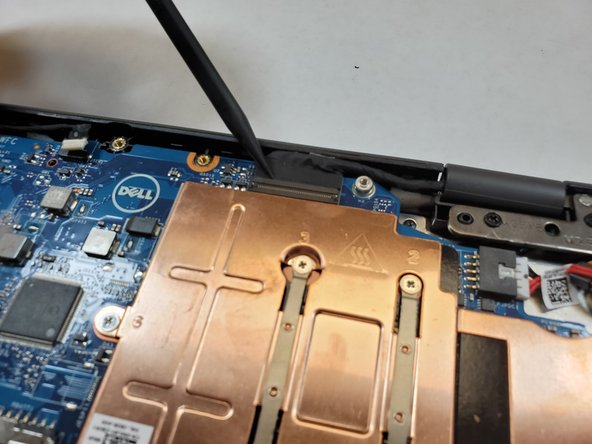
- Disconnect the black display cable using a spudger or pull it out by hand.
- Disconnect the white power connector.
- Use the spudger to lift up on black bar to release the trackpad ribbon cable.
- Pull the blue tab release to the cable from the connector.
- Use a Phillips #0 tp remove the two 3 mm screws on the metal bracket that secures the board.
- Remove the metal bracket.
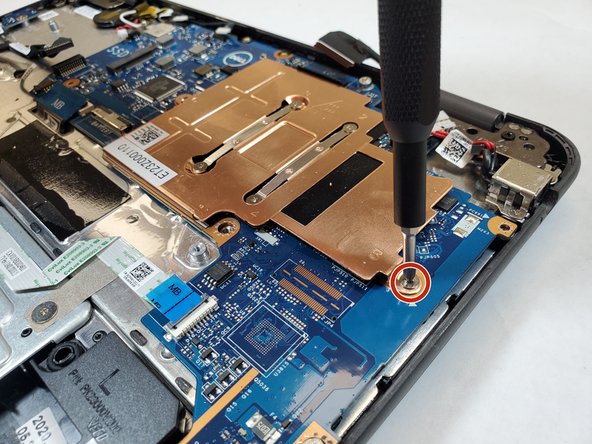
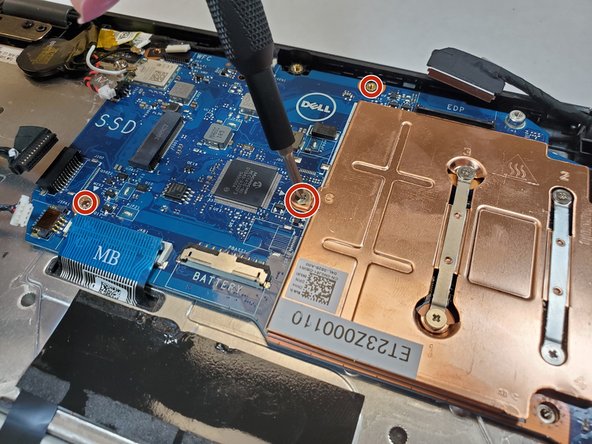
- Use the Phillips #0 screwdriver to remove the five 3 mm screws that secure the motherboard.
- Carefully lift the motherboard up to remove it from the computer.
- Make sure not to snag any of the other cables.