Nikon 35mm f/1.8G Focus Motor Replacement
ID: 147041
Description: The autofocus motor in this lens is known to...
Steps:
- Wipe the lens body down with a microfiber cloth to remove skin oils which could later be carried to the internal parts.
- Remove the lens hood and both lens caps to allow full access.
- Using a pry tool or small flat head screwdriver, lift up the plastic cover on the front of the lens. Pry from the notch on the outside, far away from the glass.
- Ensure you do not damage the filter threads when prying.
- This cover is attached with double-sided tape which can usually be re-used, otherwise replaced with any off the shelf thin double sided tape.
- Remove the 3 PH00 screws and lift off the manual focus ring and filter thread parts. The colour of the screws may vary between batches.
- Don't worry about the mechanical alignment of these parts when reassembling. Just make sure the white dot on the filter thread part is at the top (badge side) so your lens hood sits correctly.
- Turn the lens over and remove all 6 PH000 screws around the black centre part.
- This screw goes in the small hole on the opposite side of the ring to the electrical contacts.
- The three larger screws go into the larger holes.
- The remaining two small ones hold the electrical contacts in place and should be installed last when reassembling, ensuring the black plastic sits flush.
- Wiggle and lift out the black ring, leaving behind the electrical contacts and silver mount ring.
- Remove the 4 PH00 screws on the face of the lens mount.
- Lift away the lens mount without tugging on the electrical contacts which are still attached with a flat flex cable inside the lens. You may have to tuck this out of the way but do not apply any significant force. When reinstalling this mount, ensure the sealing gasket is even on the perimeter and hasn't been pushed out of place.
- Under the lens mount there will be two silver spacer disks. These should be removed and placed in order with the rest of the disassembled components.
- In this particular copy of the lens, the thinnest spacer is closer to the front of the lens.
- Do not remove the lens body yet, even though it is now loose.
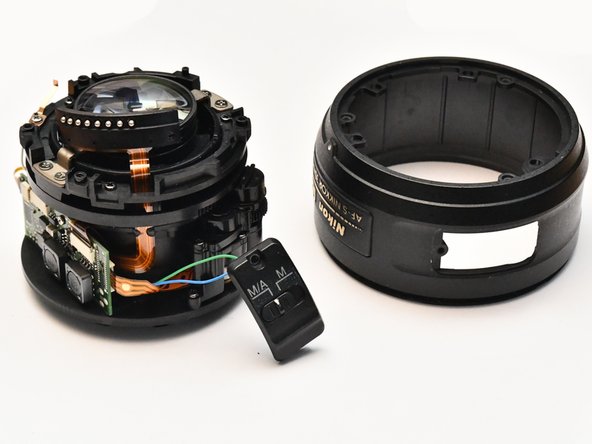
- Remove the PH00 screw holding the AF/MF switch in place and hook the plate up from the screw side.
- Remove the lens body and feed the AF/MF switch back through the opening.
- Take care when handling these wires as the solder joints will break very easily.
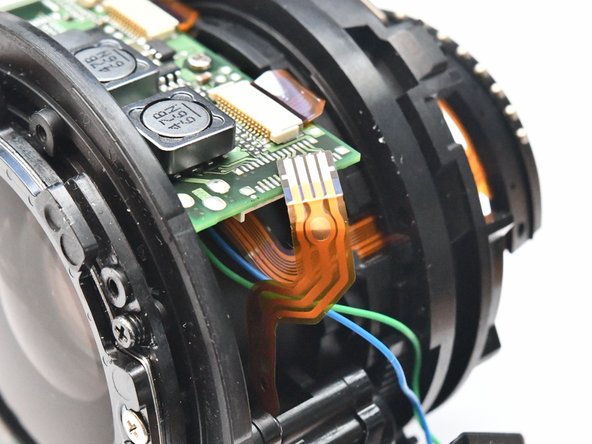
- Pull the motor flat flex cable out of the connector in the direction shown. Do not crease, pierce or unnecessarily flex the cable.
- Remove the two PH00 screws which hold the micromotor gear assembly in place and loosen it.
- Don't remove it yet as it's tethered in place.
- Remove the two screws on top of the micromotor assembly.
- Remove the screw securing the encoder contacts in place and release them.
- Place the main lens assembly to one side to focus on the focus motor assembly.
- With the whole gear assembly now freed, remove the three PH00 screws securing the motor in place. Do not touch the castellated piezo-electric material as it being clean is crucial to the operation of the ultrasonic motor.
- At this point, you can either clean the motor with isopropyl alcohol and a paintbrush or replace it entirely.
- A few people have reported online that they have had success cleaning their motors, but this is not always the case. Replacements can be found on AliExpress or sometimes eBay.
- Use clean gloves when handling the motor or ideally don't touch the critical sections at all. Nikon's service manuals for similar AF-S lenses also discourage touching the motor.
- Wipe the end of the flat flex cable with isopropyl alcohol before reinserting it into the connector.
- Personally, the author had success after cleaning their motor. The issue they faced was that the lens would focus when facing down but not upward. After cleaning it works fast and reliably, but with a squeak.