Casper Glow Light Battery Replacement
ID: 147229
Description: It’s quite easy to disassemble the Casper...
Steps:
- Use a suction cup to remove the caps on each end. Press in and pull out. They should pop right out.
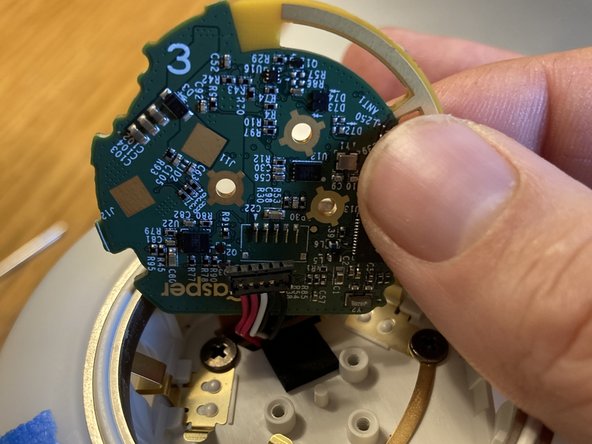
- Each side is held in by three tiny screws. You'll need to take those out. Make a note of the numbers on each side. While it's mostly interchangeable, you'll need to keep track of which connection goes in which board.
- Warning: once you remove the connections to the PCBs they will be quite difficult to reattach. Unfortunately, you'll need to at least remove one side to access the battery. I recommend starting with the side labeled 10 which does not have a power connection.
- Remove the 3 screws on the side you want to remove. In the photo here I'm removing the side with the power connection, however, I recommend you start with the other side to see if you can open it up without removing the power connection.
- Use a screw driver or something rigid to help you pry out the end cap(s). There is some light adhesive, but with a little force they pop out.
- You should now see the LED array with the battery inside.
- If you removed both caps you should be able to slide it out.
- If you left the other cap attached, try popping that cap out and removing the attached battery with it (I didn't try this, but it should work).
- The battery will just slide out.
- This is as far as I've gotten right now. I'm a little unsure as to how to proceed at this point. But you'll need a new battery and to be able to solder the connection to it.
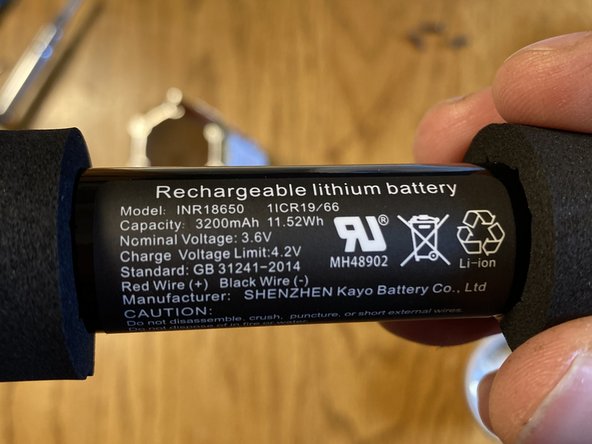
- 3200mAh INR Lithium Ion cell in a 18650 form-factor pack, inside some foam