Dell Chromebook 3100 (Touch) Motherboard Replacement
ID: 147250
Description:
Steps:
- Unscrew the nine PH#0 captive screws on the bottom of the device.
- Use a pick to run along the outside of the device popping all the clips. Prying should not be necessary.
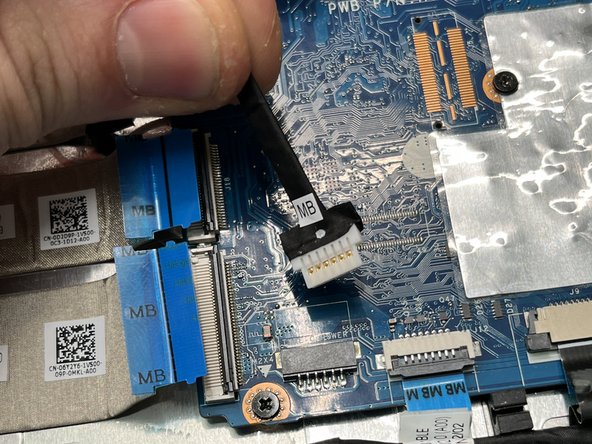
- Disconnect the daughterboard data cables.
- Pull the daughterboard power cable out of its socket parallel to the motherboard.
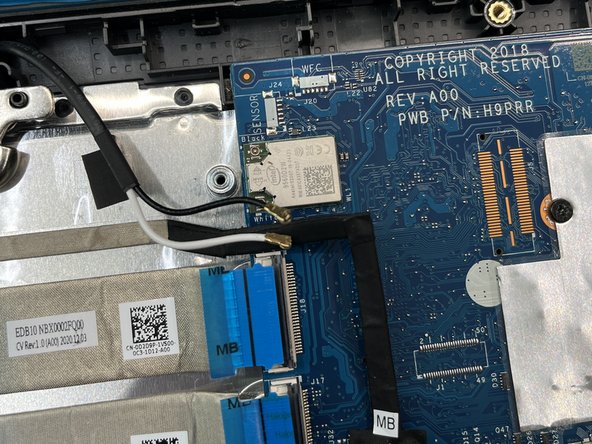
- Remove the M2x3 screw and cover, and disconnect the antenna cables.
- Note: be careful on reassembly. Antenna connectors can be troublesome and are easy to damage.
- Disconnect the touchpad, keyboard, and speakers where shown.
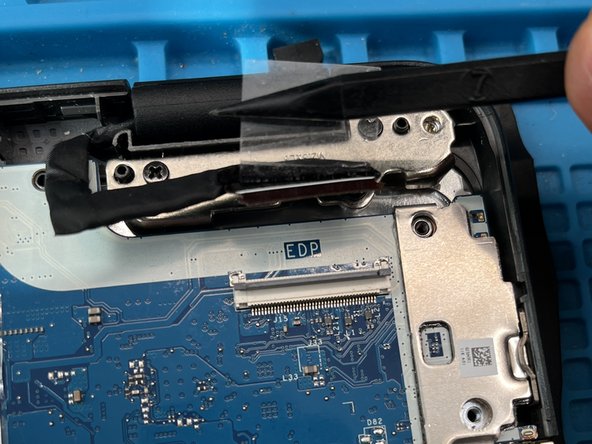
- Remove the four M2x4 screws, as well as the cover over the LVDS cable (top right).
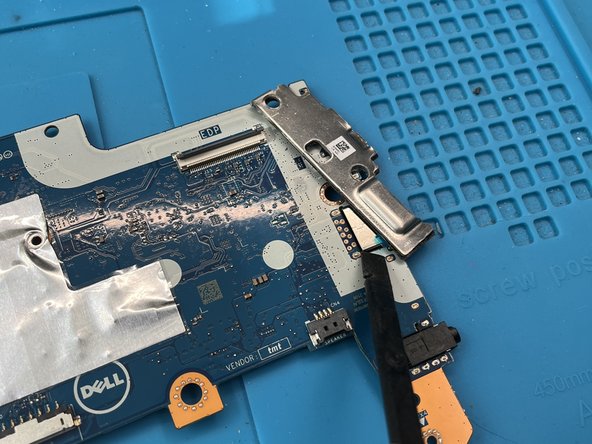
- Detach the LVDS cable.
- The cable is held down with adhesive. Don't be shy about pulling it off the motherboard.
- Lift the motherboard out from the left side and pull away from the body of the chromebook.
- During reassembly, it is much easier to insert the motherboard without the IO shield attached. The IO shield is easily inserted after the motherboard is in place.
- Apply lateral force to the IO shield to break the adhesive holding it to the motherboard.
- Save this IO shield to put on the new motherboard.
- During reassembly, make sure to include a thermal pad on the CPU. Usually you can reuse the one from the previous motherboard, but it's best to have access to a new pad in case the old one is not usable.