Replace Siemens EQ 5 ceramic valve
ID: 149010
Description: On these machines, the ceramic valve controls...
Steps:
- Never forget: pull out the mains plug!
- Remove all attachments such as water tank, pulp drawer, brew group.
- Remove the coffee container lid and take out all the coffee beans.
- Unscrew the two Torx T10 screws at the top of the right side panel.
- Some models do not have these screws. Then the side parts are only held by catches, some of which clamp very strongly. You may have to detach the back part first.
- Lay the machine on its side with the water tank side facing up.
- The side panel is essentially held on the ground by five strong catches. Pry up the pegs with a strong prying tool. It's pretty difficult and you need a lot of strength.
- If the catches are loose, you can pull the side panel away from below. But it's still stuck in other places.
- Use a plastic tool to pry the top cover up a few millimeters and lift off the side panel. Most of the time it's still stuck, especially at the front edge, you have to pull hard.
- You may need to pry the front edge with a plastic tool.
- Lift the side panel off, but don't remove it completely yet. It is still connected with a silicone tube.
- The water tank lid is located at the top of the side panel. Lift it up off the hinges.
- Pull off the silicone hose that leads to the water connection of the tank from the inside.
- Remove the cover over the electronics.
- The second picture shows the most important components:
- heater
- Ceramic valve/Brew valve (depending on model)
- electronics
- pump
- mute
- flow meter
- If you haven't already done so: Remove the two plastic covers over the cables and the electronics box.
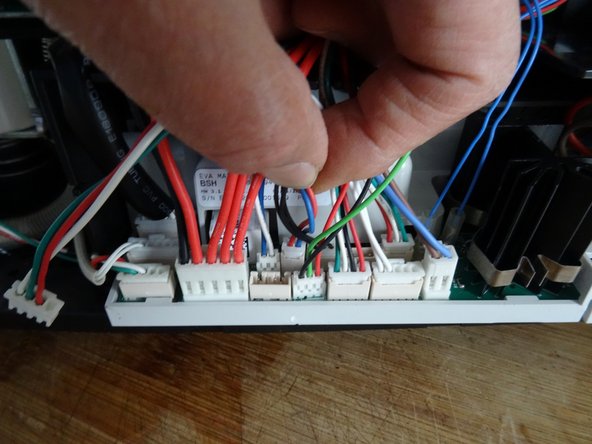
- Locate the two strands of wire going from the ceramic valve to the motherboard. Unplug the connectors and unthread the cables.
- Turn the machine over. Remove the three Torx T15 screws securing the ceramic valve. Pay attention to the washers.
- Turn the machine over again.
- Pull out the clamp on the pressure hose to the ceramic valve.
- Pull off the pressure hose and push it aside.
- Carefully pull out the valve.
- Pull off the thick and thin silicone hoses.
- Pull off the clamps on the other two pressure hoses. Make a note of which hose goes where and detach the two hoses.
- Remove the ceramic valve.