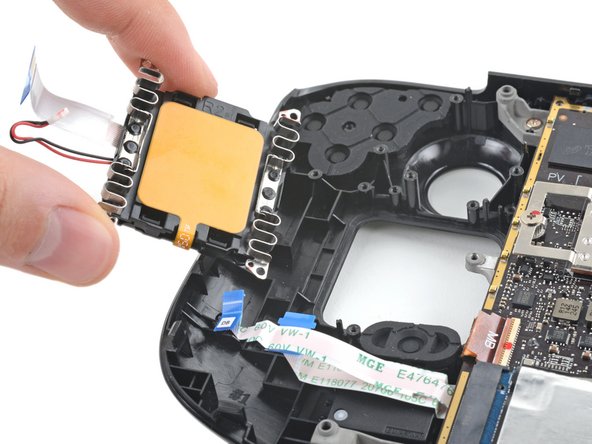
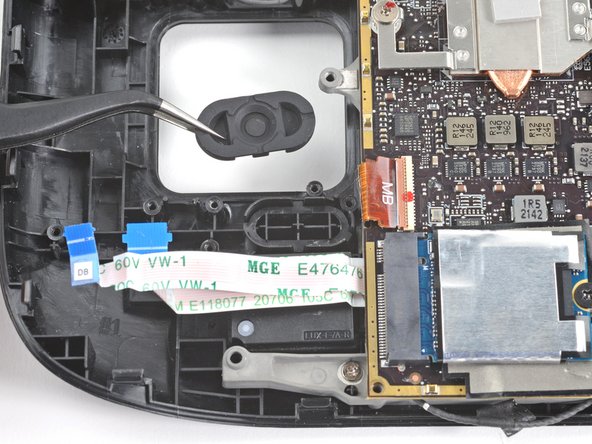
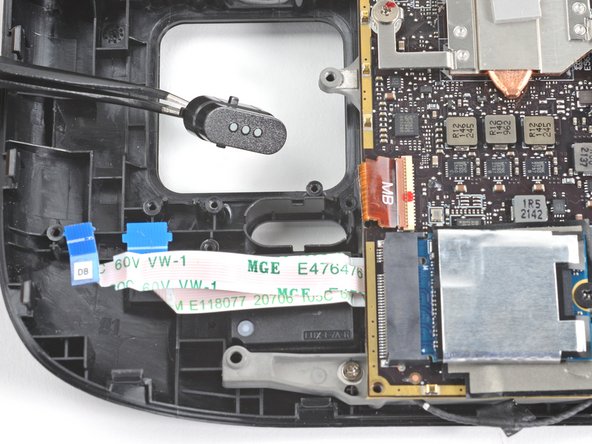
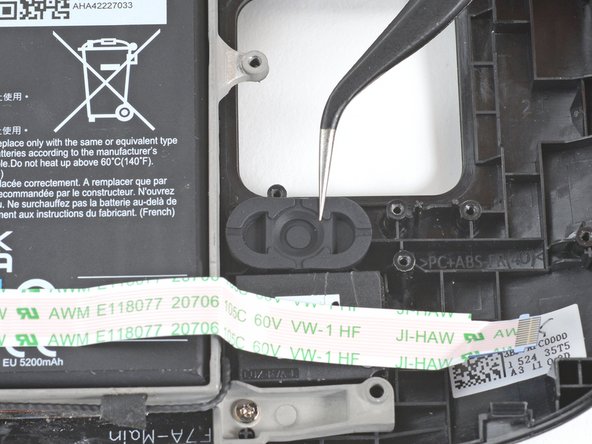
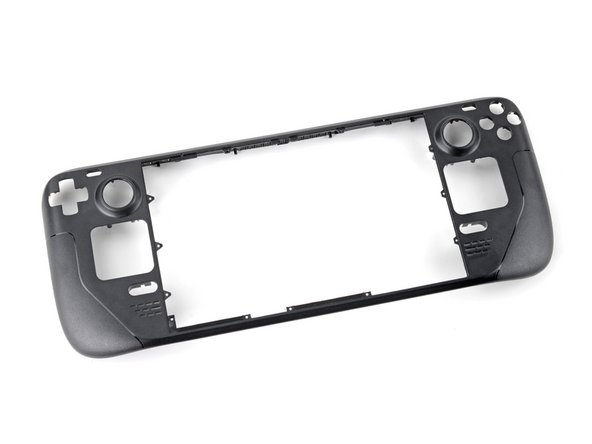
Steam Deck Front Shell Replacement
ID: 149125
Description: Use this guide to remove or replace the front...
Steps:
- Turn on your Steam Deck and allow the battery to discharge below 25% before starting your repairs, as a charged lithium-ion polymer battery can be dangerous if accidentally punctured.
- As an extra precaution, Valve recommends putting your Steam Deck into battery storage mode within the BIOS before starting any internal repairs. Read how to do that here.
- Power down your Steam Deck and unplug any cables.
- If you have a microSD card installed, make sure to remove it before opening the Steam Deck. If you attempt to remove the back cover with it still installed, it could snap right in half.
- During your repair, it can be helpful at times to lay the Steam Deck face-down into its case to protect the thumbsticks and prevent wobble.
- Use a Phillips driver to remove the eight screws securing the back cover:
- Four coarse thread 9.5 mm-long screws
- Four fine thread 5.8 mm-long screws
- Despite the standards, Phillips screwdrivers can vary in size and shape—two drivers labeled as the same size may fit differently in the same screw. Use the size that fits the snuggest into the screw head.
- Throughout this repair, keep track of each screw and make sure it goes back exactly where it came from to avoid damaging your Steam Deck.
- Insert an opening pick into the thin gap between the back cover and the front shell, along the edge of the right grip.
- If you're having trouble inserting your pick at the grip seam, try starting at either the top or bottom long edges first, then slide the pick towards the grip.
- Pry up on the back cover to release it from the locking clips.
- Once the clips are disconnected from one edge, the rest disconnect easily.
- Grip the back cover at the opening you just created and pull it up and away from the device to unclip the long edges.
- Remove the back cover.
- If you have a refreshed Steam Deck version with the black motherboard cover, skip this step.
- Use a pair of tweezers to remove the piece of foil tape covering the hidden screw on the board shield.
- If possible, try not to rip or tear this tape so it can be reused. If necessary, you can fashion a replacement by cutting a piece of aluminum foil tape to fit.
- Use a Phillips driver to remove the three screws securing the board shield:
- One 3.4 mm screw
- Two 3.7 mm screws
- Only the two 3.7 mm screws along the left edge are present in refreshed Steam Decks.
- Remove the board shield.
- Depending on the age of your Steam Deck, this shield may stick to the thermal pads underneath.
- During reassembly, ensure that the fan cable lays on the side of the board shield and isn't pinched underneath.
- Grip the battery cable by its pull tab and pull it directly away from the motherboard to disconnect it.
- Alternatively, use the flat end of a spudger or a clean fingernail to gently push the connector out of its socket, then disconnect it completely by hand.
- The left trigger will be on your right-hand side when working on the Steam Deck, as it's laying upside down.
- The Steam Deck's triggers clip into place on two pegs on the trigger bracket, which doubles as the hinge.
- Place the flat end of a spudger onto the inside edge of the trigger's left clip.
- Pivot the trigger clip out, away, and up from the peg to unlatch it.
- During reassembly, latch the outermost peg first. Once in place, push down on the trigger to latch the innermost peg, producing an audible "click" sound.
- Check to make sure that the trigger spring is properly aligned. Test the trigger action before continuing reassembly.
- Remove the left trigger.
- Take care to not lose the trigger spring. It press-fits onto a peg on the trigger's underside.
- Use a Phillips driver to remove the three 5.2 mm screws securing the left trigger bracket.
- Remove the left trigger bracket.
- Replacement triggers require calibration to work as expected. To calibrate new triggers, follow this calibration guide.
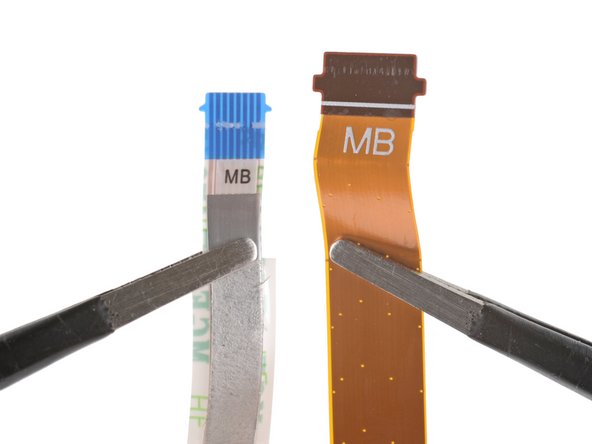
- Use the pointed end of a spudger to lift up the small locking flap on the thumbstick cable's ZIF connector.
- Use a pair of tweezers to slide the cable out of its connector.
- Grip the cable by the blue pull tab, not by the cable itself.
- Use a Phillips driver to remove the three 5.2 mm screws securing the thumbstick.
- During reassembly, you may need to hold the Steam Deck off of the work surface so it isn't resting on the new thumbstick while you tighten down the screws.
- Remove the left thumbstick.
- Use the pointed end of a spudger to lift up the small locking flap on the button board interconnect cable's ZIF connector.
- Use a pair of tweezers to slide the cable out of its connector.
- Grip the cable by the blue pull tab, not by the cable itself.
- If any connectors are covered with tape, use a pair of tweezers to remove it.
- Use the pointed end of a spudger to lift up the small locking flaps on the rest of the button board ZIF connectors. Use a pair of tweezers to slide the cables out of their connectors:
- Disconnect the D-pad cable.
- Disconnect the touchpad board cable.
- Disconnect the touchpad cable.
- Exercise caution when lifting this connector—pry up on the connector itself, not its housing.
- Use the pointed end of a spudger to lift up on the haptics cable to disconnect it.
- Alternatively, you can leave the haptics connected to the button board and flip the board up and over the edge of the shell and out of the way.
- Use a Phillips driver to disconnect the four screws securing the left button board:
- Three 5.2 mm screws
- One 3.9 mm screw
- Remove the left button board.
- Keep track of the Steam button and its membrane, as once the left button board is removed, they're no longer secured in place.
- Use a Phillips driver to remove the four 4.7 mm screws securing the touchpad board.
- Remove the touchpad board.
- Use a Phillips driver to remove the four 4.7 mm screws securing the touchpad.
- You may need to temporarily remove the Steam button membrane for easier access to the bottom left screw.
- Each of the touchpad's four mounting corners have a locating peg. During reassembly, ensure each is properly seated.
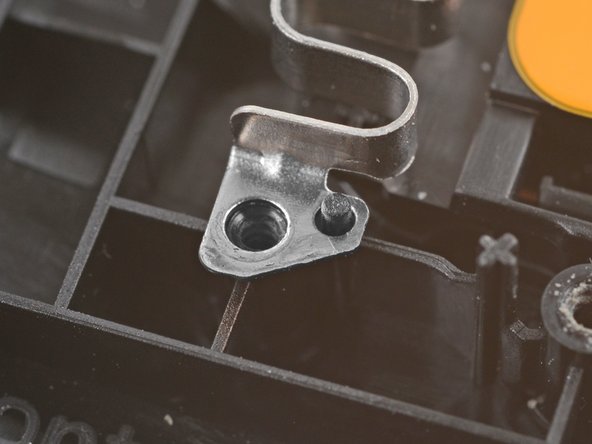
- The touchpad's springs are very delicate and are precisely positioned. If bent, the touchpad may rattle or not work as intended.
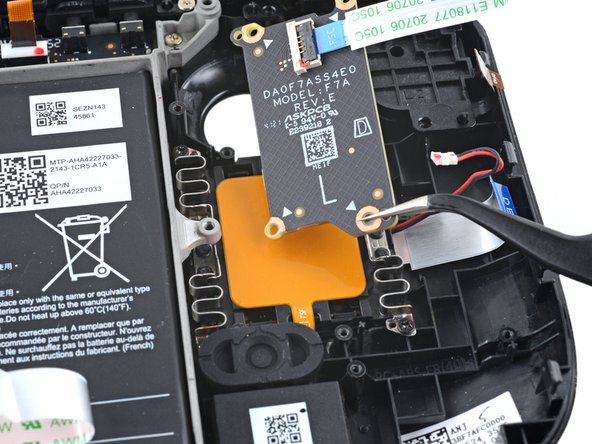
- From the front of the Steam Deck, use your finger to push the left touchpad partway through the front shell to unseat it.
- Lift the touchpad out from underneath the overhanging section of the midframe.
- Remove the touchpad.
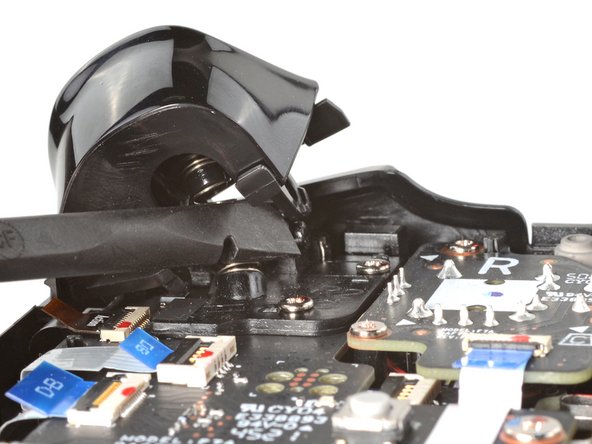
- The right trigger will be on your left-hand side when working on the Steam Deck, as it's laying upside down.
- The Steam Deck's triggers clip into place on two pegs on the trigger bracket, which doubles as the hinge.
- Place the flat end of a spudger onto the inside edge of the trigger's right clip.
- Pivot the trigger clip out, away, and up from the peg to unlatch it.
- During reassembly, latch the outermost peg first. Once in place, push down on the trigger to latch the innermost peg, producing an audible "click" sound.
- Check to make sure that the trigger spring is properly aligned. Test the trigger action before continuing reassembly.
- Remove the right trigger.
- Take care to not lose the trigger spring. It press-fits onto a peg on the trigger's underside.
- Use a Phillips driver to remove the three 5.2 mm screws securing the right trigger bracket.
- Remove the right trigger bracket.
- Replacement triggers require calibration to work as expected. To calibrate new triggers, follow this calibration guide.
- Use the pointed end of a spudger to lift up the small locking flap on the thumbstick cable's ZIF connector.
- Use a pair of tweezers to slide the cable out of its connector.
- Grip the cable by the blue pull tab, not by the cable itself.
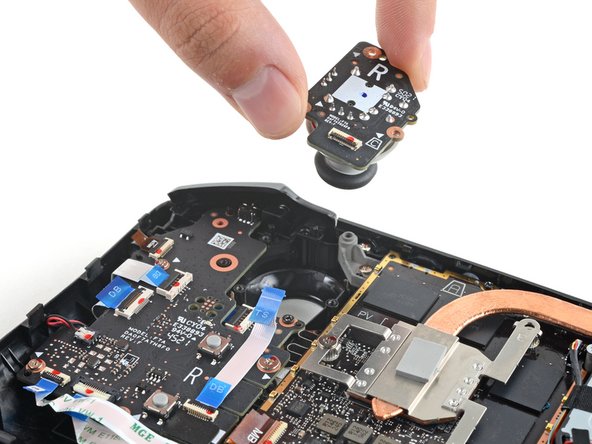
- Use a Phillips driver to remove the three 5.2 mm screws securing the thumbstick.
- During reassembly, you may need to hold the Steam Deck off of the work surface so it isn't resting on the new thumbstick while you tighten down the screws.
- Remove the right thumbstick.
- Use the pointed end of a spudger to lift up the small locking flap on the button board cable's ZIF connector.
- Use a pair of tweezers to slide the cable out of its connector.
- Grip the cable by the blue pull tab, not by the cable itself.
- Use the pointed end of a spudger to lift up the small locking flap on the button board interconnect cable's ZIF connector.
- Use a pair of tweezers to slide the cable out of its connector.
- Grip the cable by the blue pull tab, not by the cable itself.
- If any connectors are covered with tape, use a pair of tweezers to remove it.
- Use the pointed end of a spudger to lift up the small locking flaps on the rest of the button board ZIF connectors. Use a pair of tweezers to slide the cables out of their connectors:
- Disconnect the action buttons cable.
- Disconnect the touchpad board cable.
- Disconnect the touchpad cable.
- Exercise caution when lifting this connector—pry up on the connector itself, not its housing.
- Use the pointed end of a spudger to lift up on the haptics cable to disconnect it.
- Alternatively, you can leave the haptics connected to the button board and flip the board up and over the edge of the shell and out of the way.
- Use a Phillips driver to disconnect the four screws securing the right button board:
- Three 5.2 mm screws
- One 3.9 mm screw
- Remove the right button board.
- Keep track of the quick access button and its membrane, as once the right button board is removed, they're no longer secured in place.
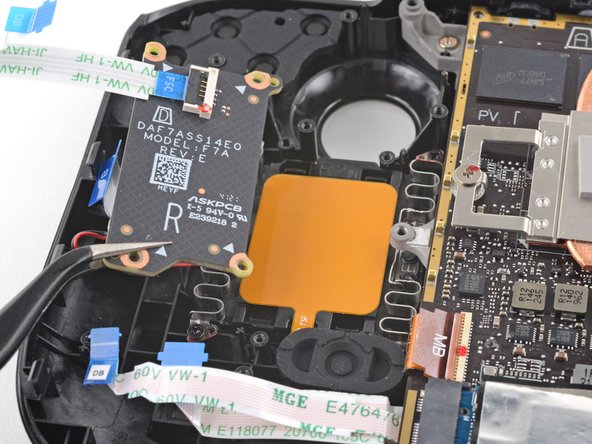
- Use a Phillips driver to remove the four 4.7 mm screws securing the touchpad board.
- Remove the touchpad board.
- Use a Phillips driver to remove the four 4.7 mm screws securing the touchpad.
- You may need to temporarily remove the quick access button membrane for easier access to the bottom right screw.
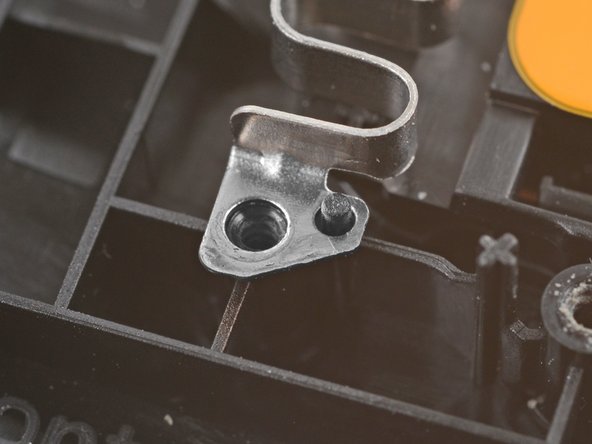
- Each of the touchpad's four mounting corners have a locating peg. During reassembly, ensure each is properly seated.
- The touchpad's springs are very delicate and are precisely positioned. If bent, the touchpad may rattle or not work as intended.
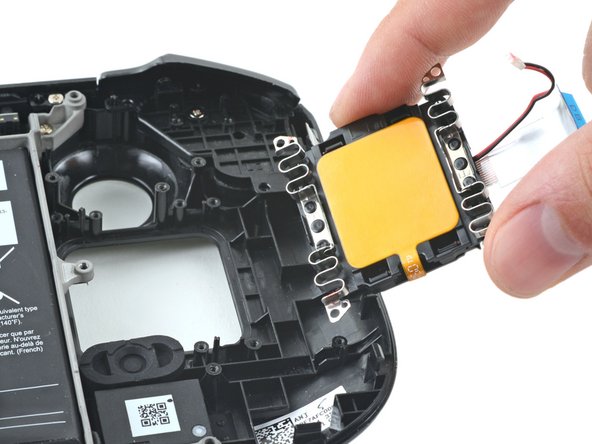
- From the front of the Steam Deck, use your finger to push the right touchpad partway through the front shell to unseat it.
- Lift the touchpad out from underneath the overhanging section of the midframe.
- Remove the touchpad.
- Use a pair of tweezers to remove the quick access button membrane.
- Use a pair of tweezers to remove the quick access button.
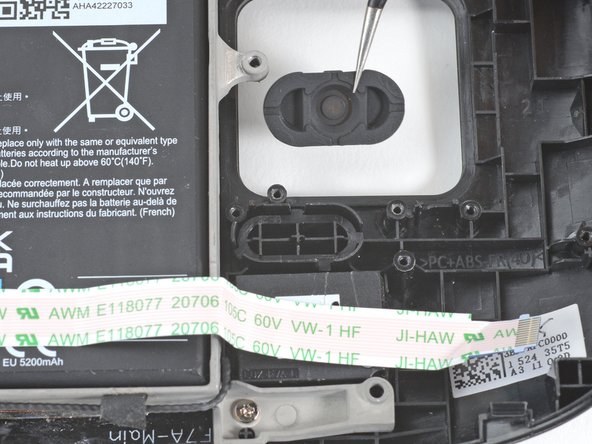
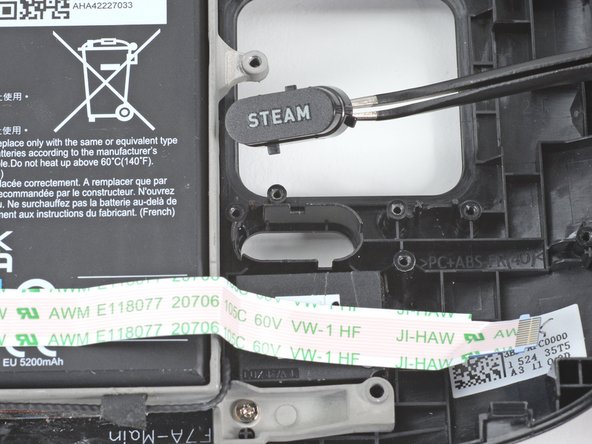
- Use a pair of tweezers to remove the Steam button membrane.
- Use a pair of tweezers to remove the Steam button.
- Use a Phillips driver to remove the 3.4 mm screw securing the SSD.
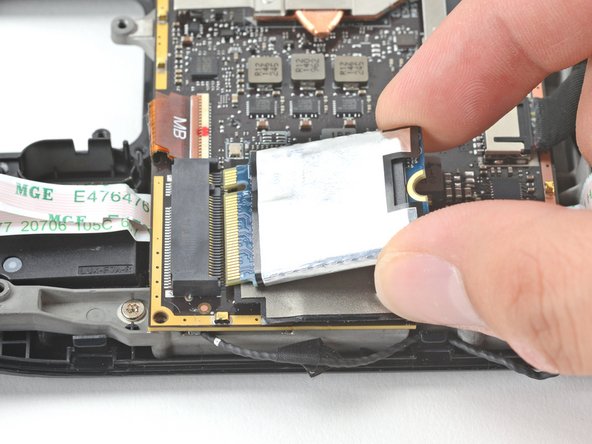
- With the SSD screw removed, the SSD will pop up at a shallow angle.
- Grip the end of the SSD and pull it away from its M.2 board connector to remove it.
- During reassembly, insert the SSD at a shallow angle into its board connector, and secure it back into its horizontal position with the SSD screw.
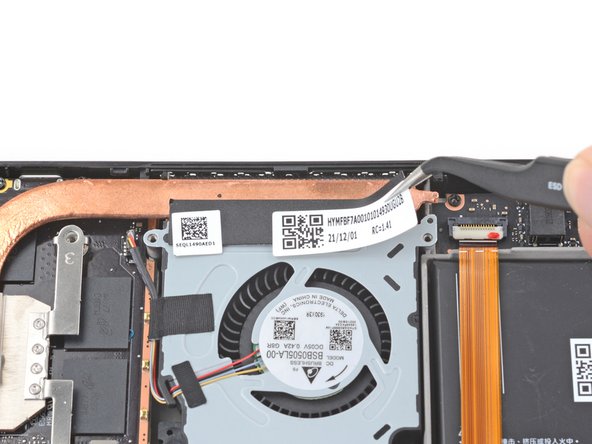
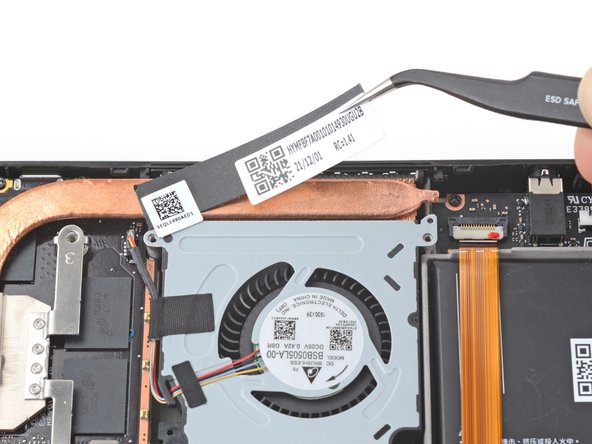
- Use a pair of tweezers to remove the sticker from the top edge of the fan.
- If possible, try not to rip or tear this sticker so it can be reused. Use a little bit of heat if necessary to soften the adhesive.
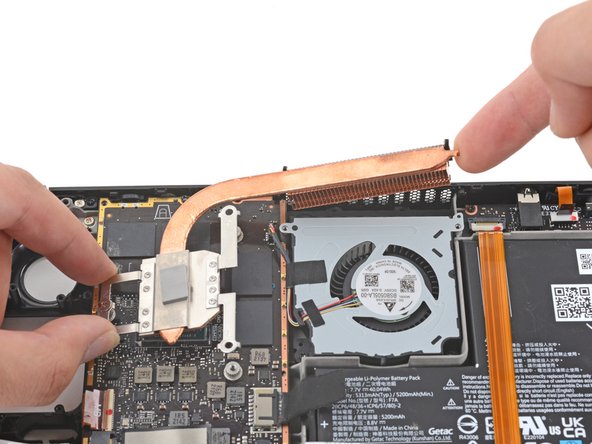
- Use a Phillips driver to loosen and remove the two screws securing the heatsink to the motherboard:
- One captive 3.5 mm screw
- One 3.4 mm screw
- No, your eyes don't deceive you! The third heatsink screw was removed earlier in the disassembly: it doubles as the hidden board shield screw.
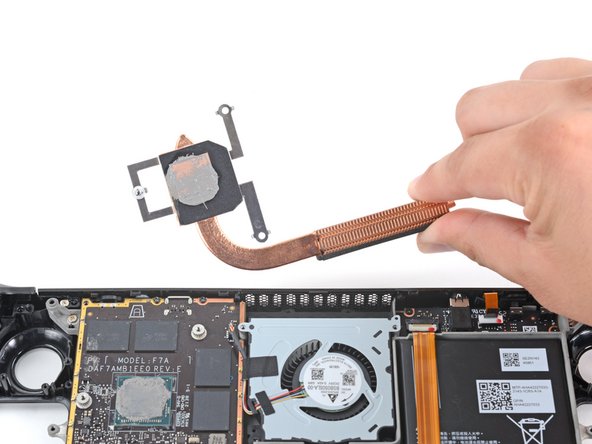
- Lift and remove the heatsink.
- Before reinstalling the heatsink, follow this guide to clean the heatsink and APU and reapply thermal paste.
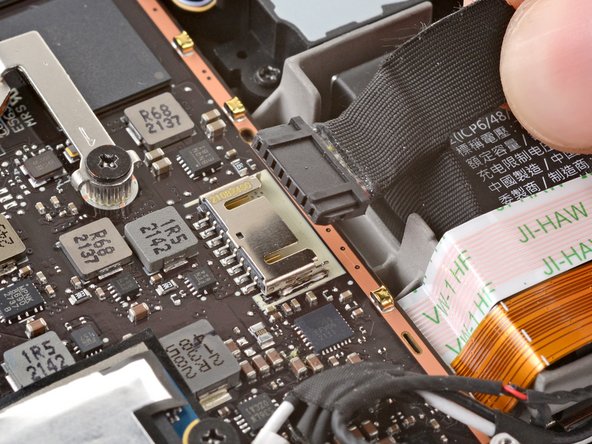
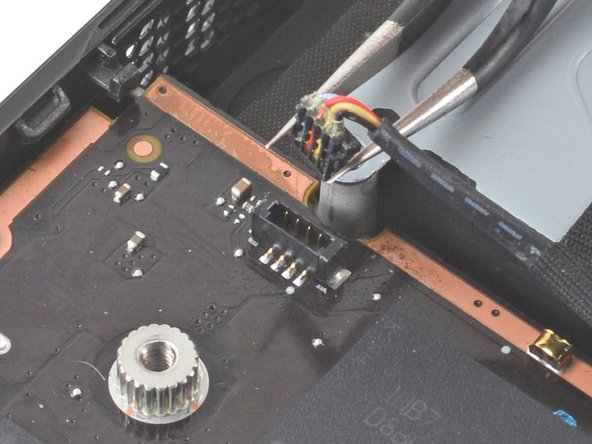
- Use a pair of tweezers to grip the edges of the fan connector and pull up to disconnect it from the motherboard.
- Pull the fan cable by its connector, not the wires themselves.
- Use a Phillips driver to remove the two 3.7 mm screws securing the fan.
- The other two fan screws were removed earlier in the disassembly: they double as two back cover screws.
- Remove the fan.
- Use a pair of tweezers to grip the edges of the speaker connector and pull up to disconnect it from the motherboard.
- Pull the speaker cable by its connector, not the wires themselves.
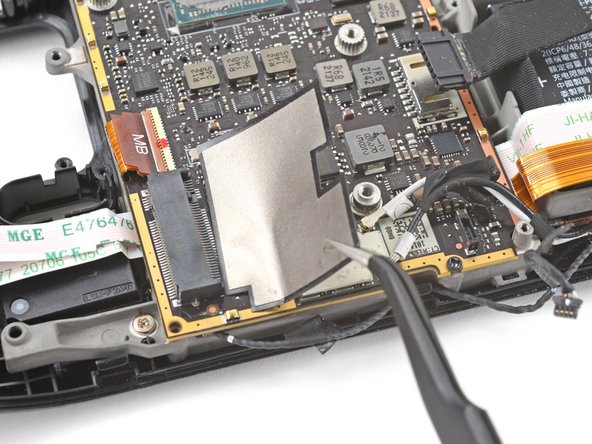
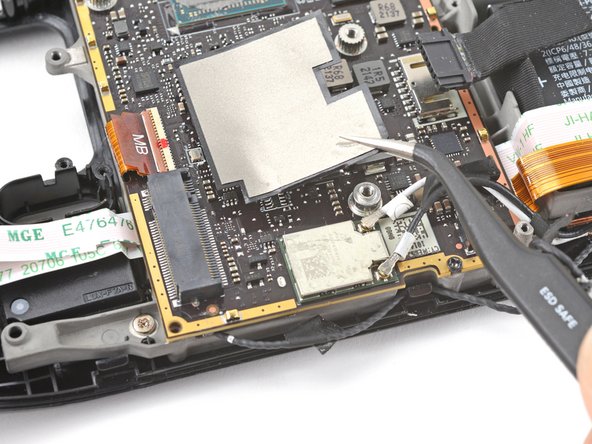
- Use a pair of tweezers to peel up and remove the Wi-Fi shield tape.
- If possible, try not to rip or tear this sticker so it can be reused. Use a little bit of heat if necessary to soften the adhesive.
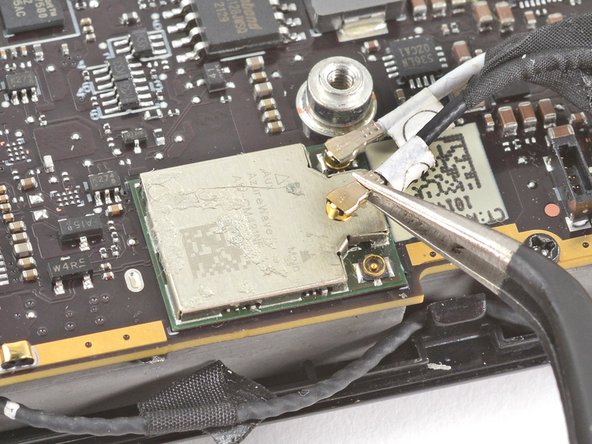
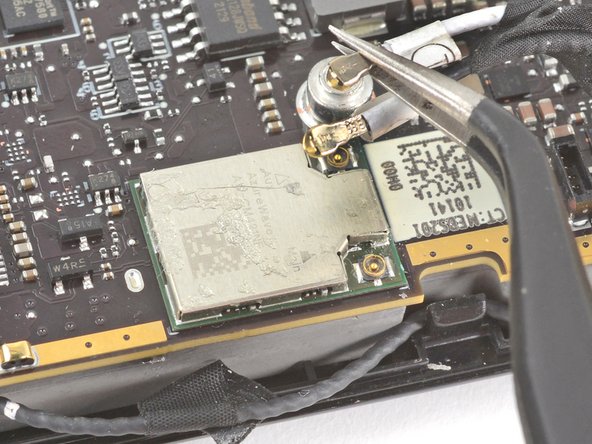
- Use a pair of tweezers to grip the antenna connector close to its base.
- Pull straight up to disconnect the cable.
- Repeat for the second antenna cable.
- During reassembly, ensure that both antenna cables are reconnected at their appropriate connectors. The labels on the cables match the markings on the Wi-Fi module.
- To reconnect each cable, align the connector directly over its socket, and then press down so it snaps into place.
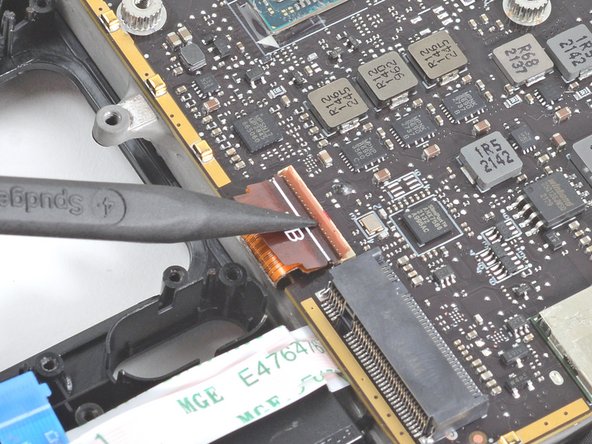
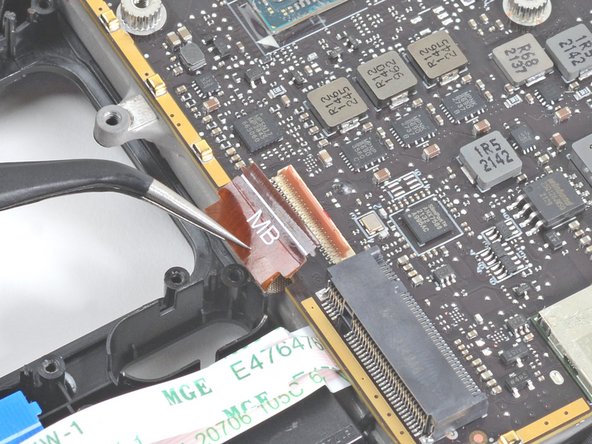
- Use the pointed end of a spudger to lift up the small locking flap on the display cable's ZIF connector.
- Use a pair of tweezers to slide the cable out of its connector.
- Grip the cable by the pull tab, not by the cable itself.
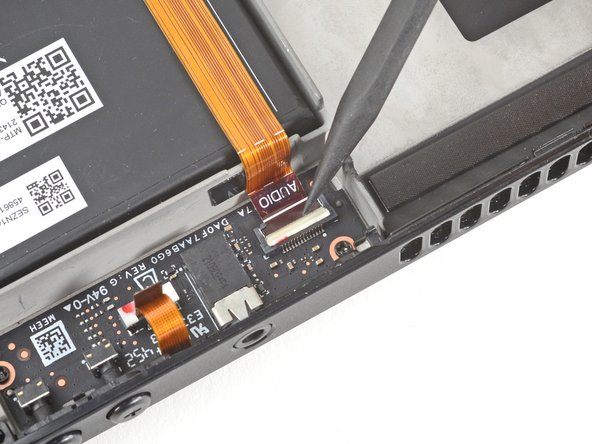
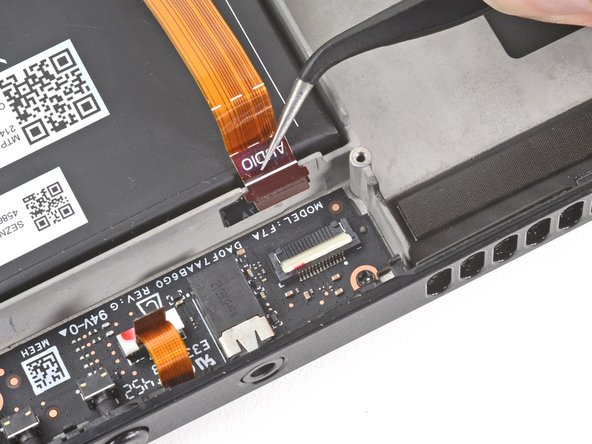
- Use the pointed end of a spudger to lift up the small locking flap on the audio cable's ZIF connector.
- Use a pair of tweezers to slide the cable out of its connector.
- Grip the cable by its pull tab, not by the cable itself.
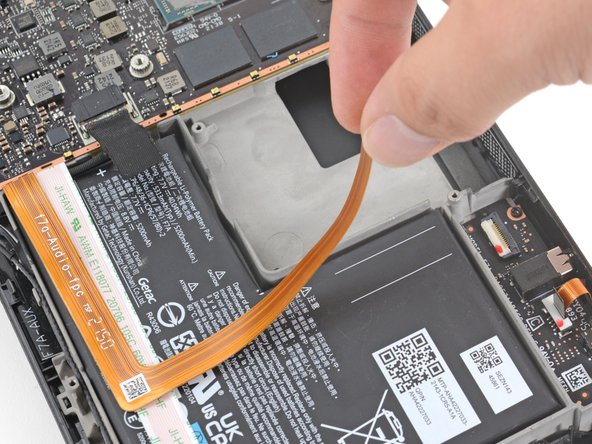
- Carefully peel the audio cable off of the battery.
- The audio cable is secured to the battery with some light adhesive.
- If the adhesive is stubborn, don't force the cable. Lightly heat the audio cable using an iOpener or a hair dryer to soften the adhesive.
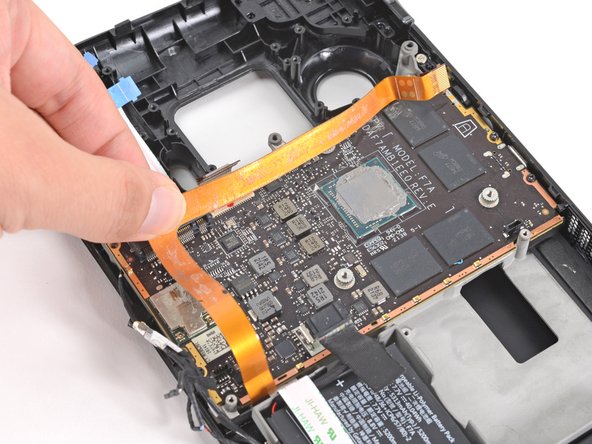
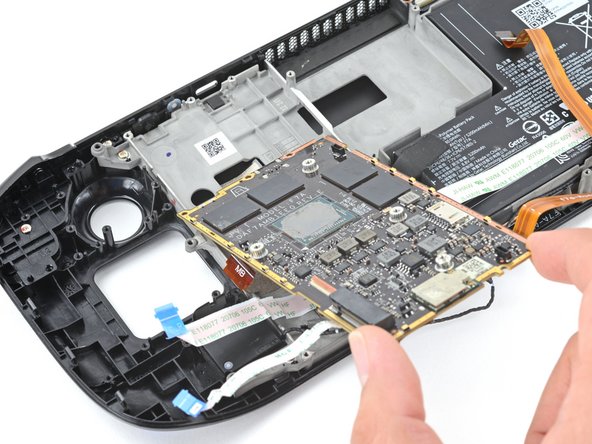
- Use a Phillips driver to remove the three 3.7 mm screws securing the motherboard.
- Remove the motherboard.
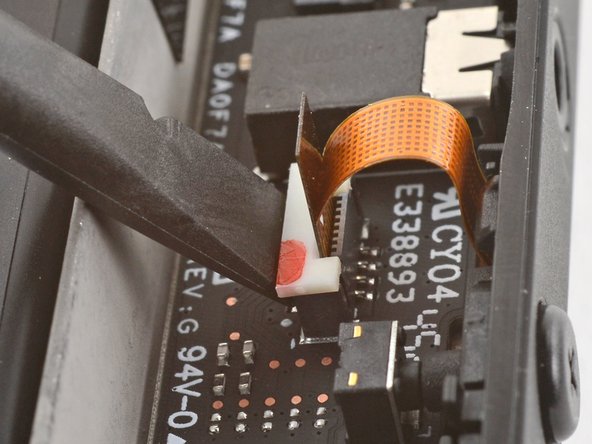
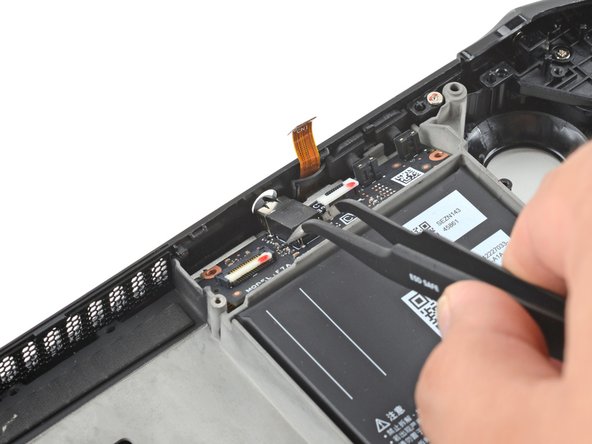
- The audio and button board cables attach to the underside of the motherboard with ZIF connectors.
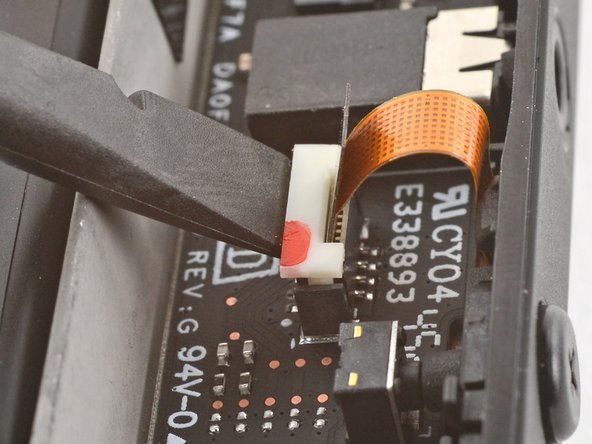
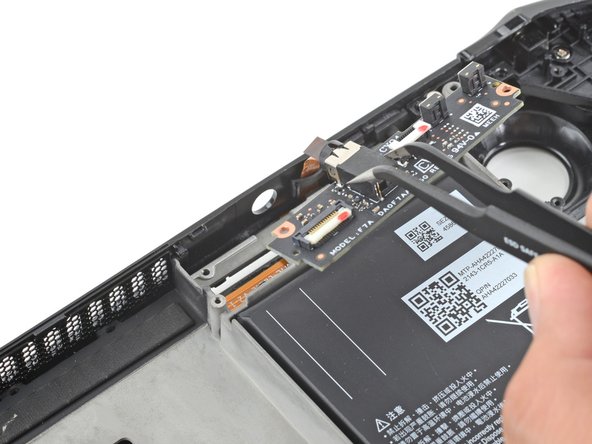
- Use the pointed end of a spudger to lift up on the mic cable's white locking tab.
- You should feel a small tactile bump once the connector unlocks.
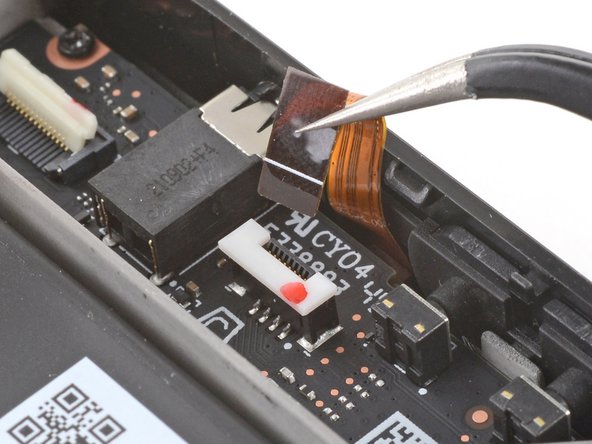
- Use a pair of tweezers to pull the mic cable up and out of its connector.
- With the connector properly unlocked, the mic cable should slide out with little to no resistance.
- During reassembly, ensure that the locking tab is in its unlocked, lifted position before reinserting the mic cable. Press down on the tab to lock the cable in place.
- Use a Phillips driver to remove the two 3.7 mm screws securing the audio board.
- Use a pair of tweezers to grip the audio board by the headphone jack.
- Pivot the board up and out of its recess to remove it.
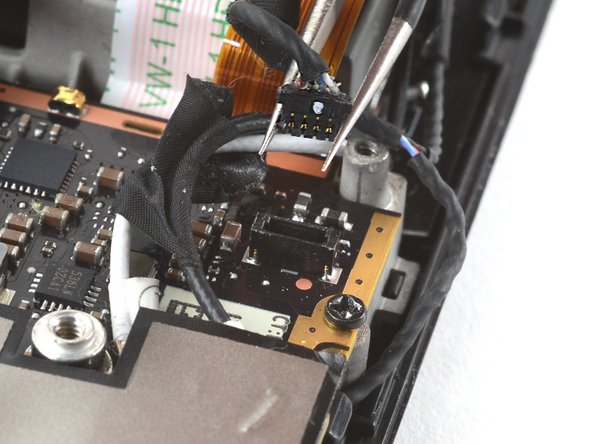
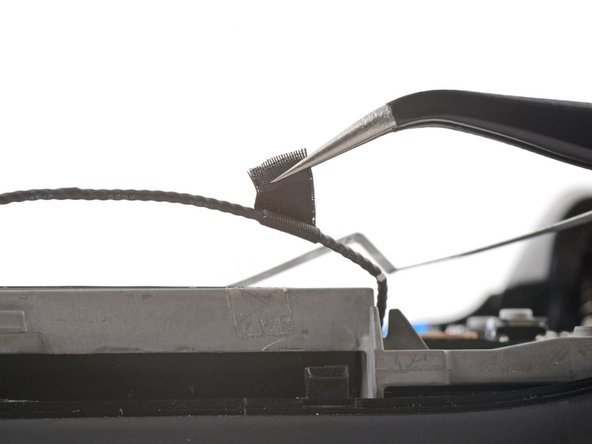
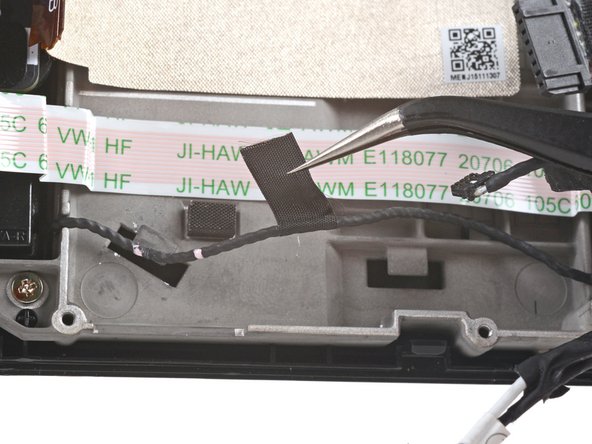
- Use a pair of tweezers to peel up the tape bundling the speaker wire to the Wi-Fi antenna cables.
- Use a pair of tweezers to peel up the various strips of black tape routing the speaker wire along the bottom edge of the chassis.
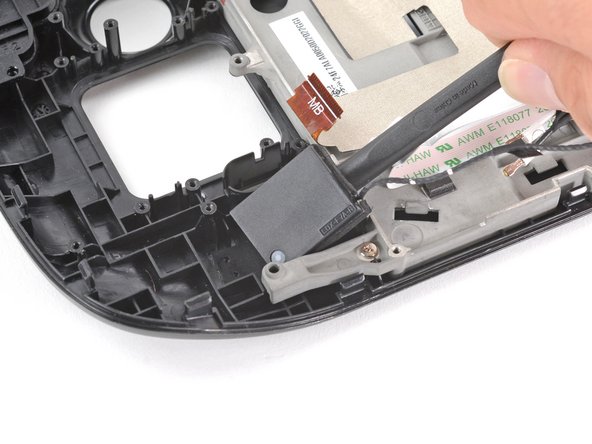
- Insert the flat end of a spudger between the right speaker and the frame.
- Pivot the spudger up to separate the speaker from the light adhesive securing it against the front shell.
- If the adhesive is stubborn, don't force the speaker out. Lightly heat it using an iOpener or a hair dryer to soften the adhesive underneath.
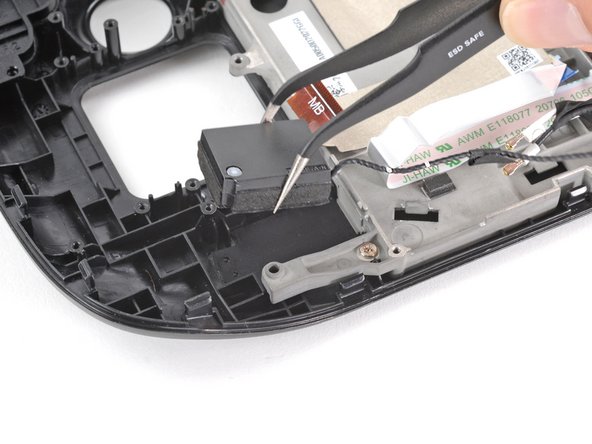
- Use a pair of tweezers to grip and remove the right speaker from its cavity.
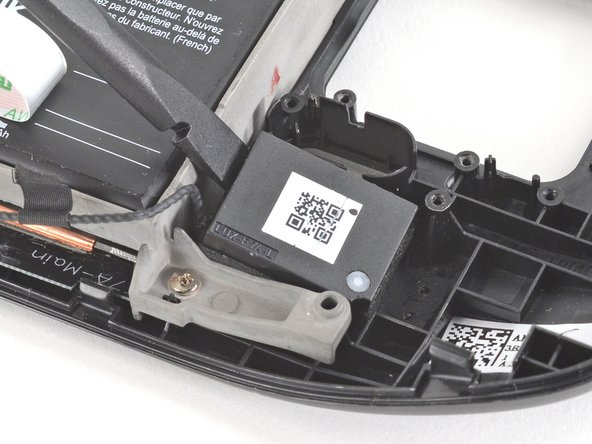
- Insert the flat end of a spudger between the left speaker and the frame.
- Pivot the spudger up to separate the speaker from the light adhesive securing it against the front shell.
- If the adhesive is stubborn, don't force the speaker out. Lightly heat it using an iOpener or a hair dryer to soften the adhesive underneath.
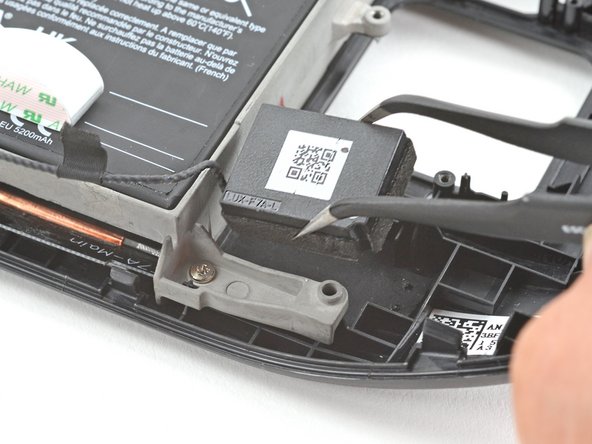
- Use a pair of tweezers to grip and remove the left speaker from its cavity.
- Remove the tethered right and left speakers.
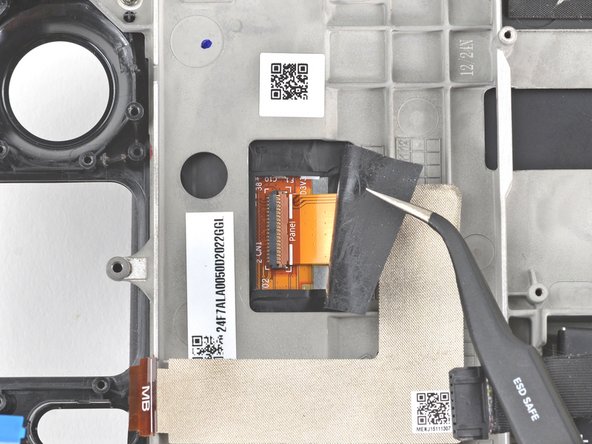
- Use a pair of tweezers to peel back the sticker covering the display connector.
- If possible, try not to rip or tear this sticker so it can be reused. Use a little bit of heat if necessary to soften the adhesive.
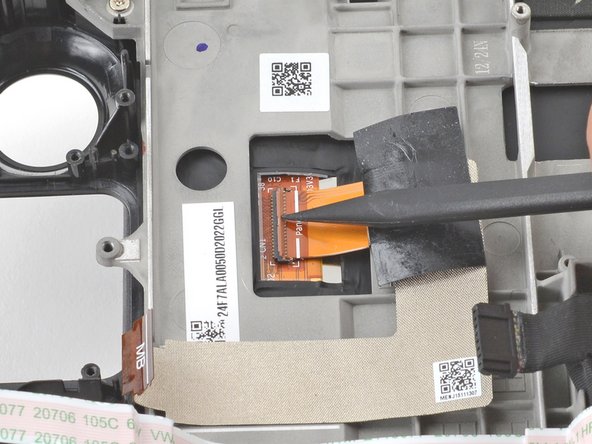
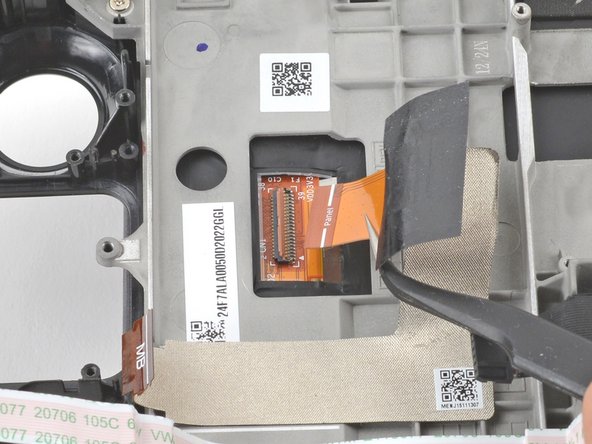
- Use the pointed end of a spudger to lift up the small locking flap on the display cable's ZIF connector.
- Use a pair of tweezers to slide the cable out of its connector.
- Prepare an iOpener and apply it to the top edge of the display for one minute.
- A hair dryer or heat gun may also be used, but be careful not to overheat the Steam Deck—displays and internal batteries are both susceptible to heat damage.
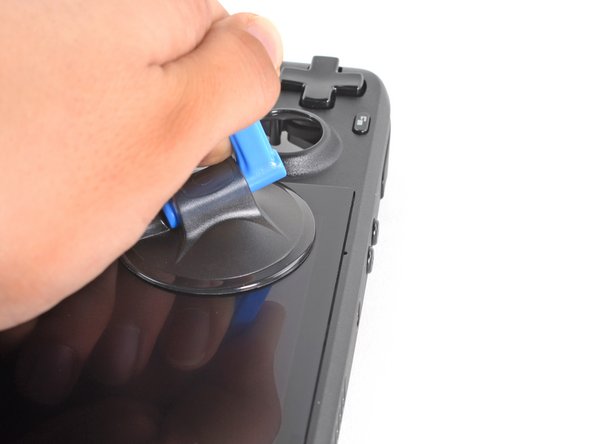
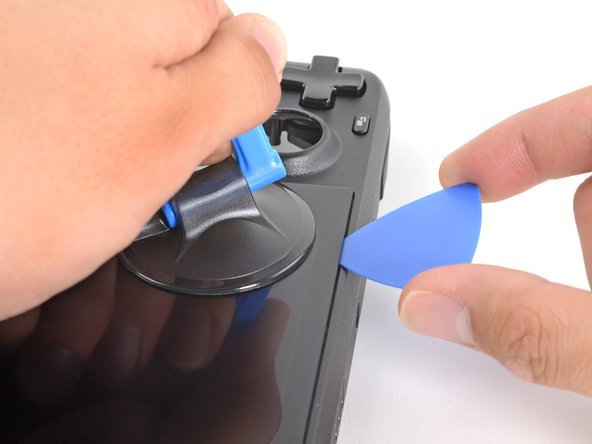
- Apply a suction cup to the top left corner of the display by pressing down on it to create suction, as close to the edge as possible.
- If your screen is badly cracked, covering it with a layer of clear packing tape may allow the suction cup to adhere. Alternatively, very strong tape may be used instead of the suction cup. If all else fails, you can superglue the suction cup to the broken glass.
- Pull up on the suction cup with strong, steady force to create a gap between the display and the frame.
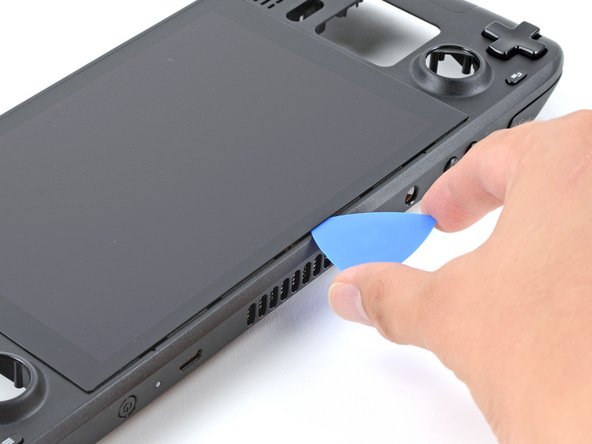
- Insert the point of an opening pick into the gap.
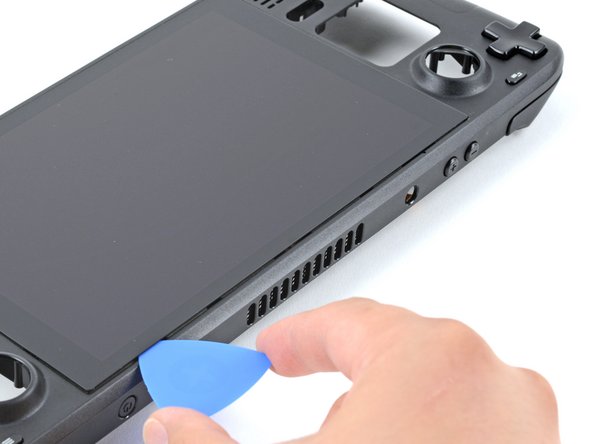
- Don't insert the pick more than 1/8 of an inch (~3 mm) or you risk damaging the display panel, ambient light sensor, or fragile cable underneath.
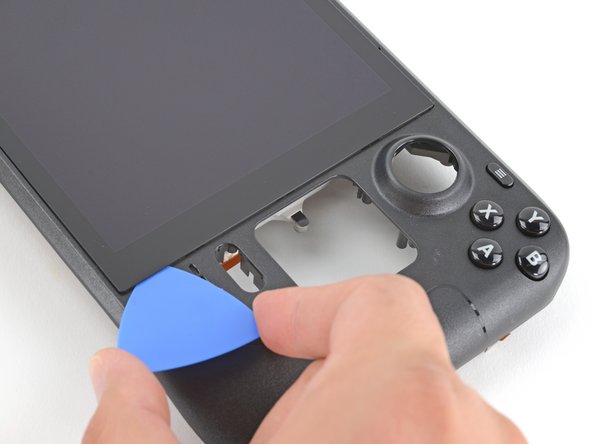
- Slide the opening pick no more than 3 mm deep across the top edge to slice the adhesive.
- Heat the right edge of the display for one minute.
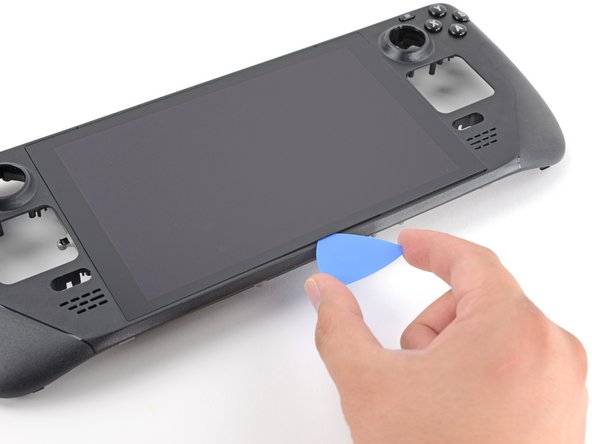
- Slide the opening pick down the right edge to slice the adhesive.
- Heat the bottom edge of the display for one minute.
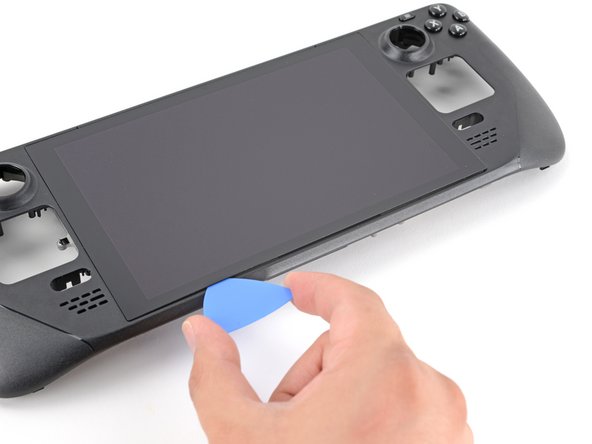
- Slide the opening pick across the bottom edge to slice the adhesive.
- Heat the left edge of the display for one minute.
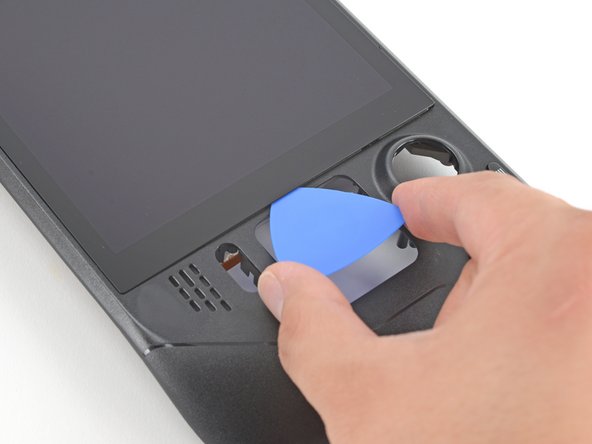
- Slide the opening pick across the left edge to slice the adhesive.
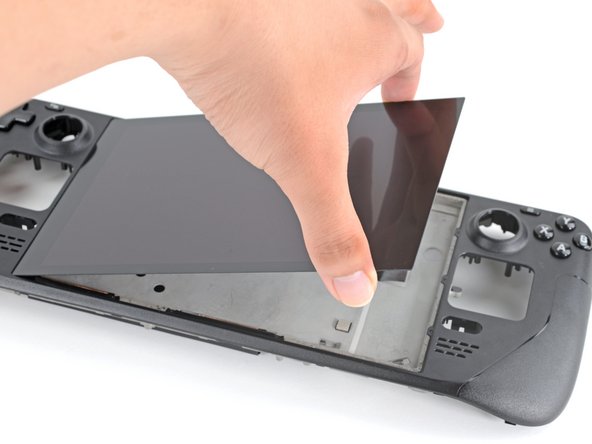
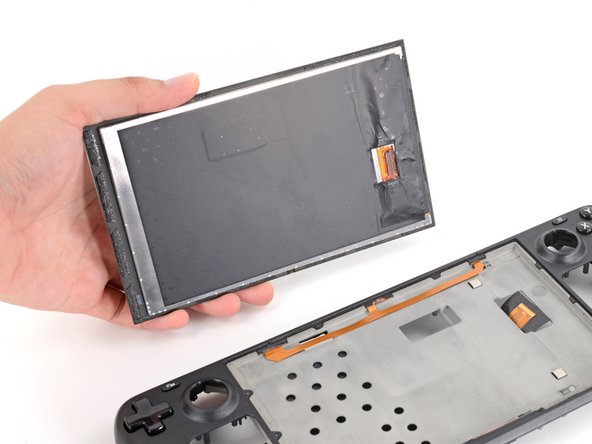
- Once you have sliced around the perimeter of the display, carefully lift the right edge up, opening it like a book.
- Remove the display.
- During reassembly, if you’d like to install new display adhesive strips, follow these steps after removing your old adhesive strips from your current display.
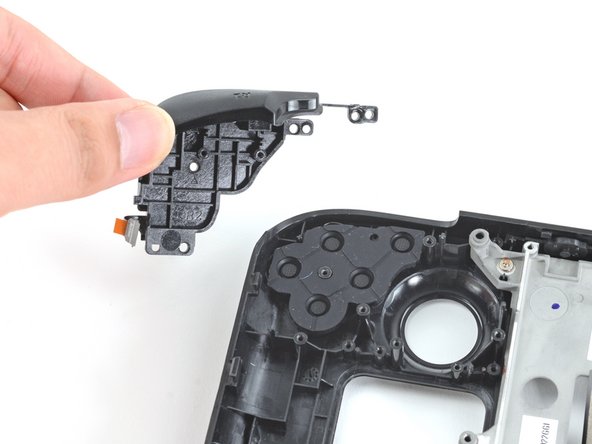
- Use a Phillips driver to remove the two 5.2 mm screws securing the left bumper assembly.
- Remove the left bumper assembly.
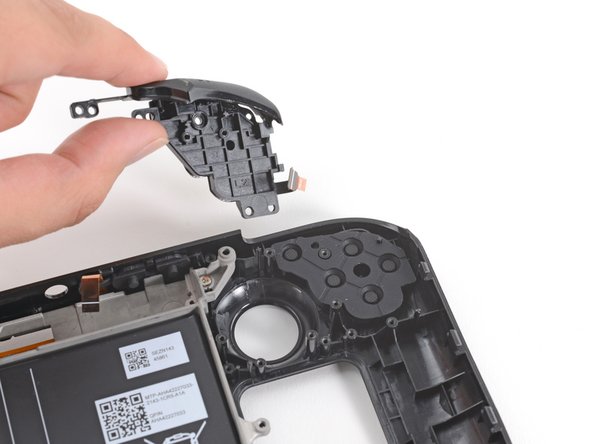
- Use a Phillips driver to remove the two 5.2 mm screws securing the right bumper assembly.
- Remove the right bumper assembly.
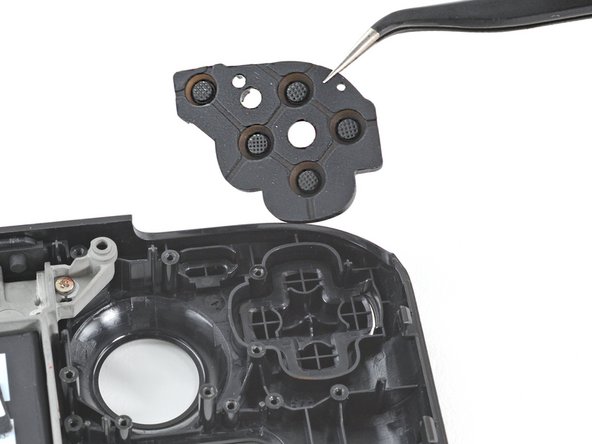
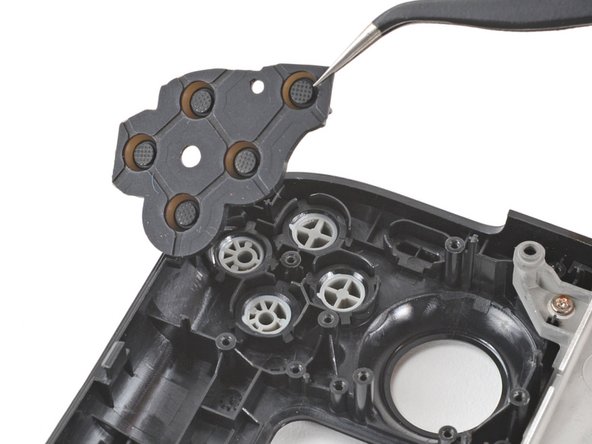
- Use a pair of tweezers to remove the D-pad membrane.
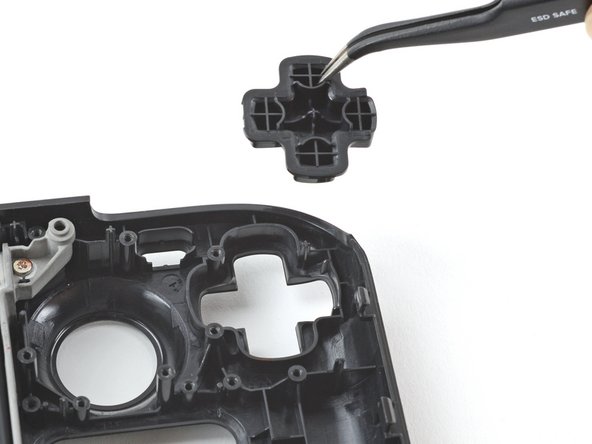
- Use a pair of tweezers to remove the D-pad.
- During reassembly, align the D-pad button such that the short side is facing towards the Steam Deck's outer edge.
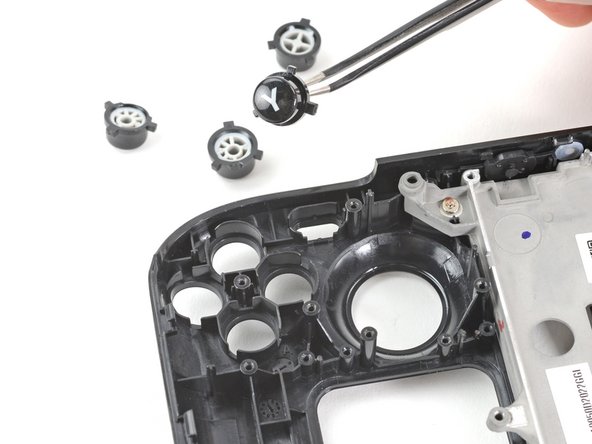
- Use a pair of tweezers to remove the action buttons membrane.
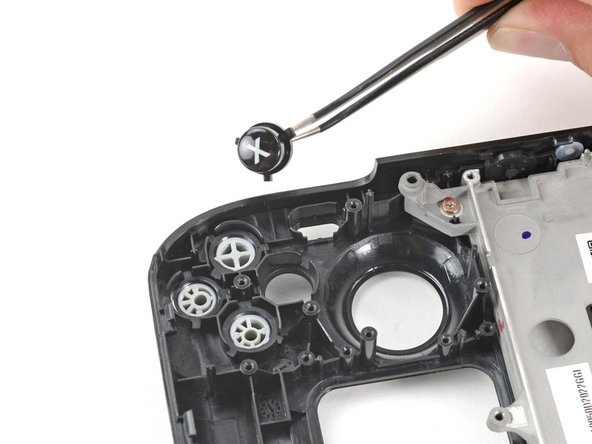
- Use a pair of tweezers to remove the four action buttons, A, B, X, and Y.
- During reassembly, don't worry! The buttons are keyed—they can only be reinstalled in one orientation.
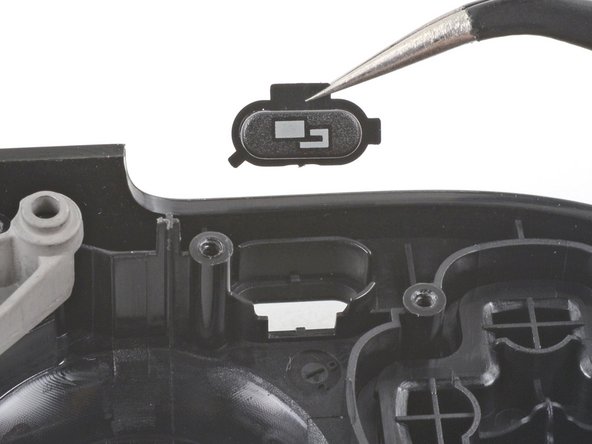
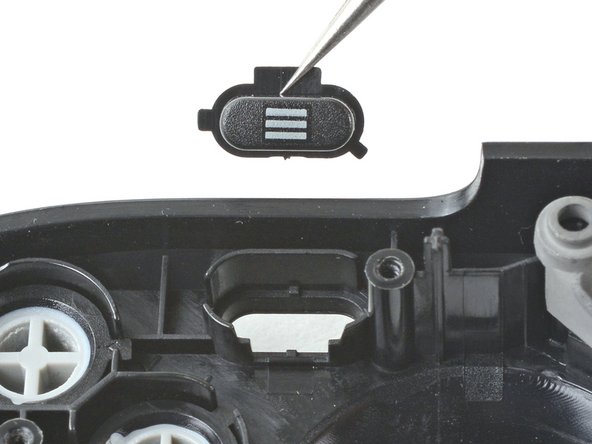
- Use a pair of tweezers to remove the view button.
- Use a pair of tweezers to remove the menu button.
- Use a Phillips driver to remove the six 2.3 mm screws securing the midframe to the front shell, located on the front side.
- To prevent these tight screws from stripping, apply firm downward force, work slowly and try a different Phillips driver if the screws won't come out.
- Use a Phillips driver to remove the four 5.2 mm screws securing the midframe to the front shell.
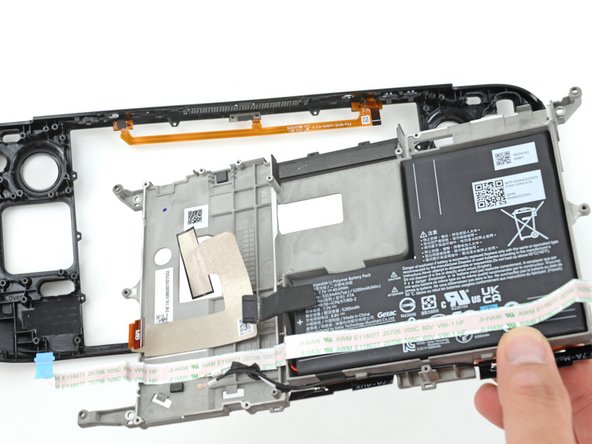
- Remove the midframe.
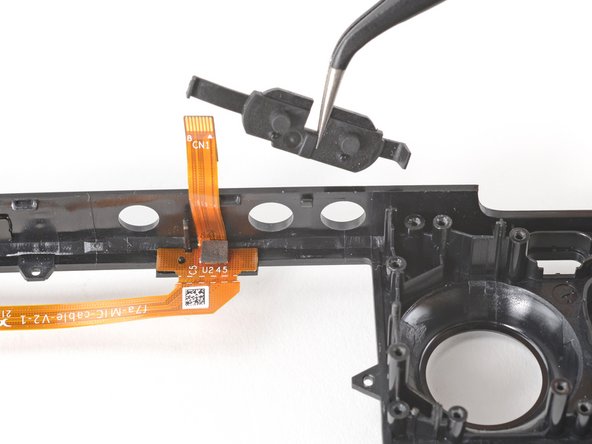
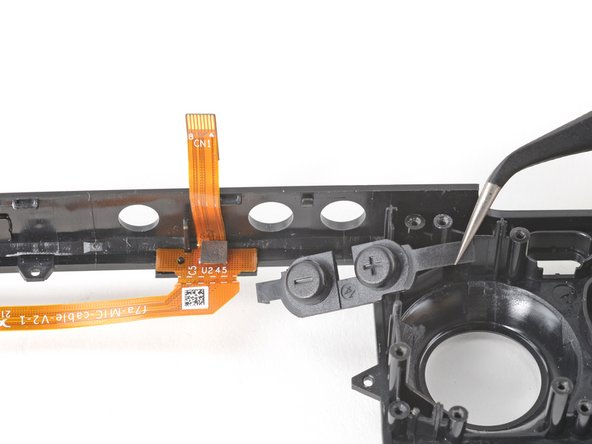
- Use the pointed end of a spudger to lift the rubber flap to the left of the volume buttons up and out of its plastic clip.
- Use a pair of tweezers to remove the volume buttons by pulling them up and away from the front shell.
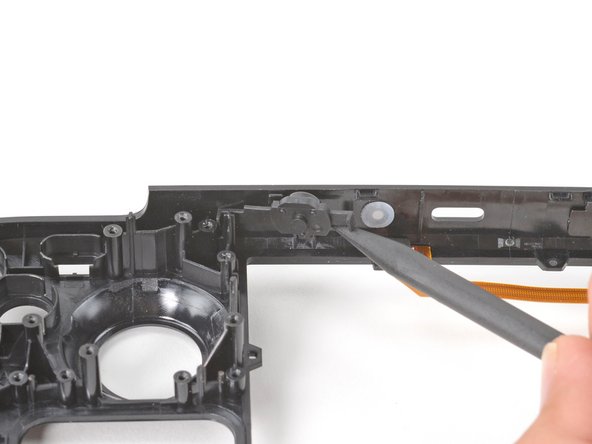
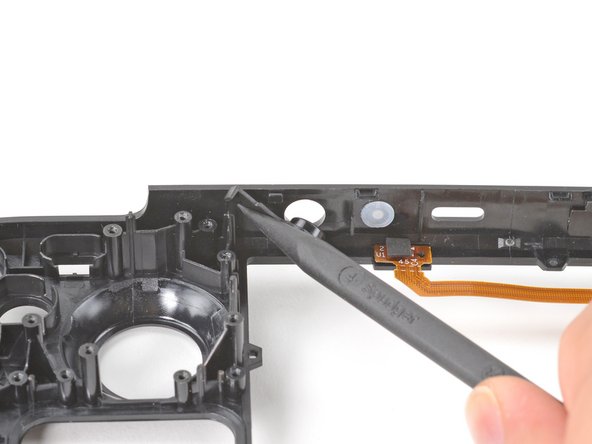
- Use the pointed end of a spudger to lift the rubber flap to the right of the power button up and out of its plastic clip.
- Use the pointed end of a spudger to lift the rubber flap to the left of the power button up and out of its plastic clip.
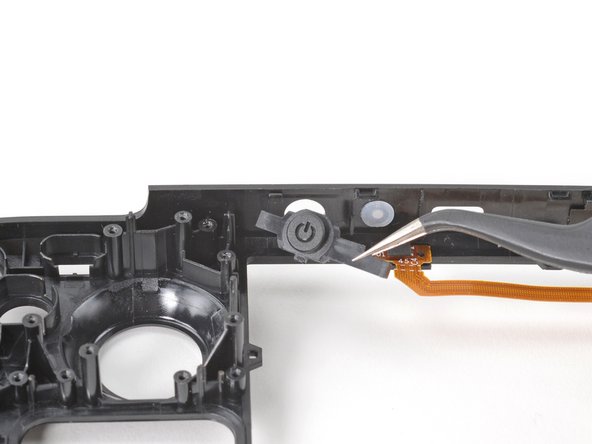
- Remove the power button.
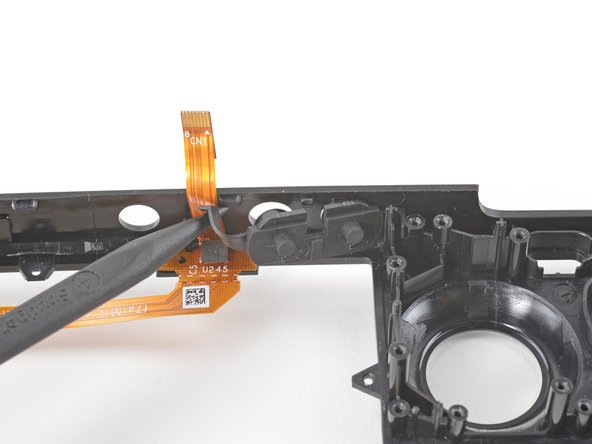
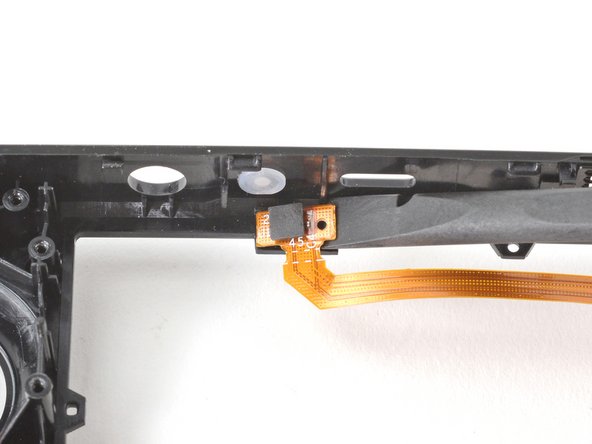
- Insert the flat end of a spudger under the left end of the mic cable and pry upwards to peel it up from the front shell.
- The mic cable is secured to the front shell with some light adhesive.
- If the adhesive is stubborn, don't force the cable. Lightly heat the mic cable using an iOpener or a hair dryer to soften the adhesive.
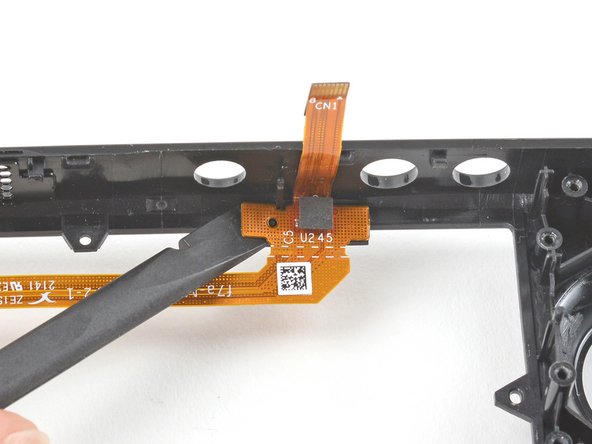
- Insert the flat end of a spudger under the right end of the mic cable and pry upwards to peel it up from the front shell.
- The mic cable is secured to the front shell with some light adhesive.
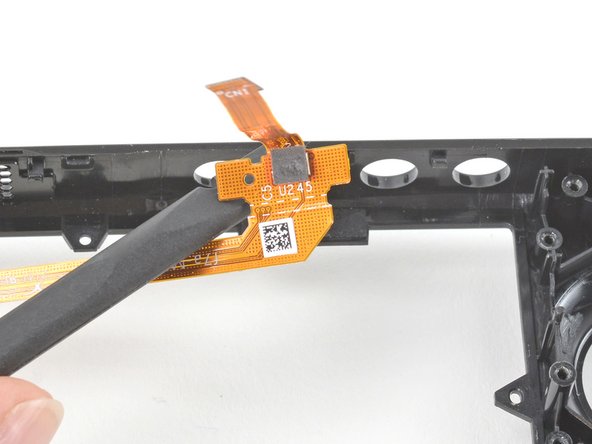
- If the adhesive is stubborn, don't force the cable. Lightly heat the mic cable using an iOpener or a hair dryer to soften the adhesive.
- Remove the mic cable from the front shell.
- Only the front shell remains.