HVAC Run Capacitor Replacement
ID: 149327
Description: This guide demonstrates how to quickly and...
Steps:
- Turn off the power before beginning by pulling the plug or flipping the switch on the disconnect box. Leaving the power on during the repair could result in death or serious injury.
- Use either a Phillips #2 screwdriver or a 1/4 inch Phillips bit to remove the two screws securing the electrical panel cover
- Screw size/type is dependent on the model of your unit.
- Remove the electrical panel cover.
- Use either a Phillips #2 screwdriver or a 1/4 inch Phillips bit to remove the two screws securing the capacitor bracket.
- Lift the capacitor away from the electrical panel, with care not to damage or dislodge any wires.
- Pull the wires directly up and off their terminals.
- Note where the wires go based on their color and the number of prongs on their terminals.
- Hazardous situation which can result in moderate injury or death. Though the discharge process is demonstrated with a screwdriver, use an appropriately-rated capacitor discharge tool.
- The terminals have stamps on the metal that indicate which terminal is which. One is labeled "C" for "common," the next is labeled "Fan," and the last one is labeled "Hum" for the compressor.
- Use the capacitor discharge tool to bridge the gap between the terminals labeled "Hum" (Compressor) and "common" (ground). This will discharge any stored electricity in the capacitance meter to prevent any damage to you and your capacitor meter.
- Repeat the process with the "fan" terminal and the "common" terminal.
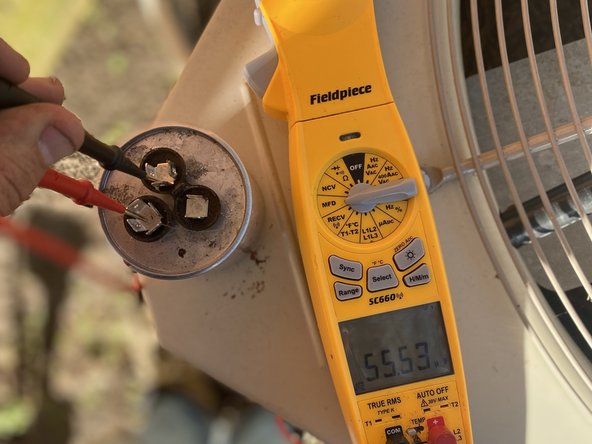
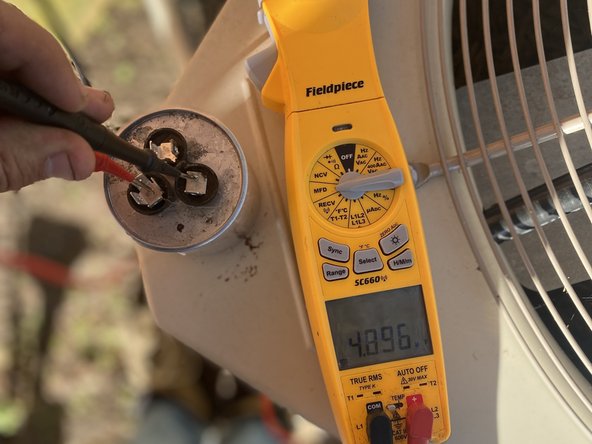
- Use your capacitance meter to read the microfarads between the 3-prong terminal (Hum) and the 4-prong terminal (common).
- Repeat the process between the 1-prong (fan) and the 4-prong terminal (common).
- Compare the gathered readings with those printed on the capacitor label. If the numbers that you collected are roughly the same (within 0.4 microfarads) then the capacitor doesn't need to be replaced. If the difference is larger than 0.4 microfarads, then it's time to replace the capacitor.
- For example, a 5-microfarad capacitor that tests at 4.5 microfarads needs replacement, even even if it isn’t causing any issues yet.
- If the capacitor is already spent, there is often a visual cue to look out for: it will have a bulging appearance on the top of the cylinder, like an unopened soda can that has been dropped.