Creality Ender 3 Pro Extruder Replacement
ID: 149594
Description: This guide's intention is to solve problems...
Steps:
- Press the knob to enter the marlin LCD menu and turn it to navigate between the options.
- Navigate to Temperature > Nozzle.
- Adjust the nozzle temperature by turning the knob and confirm by pressing it.
- Use whatever temperature you would be printing with, minus about 10°C. For both PLA and PETG 210°C usually works fine.
- Wait until the current temperature (bottom) matches the target temperature (top).
- Press down on the extruder lever arm and pull out the loaded filament.
- Fully pressing down the lever arm might lead to the filament snagging when you try to pull it out. Just pressing it a bit will usually suffice.
- Navigate to Temperature and press Cooldown.
- If you do not have the Cooldown-option available, you can just repeat step one and set the temperature to 0°C instead.
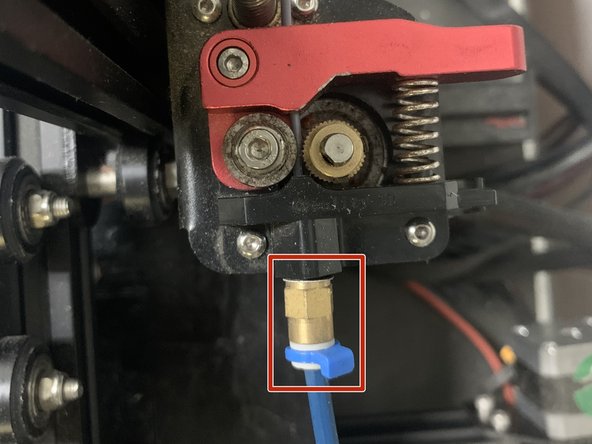
- Use a 8 mm wrench or some pliers to unscrew the PTFE tube from the extruder mechanism.
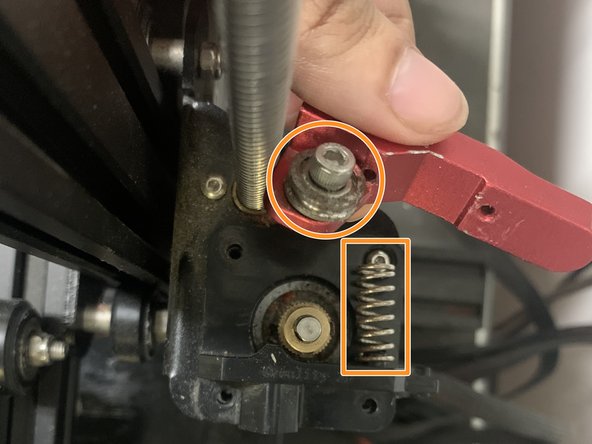
- Unscrew the single M3x18 socket head screw with a 2.5 mm hex key.
- Remove the extruder arm and spring.
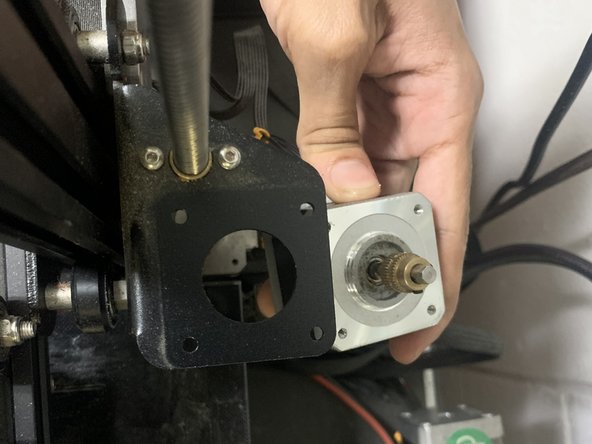
- Use a 2 mm hex key to remove the three remaining M3x10 socket head screws while making sure to not let the motor drop.
- Remove the plastic bracket and the motor.
- Install the replacement extruder and screw it to the motor, following all the previous steps backwards.
- Reattach the PTFE tube to the extruder and insert some filaments.