Dell XPS 14 Fan Replacement
ID: 149670
Description: The device featured in this replacement guide...
Steps:
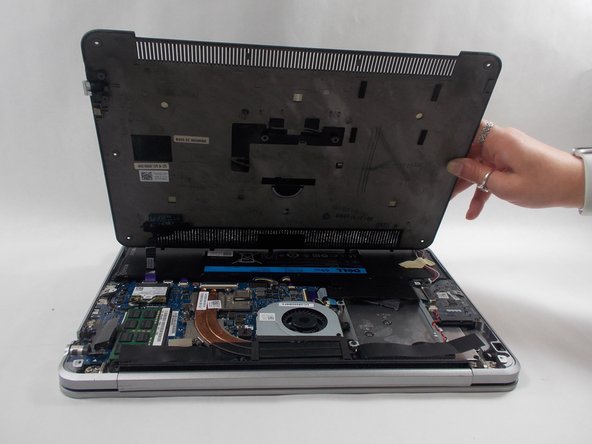
- Position the computer back side up so that the “XPS” logo is facing you.
- Remove six 3 mm screws along the perimeter of the back panel using a T5 Torx screwdriver.
- Use an opening tool to pry up the metal plate.
- Remove the two 6 mm screws under the silver flap using a Phillips #0 screwdriver.
- Use an opening tool to pop out the back panel.
- Once unhinged, the panel will open away from you.
- The back panel will still be attached by a ribbon cable. Be cautious when opening the panel to ensure the ribbon stays intact.
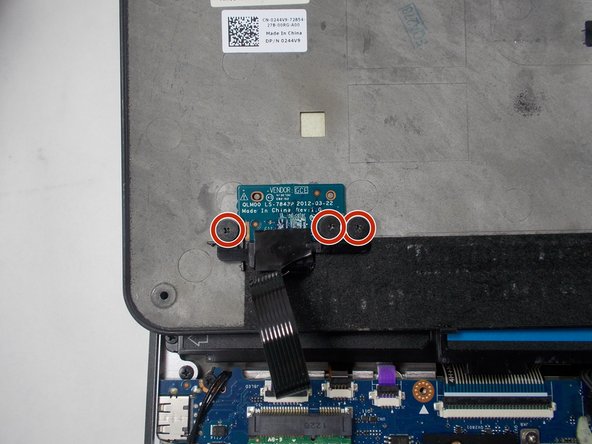
- Flip over the back panel so that the interior of the panel is facing up.
- Remove three 2 mm screws that are connected to the vendor GCE disk on the bottom left corner of the back panel using a Phillips #0 screwdriver.
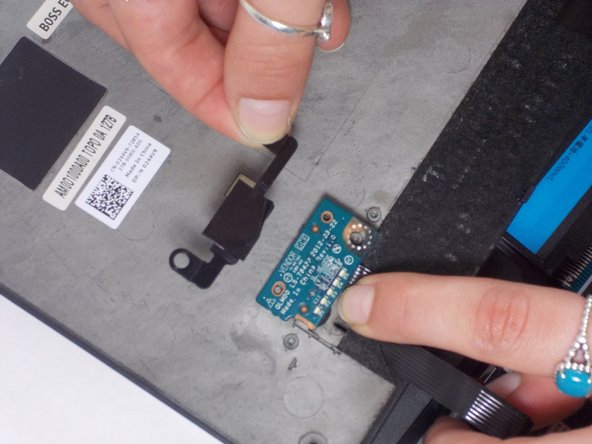
- Remove the black plastic cover that holds the disk in place.
- Remove the back panel.
- The GCE disk should still be connected to the computer via a purple ribbon cable.
- Remove four 2 mm screws that are connected to the speaker using a Phillips #0 screwdriver.
- Remove the speaker from its original location so the wire connector is visible.
- Unplug the red and white cable plug by pulling out the white end tag.
- The speaker is now fully removed.
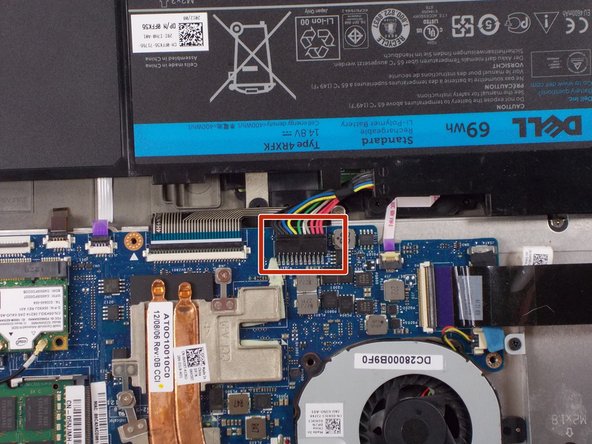
- Make sure to ground yourself before removing the battery.
- Remove the four 6 mm screws from the sides of the battery using a T5 Torx screwdriver.
- Remove the two 3 mm screws from the top of the battery using a Phillips #0 screwdriver.
- Detach the battery connector from the motherboard using two thumbs to pop it out.
- Remove the battery from the laptop.
- Remove the two 2 mm screws from the fan using a Phillips #0 screwdriver.
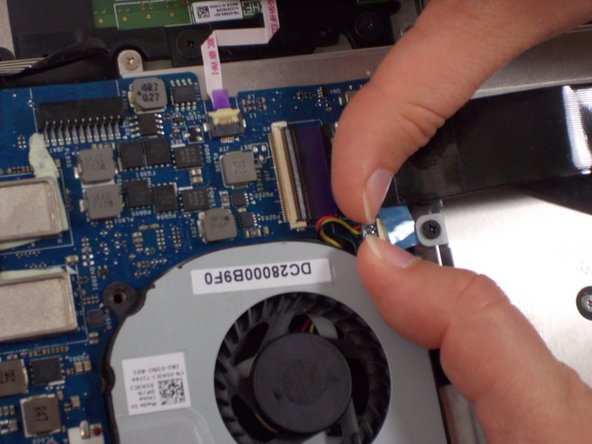
- Use two thumbs to pop out the plug that connects the fan to the laptop.
- Remove the fan from the laptop.