HP ProBook 650 G4 Keyboard Replacement
ID: 151335
Description:
Steps:
- Loosen the 8 Philips screws circled in red in the photo. These screws are captive and should not come out fully.
- Use pry tool starting at one of the hinges to release the clips all around the back plate
- Remove plate and set aside.
- Unscrew the 3 Philips screws by the keyboard icons. (Circled in red)
- The screws are captive and should not be removed fully.
- Open the laptop screen
- Use keyboard removal tool to push out the keyboard (circled in green)
- anything that fits in the hole could be used if tool not available.
- Work around the keyboard releasing the clips.
- Clips are only located on the top, left, and right of the keyboard.
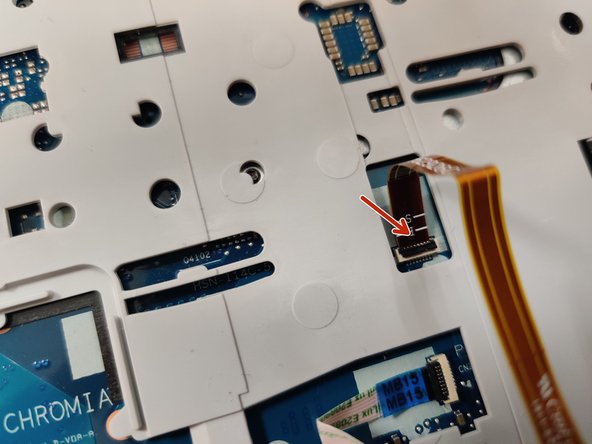
- flip the keyboard towards the mouse pad taking care not to damage the ribbon cables.
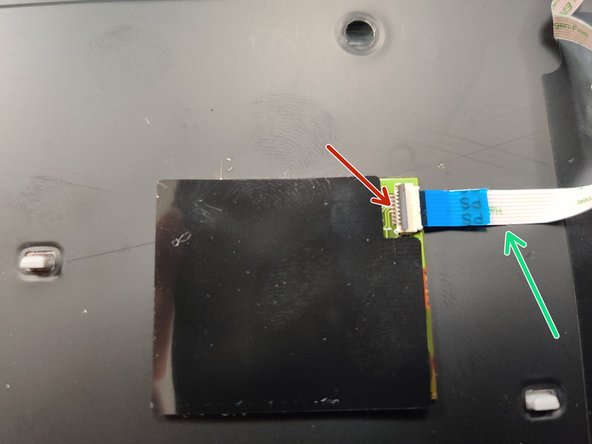
- with a plastic spudger tool flip up the black clips to release the ribbon cables
- Gently pull out the cables, there should be no resistance if the clips were opened properly.
- There may be some adhesive connecting the cable to the keyboard (green arrow).
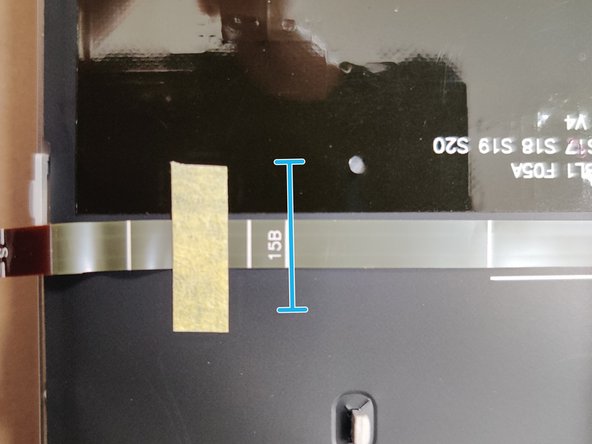
- Gently fold the new ribbon cables at the 15B line
- Gently push in the ribbon cables and press down the black clips.
- Make sure that the cables are pushed in far enough. They have a line marking how far they should be inserted.
- Slide in the bottom clips of the keyboard and flip towards the screen
- Push the keyboard all around until all of the clips click into place.
- Screw in the 3 keyboard screws
- Push the back plate on and screw in the 8 screws
- Go around the back plate making sure that it is clipped in all around.