5. Canbus
ID: 152103
Description: Do not connect 24v until told to do so. It's...
Steps:
- Create the CAN0 interface file
- sudo nano /etc/network/interfaces.d/can0
- Enter the following
- auto can0 iface can0 can static bitrate 500000 up ifconfig $IFACE txqueuelen 256 pre-up ip link set can0 type can bitrate 500000 pre-up ip link set can0 txqueuelen 256
- You can copy paste into the file but make sure your formatting is correct to include the single space in the beginning of the last 4 lines.
- Exit and save the file with CTRL + SHIFT X > Yes
- Sudo Reboot
- The CAN board needs a bootloader so we can flash the Klipper firmware. We will use CanBoot. Download the CanBoot repository:
- git clone https://github.com/Arksine/CanBoot
- cd CanBoot
- make clean
- make menuconfig
- Micro-controller Architecture > (STMicroelectronics STM32)
- Processer model > STM32F072
- Build CanBoot Deployment Application > (Do not build)
- Bootloader offset > (8KiB bootloader)
- Clock Reference > (8 MHz)
- (500000) CAN bus speed
- Communication interface > (CAN bus (on PB8/PB9))
- Micro-controller Architecture > (STMicroelectronics STM32)
- Processer model > STM32G0B1
- Build CanBoot Deployment Application > (Do not build)
- Clock Reference > (8 MHz)
- Communication interface > (CAN bus (on PB0/PB1))
- Application start offset > (8KiB offset)
- (500000) CAN bus speed
- Add the 5v jumper. Connect the USB-C from the Pi to the EBB36 board.
- Put the EBB36 into DFU mode
- Press and hold the RESET + BOOT button. Release the RESET button while holding the BOOT button, than release the BOOT button.
- Get the device ID of the board after it's in DFU mode
- Before DFU mode
- In DFU mode
- Erase and flash the firmware
- sudo dfu-util -a 0 -D ~/CanBoot/out/canboot.bin --dfuse-address 0x08000000:force:mass-erase:leave -d DEVICE:ID
- Power off the system. Plug in the 4 wire CAN cable from the UT0C to the EBB36, and power on the the printer and RPI.
- After the system is powered up verify the CAN network is up.
- cd klipper
- python3 lib/canboot/flash_can.py -q
- You should see 1 entry for application CanBoot. Note your UUID.
- Run
- cd ~/klipper
- make menuconfig
- Select the following
- Enable extra low-level configuration
- Micro-controller Architecture > (STMicroelectronics STM32)
- Processer model > STM32F072
- Bootloader offset > (8KiB bootloader)
- continued:
- Clock Reference > (8 MHz)
- (500000) CAN bus speed
- Save the configuration pressing ESC > Yes
- Run
- make clean
- make
- Micro-controller Architecture > (STMicroelectronics STM32)
- Processer model > STM32G0B1
- Bootloader offset > (8KiB bootloader)
- Clock Reference > (8 MHz)
- Communication interface > (CAN bus (on PB0/PB1))
- (500000) CAN bus speed
- flash the EBB36 with the newly compiled firmware
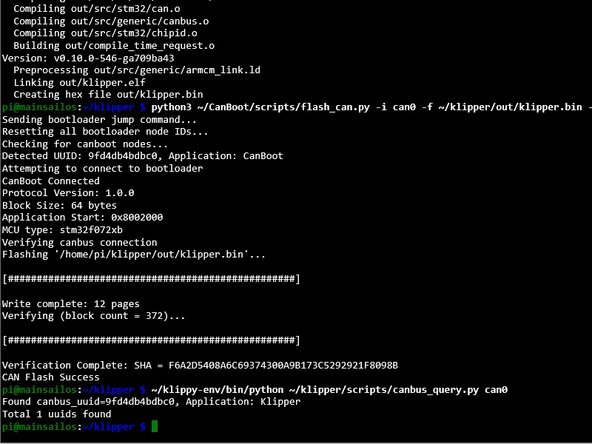
- python3 ~/CanBoot/scripts/flash_can.py -i can0 -f ~/klipper/out/klipper.bin -u 9fd4db4bdbc0
- sudo dfu-util -a 0 -d 0483:df11 --dfuse-address 0x08000000 -D ~/CanBoot/out/canboot.bin
- If all goes well your CAN board should now be flashed
- run
- ~/klippy-env/bin/python ~/klipper/scripts/canbus_query.py can0
- Load the provided files to the printer and press FIRMWARE_RESTART
- Checking the Machine tab you should see the 4 systems