Haier HW100-BD14756 Repair/Replace detergent compartment
ID: 152119
Description: Hello everyone! A few months ago, I submitted a...
Steps:
- First remove the tray by pressing the yellow latch and clean with warm water. It is also easy to check whether the valve is really leaking. Simply fill the tank with water and hold the valve down.
- Since the yellow latch on the detergent compartment gets in the way when the lid is removed, it must be removed. Simply losen the latch with a knife.
- Unfortunately, the lid is relatively well connected to the base. It must be carefully pried open with a knife or similar tool. The knife doesn't have to be sharp. You break the connection open rather than cutting it.
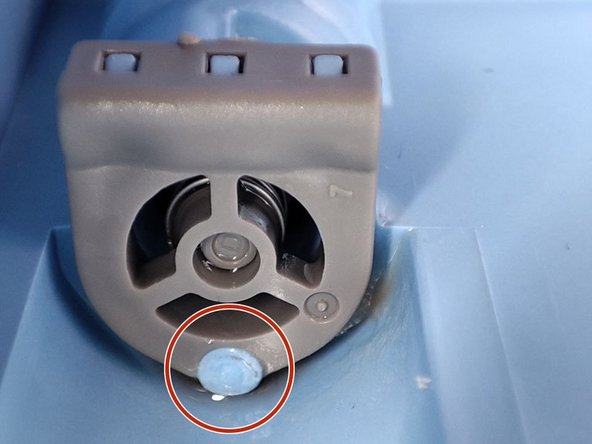
- Unfortunately, the manufacturer did not choose a detachable connection for the cover of the valve. The lower blue fused part must be removed with a knife.
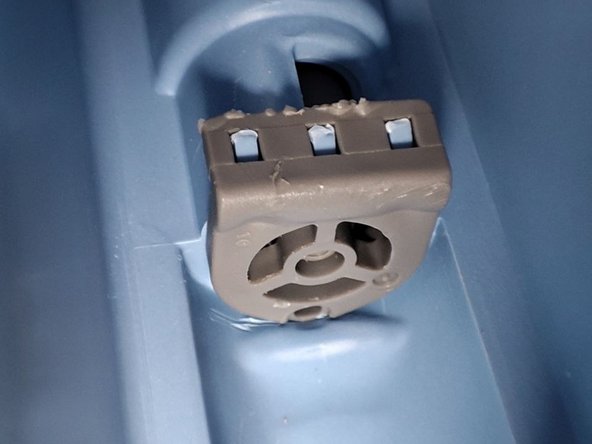
- The gray cover can then be easily pried off. CAUTION! The valve is spring loaded. Don't lose the spring!
- Check the disassembled valve. In the case shown in the photo, the O-ring is bloated and needs to be replaced. In another compartment that I repaired, the O-ring just slipped out of the groove and was a little crushed.
- O-ring dimensions: 6mm x 1.5mm (inner diameter x cord thickness)
- Due to the removal of the fused bottom post, the positioning of the cover is no longer adequately defined. Consequently, when the dosing compartment is pushed in, the valve can be actuated and the cover slips out of its latching position.
- Various options are now available for attachment. First I wanted to turn a screw into the tank, which then fixes the cover below. But I was worried about possible leaks.
- I didn't want to glue the cover so I could easily get to the valve if I had another problem.
- I decided to heat the tank from the outside in this area and press it in to get a molded fit.
- Then check the watertightness by filling in some water.