Xiaomi Poco F3 Screen Replacement
ID: 152594
Description: Use this guide to replace a cracked or broken...
Steps:
- Prepare an iOpener and apply it to the rear glass for at least two minutes to loosen the adhesive underneath.
- A hair dryer, heat gun, or hot plate may also be used, but be careful not to overheat the phone—the screen and internal battery are both susceptible to heat damage.
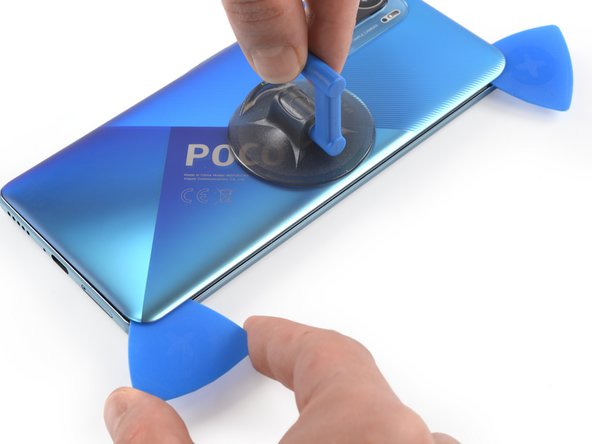
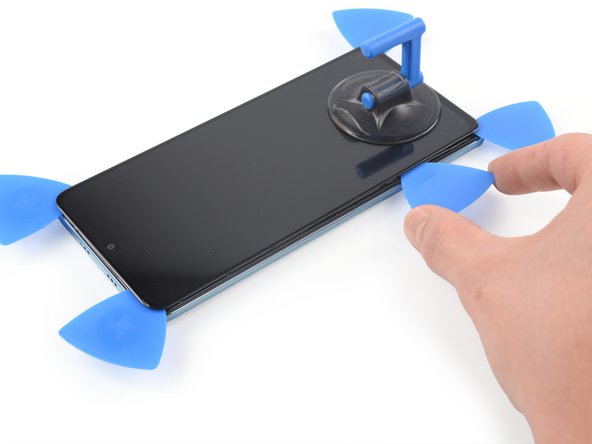
- Secure a suction handle to the right edge of the rear glass, as close to the edge as possible.
- If the rear glass is cracked, the suction handle may not stick. Try lifting it with strong tape, or superglue the suction handle in place and allow it to cure so you can proceed.
- Lift the rear glass with the suction handle to create a small gap between the rear glass and the frame.
- In case you have trouble creating a gap, apply more heat to further soften the adhesive. Follow the iOpener instructions to avoid overheating.
- Insert an opening pick into the gap you created.
- Slide the opening pick to the top right corner to slice the adhesive.
- Leave the opening pick in place to prevent the adhesive from resealing.
- Insert a second opening pick at the top right corner.
- Slide the opening pick to the bottom right corner to slice the adhesive.
- Leave the opening pick in place to prevent the adhesive from resealing.
- If the adhesive becomes hard to cut, it has most likely cooled down. Use your iOpener for one to two minutes to reheat it.
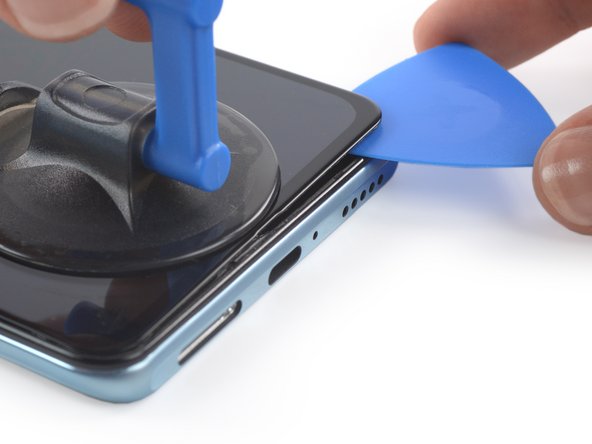
- Insert a third opening pick in the bottom right corner.
- Slide the opening pick along the bottom edge of your phone to slice the adhesive.
- Leave the opening pick in the bottom left corner to prevent the adhesive from resealing.
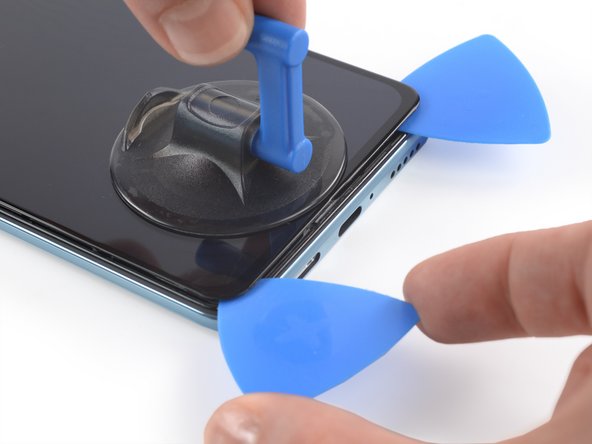
- Insert a fourth opening pick in the bottom left corner of your phone.
- Slide the opening pick along the left edge to slice the adhesive.
- Leave the opening pick in the top left corner to prevent the adhesive from resealing.
- Be careful not to damage the button cables. They are also glued and you might unintentionally catch them while cutting through the glue.
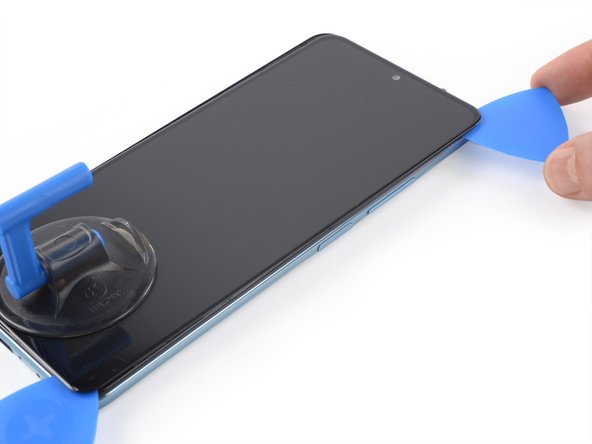
- Insert a fifth opening pick underneath the top left corner.
- Slide the opening pick along the top edge of the rear glass to slice the remaining adhesive.
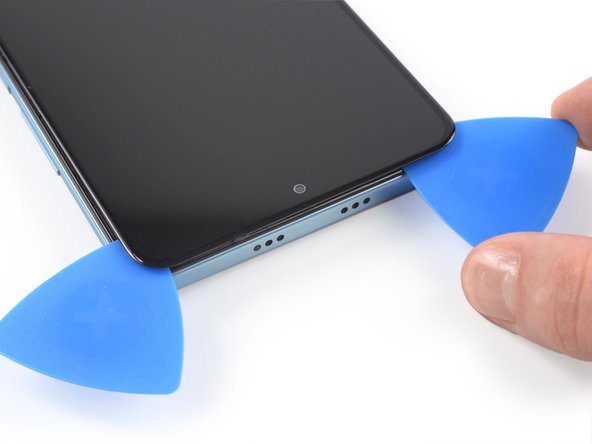
- Remove the rear glass.
- Apply new adhesive where necessary after cleaning the relevant areas with isopropyl alcohol (>90%).
- Secure the new rear glass with pre-cut adhesive or double-sided adhesive tape. After installing the rear glass, apply strong, steady pressure to your phone for several minutes to help the adhesive form a good bond—a stack of heavy books works well.
- Use a Phillips screwdriver to remove the eleven screws securing the motherboard cover:
- Ten 3.4 mm-long screws
- One 1.5 mm-long screw
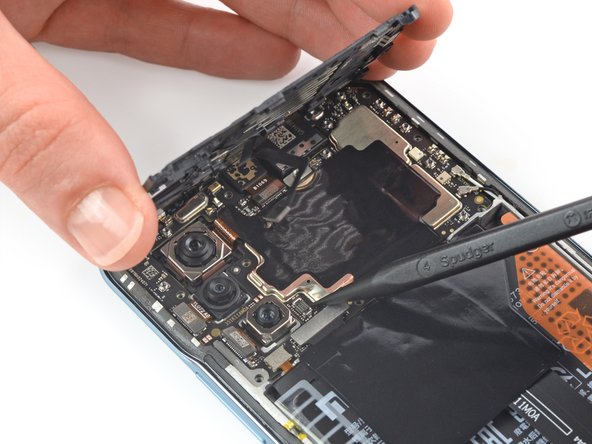
- Insert the tip of an opening pick under the bottom left edge of the motherboard cover.
- Use the opening pick to lift up the motherboard cover and release the plastic clips that hold the cover in its place.
- Don't remove the motherboard cover all the way yet! It's still connected to the motherboard.
- Use your fingers to lift up the motherboard cover to access the connector on the motherboard.
- Use a spudger to disconnect the motherboard cover by prying the connector straight up from its socket at the motherboard.
- Remove the motherboard cover.
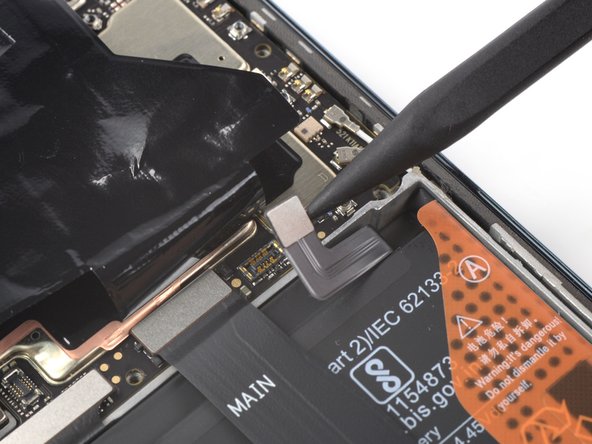
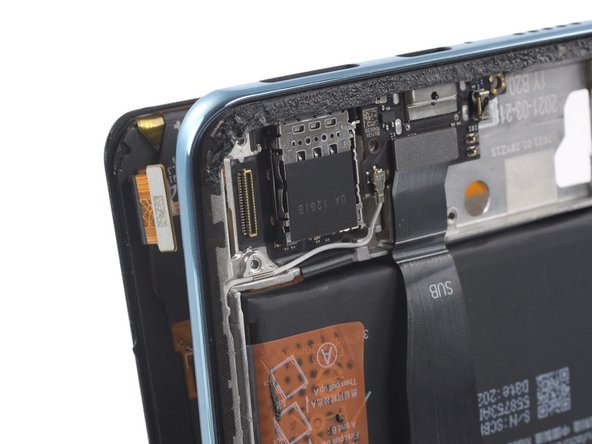
- The battery connector is covered by a graphite foil. Carefully fold it up or tape it to the top edge of the Poco F3 to access the battery connector.
- Use a spudger to disconnect the battery by prying the connector straight up from its socket.
- Insert a SIM card eject tool or a paperclip into the small hole in the SIM card tray, located on the left bottom edge of the Poco F3.
- Press firmly to eject the tray.
- Remove the SIM card tray from the phone.
- Use a Phillips screwdriver to remove the seven 3.5 mm-long screws securing the loudspeaker.
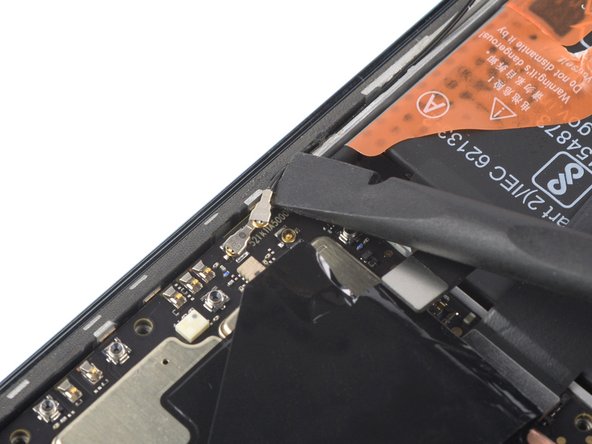
- Use a spudger to pry up and disconnect the black antenna cable from the motherboard.
- During reassembly, these can be tricky to reconnect. Hold the connector in place over its socket and press down with the flat end of a spudger. The connector should snap into place.
- Insert an opening pick between the frame and the top left of the loudspeaker.
- Use the opening pick to pry up the loudspeaker by tilting it downwards.
- Use a pair of tweezers or your fingers to remove the loudspeaker.
- Compare your new replacement part to the original part—you may need to transfer remaining components like the antenna cable.
- Use the flat end of a spudger to pry up and disconnect the screen flex cable connector on the daughterboard.
- Apply a heated iOpener to the screen to loosen the adhesive underneath. Apply the iOpener for at least two minutes.
- Secure a suction handle to the bottom of the screen, as close to the edge as possible.
- If the phone's screen is cracked, the suction handle may not stick. Try lifting it with strong tape, or superglue the suction handle in place and allow it to cure so you can proceed.
- Lift the screen with the suction handle to create a small gap between the screen and the frame.
- Insert an opening pick into the gap.
- If you have trouble, apply more heat to further soften the adhesive. Follow the iOpener instructions to avoid overheating.
- Slide the opening pick to the bottom right corner.
- Insert a second opening pick in the gap you just created and slide it to the bottom left corner to cut the adhesive.
- Leave the pick in place to prevent the adhesive from resealing.
- Insert a third opening pick under the bottom right corner of the phone.
- Slide the opening pick up to the top right corner to slice the adhesive. Leave it there to prevent the adhesive from resealing.
- If slicing becomes too difficult, reheat and reapply the iOpener.
- Insert a fourth opening pick at the top right corner.
- When slicing around the front camera, only insert the tip of the pick to avoid damaging or smearing the lens.
- Slide the opening pick along the top edge of the phone to cut the adhesive.
- Leave the pick in the top left corner of the screen to prevent the adhesive from resealing.
- Insert a fifth opening pick and slide it along the left edge of the phone to cut the remaining adhesive.
- Don't remove the screen all the way yet. The screen cable is still threaded through the frame and possibly adhered on the inner side of the midframe.
- Thread the display flex cable through the gap in the midframe and remove the display.
- Apply new adhesive where it's necessary after cleaning the relevant areas with isopropyl alcohol (>90%).
- During reassembly, follow this guide in case you're using a pre-cut adhesive card.