Stanley J5C09 Power Station (Jump Starter and Air Compress/Tire Inflator) Power Adapter Replacement
ID: 153076
Description: My Stanley J5C09 power station (jump starter...
Steps:
- The most likely failure on this device is a dead battery. But, you also might have a failed power adapter.
- Plug in the power cord.
- Check the indicator lights. The "low" light should be on. If it's not, chances are that the power adapter has failed.
- If the "low" light is on, this isn't the repair guide for you. Something other than the power adapter has failed.
- Important: Turn the power switch to off! Unplug and remove the power cord.
- Remove the screws from the outside edges of the rear of the power station case. (No need to remove the screws that hold the compressor module to the case.)
- Gently pull the two halves of the case apart. Feed the jumper wire cables into the case so there is room to open it.
- Remove the two screws holding the power adapter in place.
- Cut the power adapter wires, leaving about 1" on the power adapter side. Strip about 1/4" inch of the insulation on the two wires coming out of the power adapter.
- Check the power adapter with your multimeter.
- Set the multmeter to DC volts.
- Connect the multimeter probes to the two wires coming out of the power adapter.
- Plug in the power adapter.
- Is the meter showing 13 volts DC or more? If so, you power adapter is probably OK. There's some other reason your power station isn't charging. This guide won't help.
- You could simply drill a hole somewhere in the power station case to mount the barrel connector
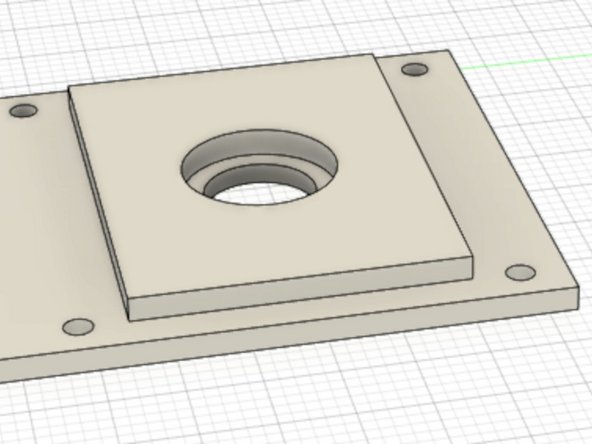
- Or, you could 3D-print a plate to neatly cover up the hold where the power adapter was originally.
- The 3D design is on thingiverse.com
- https://www.thingiverse.com/thing:550616...
- Print it. No supports needed.
- Place the power jack plate into the case in the hold where the power adapter was.
- You may need to trim the plate to fit the case.
- Drill small holes into the case to match the (4) holes in the plate.
- Use (4x) 2mm x 5mm sheet metal screws to attach the plate to the case.
- Strip the wires that used to connect to the power adapter, about 1/4".
- The wire with the "- - -" stripe pattern is the negative. Connect this to the barrel jack terminal that is connected to the outer ring of the jack.
- Connect the other wire to the terminal connect to the center pin.
- Use your multimeter's continuity test feature to verify the barrel jack connections.
- Solder the wires to the barrel jack.
- Remove the nut from the barrel jack
- Insert the barrel jack into the plate
- Tighten the barrel jack nut.