DualSense Controller v2 Speaker Replacement
ID: 154746
Description: Follow this guide to replace the speaker on...
Steps:
- Disconnect and power down the controller before you begin.
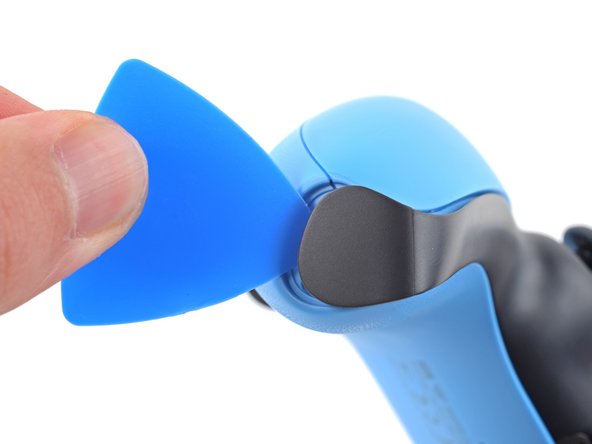
- Insert an opening pick underneath the middle trim at the bottom-right corner of the controller to release the clips securing it to the case.
- Slide the opening pick along the lower-right edge of the middle trim to release the clips securing it to the case.
- Insert an opening pick underneath the middle trim at the bottom-left corner of the controller to release the clips securing it to the case.
- Slide the opening pick along the lower-left edge of the middle trim to release the clips securing it to the case.
- Use your fingers to lift up the bottom edge of the middle trim to release the remaining clips.
- Lift the middle trim over the joysticks to remove it.
- During reassembly, position the middle trim into place and press along all edges to engage the clips securing it to the controller.
- Insert the flat end of a spudger into the gap above the L1 button.
- Cover the button with your thumb to prevent it from ejecting across the room.
- Pry the spudger upward to remove the L1 button.
- Insert the flat end of a spudger into the gap above the R1 button.
- Cover the button with your thumb to prevent it from ejecting across the room.
- Pry the spudger upward to remove the R1 button.
- Use a Phillips screwdriver to remove the two 6.5 mm screws securing the bottom corners of the lower case.
- Use a Phillips screwdriver to remove the two 6.5 mm screws behind the L1 and R1 buttons.
- Use the pointed edge of a spudger to unclip the two clips on either side of the headset jack.
- Use your hands to carefully pull the rear case off of the controller.
- During reassembly, make sure the red and black vibration motor wires are not pinched between the front and rear case.
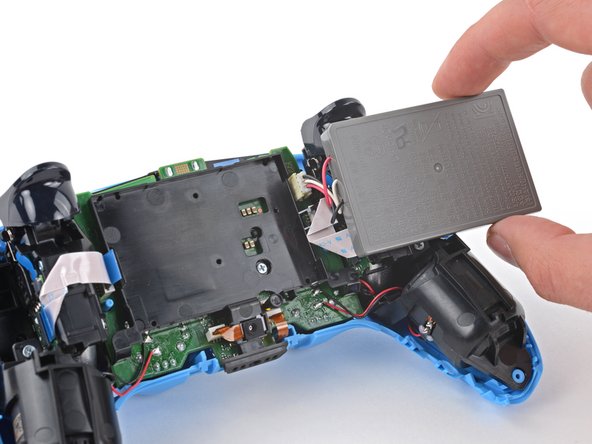
- Lift the battery out of its bracket and reposition it to the right for better access to the battery connector.
- Don't strain the battery cables.
- Use a pair of tweezers or your fingers to disconnect the battery from the motherboard.
- Don't pull on the wires to disconnect the battery.
- Remove the battery.
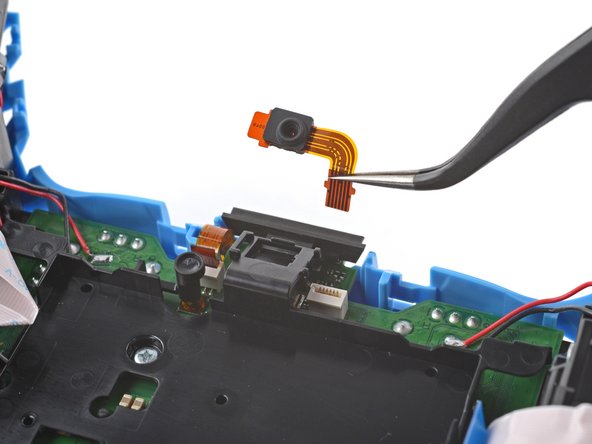
- Use the pointed end of a spudger to remove the lower microphone from its bracket next to the battery.
- During reassembly, make sure the end of the microphone's ribbon cable is slotted into the bracket.
- Grab the lower microphone ribbon cable pull tab with your fingers or a pair of tweezers and disconnect it from the motherboard.
- Use a Phillips screwdriver to remove the 6.5 mm screw securing the battery bracket.
- Lift the battery bracket off of the motherboard.
- Grip the right trigger assembly cable with a pair of tweezers or your fingers and disconnect it from the motherboard.
- Use the pull tab to disconnect the cable. Don't pull on the cable itself.
- Don't completely remove the ribbon cable yet.
- Grip the right trigger assembly cable with a pair of tweezers or your fingers, and disconnect it from the trigger assembly.
- Use the pull tab to disconnect the cable. Don't pull on the cable itself.
- Depending on the controller's model, the ribbon cable may block the motherboard from coming loose. If so, remove the cable from the trigger assembly.
- Grip the left trigger assembly cable with a pair of tweezers or your fingers to disconnect it from the motherboard.
- Use the pull tab to disconnect the cable. Don't pull on the cable itself.
- Don't completely remove the ribbon cable yet.
- Grip the left trigger assembly cable with a pair of tweezers or your fingers to disconnect it from the trigger assembly.
- Use the pull tab to disconnect the cable. Don't pull on the cable itself.
- Depending on the controller's model, the ribbon cable may block the motherboard from coming loose. If so, remove the cable from the trigger assembly.
- Use a pair of tweezers or your fingers to disconnect the upper microphone from the motherboard.
- Use the pull tab to disconnect the cable. Don't pull on the cable itself.
- If you're not replacing this microphone, don't remove it from the frame.
- Use a pair of tweezers or your fingers to disconnect the touchpad cable from the motherboard.
- Use the pull tab to disconnect the cable. Don't pull on the cable itself.
- Carefully guide the joysticks through the front case and lift the motherboard out.
- Don't strain the four soldered wires tethering the motherboard to the vibration motors.
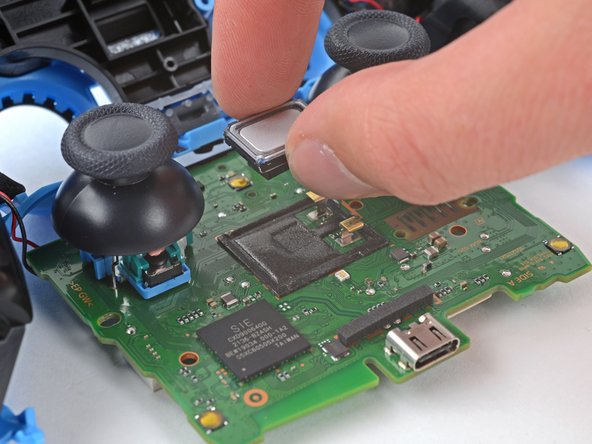
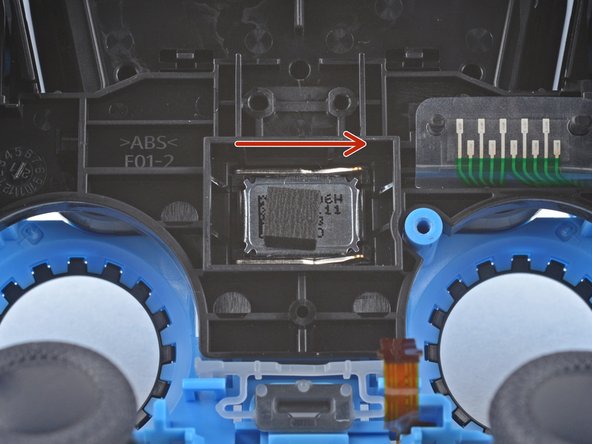
- Gently lift the speaker off of the motherboard.
- The speaker is secured to the motherboard by some light foam adhesive. Don't remove this foam.
- During reassembly, place the speaker into the midframe with the gold contacts pointing towards the left joystick.