Samsung Galaxy Book Pro 360 15" Screen Replacement
ID: 154956
Description: Use this guide to replace the screen on your...
Steps:
- Before you begin, shut down your laptop and unplug it.
- Close the screen and lay your laptop down with the rear case facing up to access the four rubber feet.
- Insert an opening pick between the rear case and the rubber foot.
- Pry up with the pick and dislodge the foot from the rear case.
- Use tweezers or your fingers to remove the rubber foot.
- Repeat this process on the remaining rubber feet.
- There are two types of rubber feet for this laptop. During reassembly, make sure the top feet say "M4" and the bottom feet say "M1".
- To reinstall a rubber foot, align it over the recess and push down until it's secured.
- Use a Phillips screwdriver to remove the four 4.5 mm screws securing the rear case.
- Throughout this repair, keep track of each screw and make sure it goes back exactly where it came from.
- Apply a suction handle to the middle of the rear case's bottom edge, as close to the edge as possible.
- Pull up on the handle with a strong, steady force to create a small gap between the rear case and the frame.
- This may take significant force and multiple tries.
- Insert an opening pick into the gap you created.
- Slide the opening pick along the bottom edge to release the clips securing the rear case.
- Continue sliding the pick along the perimeter of the laptop until all the clips securing the rear case have been released.
- Lift the rear case up and away from the laptop and remove it.
- During reassembly, this is a good point to power on your laptop and test all functions before sealing it up. Be sure to power your laptop back down before you continue working.
- Use tweezers or your fingers to peel up and remove the tape covering the battery connector.
- Set the tape aside. You'll reuse it during reassembly.
- Insert the flat end of a spudger under the battery cables, as close to the connector as possible.
- Gently pry up and disconnect the battery connector from its socket.
- Use the flat end of a spudger to pry up the locking flap on the right display cable's ZIF connector.
- Use tweezers or your fingers to grip the display cable's pull tab and gently pull the cable out of its socket on the motherboard.
- Slowly pull the right display cable out of its recess.
- A small clip secures the cable.
- During reassembly, make sure that the display cable is secured under its clip.
- Repeat the disconnection and removal procedure on the left display cable.
- Open the laptop until it's completely flat and lay it down with the display and keyboard facing down.
- Before laying the laptop down, make sure you have a clean surface that is clear of items that could damage the display.
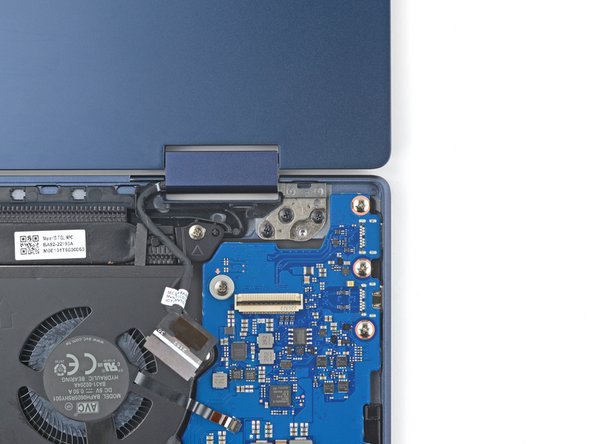
- Use a Phillips screwdriver to remove the three 3.6 mm screws securing the right screen hinge.
- During reassembly, install the screws from left to right.
- Use a Phillips screwdriver to remove the three 3.6 mm screws securing the left screen hinge.
- During reassembly, install the screws from right to left.
- Lift the screen up and away from the laptop and remove it.
- The screen is now detached from the laptop.