2015-Present Nissan Maxima Headlight Bulb(s) Replacement
ID: 155321
Description: A non-functioning headlight can lead to...
Steps:
- Pull the hood release latch located on the lower left portion of your dashboard (near the steering wheel).
- Fully release the hood latch by moving the yellow prop bar to the left.
- Disconnect the battery connections from the terminals using the 10 mm socket wrench.
- Ensure that the negative (black) terminal is disconnected first.
- Remove the battery securing clamp by removing the following bolts:
- Three 10mm bolts
- Ensure that the battery clamp is tightly secured to the battery during reassembly. The battery should not move when shaken.
- Grabbing the battery by the handle, carefully lift it out of the vehicle.
- The battery is heavy. Use two hands to lift if needed.
- Ensure that the battery is facing the correct direction when reinstalled. The positive terminal will be on top and the negative terminal will be on the bottom.
- Using a flathead screwdriver or nonmetal pry tool, gently pry up the following clips on the plastic covering:
- 10 plastic clips
- Each clip is made up of two pieces. Ensure that all pieces are accounted for.
- Reaching through the battery area and to the back of the driver's side headlight, find the headlight bulb.
- Twist the bulb to remove it from the headlight housing.
- Once free, pull the headlight and cables up to the battery area.
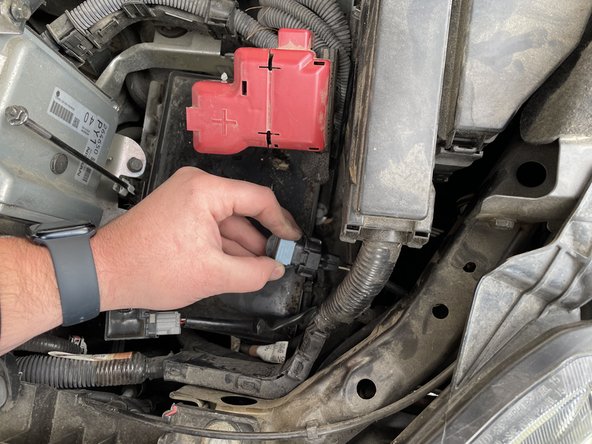
- Push the small tab on the wire clip to disconnect the bulb.
- The tab is located on the side opposite of the bulb.
- Install new bulb into wire clip. A click should be felt when it is properly seated.
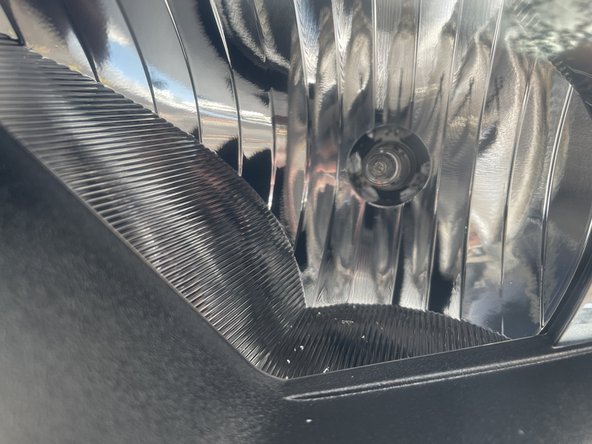
- Insert the bulb back into the headlight housing.
- The bulb will be visible inside the headlight when installed correctly.
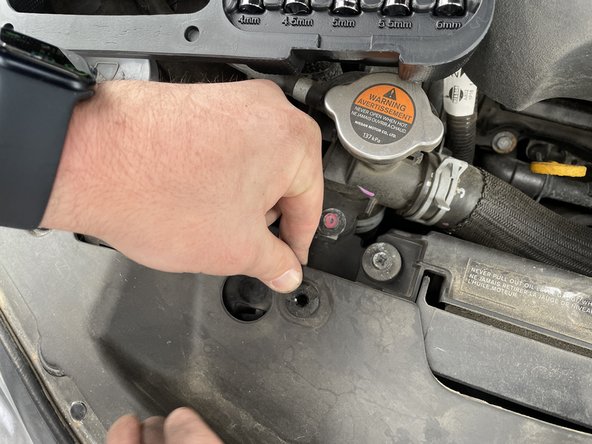
- Remove the plastic clip holding the washer fluid tank in place using a flathead screwdriver or nonmetal pry tool.
- This clip is different than those from step 5. Keep it separate from the others.
- Once free, remove the tank from the vehicle.
- Remove and replace the passenger side bulb using the same steps as the driver's side.
- Before reinserting the plastic clips for the plastic cover, they must each be separated into two pieces.
- First, install the shorter, hollow piece into the hole until it is firmly seated.
- Then, insert longer, solid piece into the hollow piece until it firmly snaps into place.