Razer Kraken Ultimate Microphone Replacement
ID: 155541
Description: If your Razer Kraken Ultimate microphone is not...
Steps:
- Grab the ear piece from one of the sides and lightly pull it outwards.
- Ideally, do not pull the ear piece directly away from the speaker; it may damage the piece.
- Once you have taken off one side, you can then remove the whole piece by slowly prying the pad away from the headphones.
- Repeat steps on the other side.
- Remove the four 10 mm Phillips #00 screws securing the right speaker.
- Be sure the device is unplugged before attempting to remove any of the screws.
- Remove the 10 mm Phillips #00 screws securing the left speaker.
- Note that one of the screws is hidden behind the product information sticker. Use your screw driver to punch a hole in the sticker.
- To fully detach the speakers cut the wires as close as possible to the connection point, leaving plenty of room to solder the new speaker on.
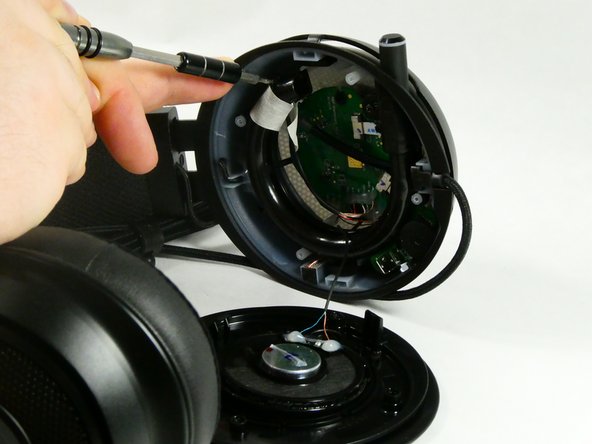
- Remove the two 10 mm Phillips #00 screws securing the microphone.
- Gently pry the bottom connection away from the casing with the iFixit opening tool.
- Pull the microphone down and out of the casing.
- Open up the casing the microphone retracks into.
- Cut the cable as close to the microphone as possible, leaving behind enough to solder the new microphone to.
- The casing the microphone if removed correctly in the previous step is easily opened by hand